
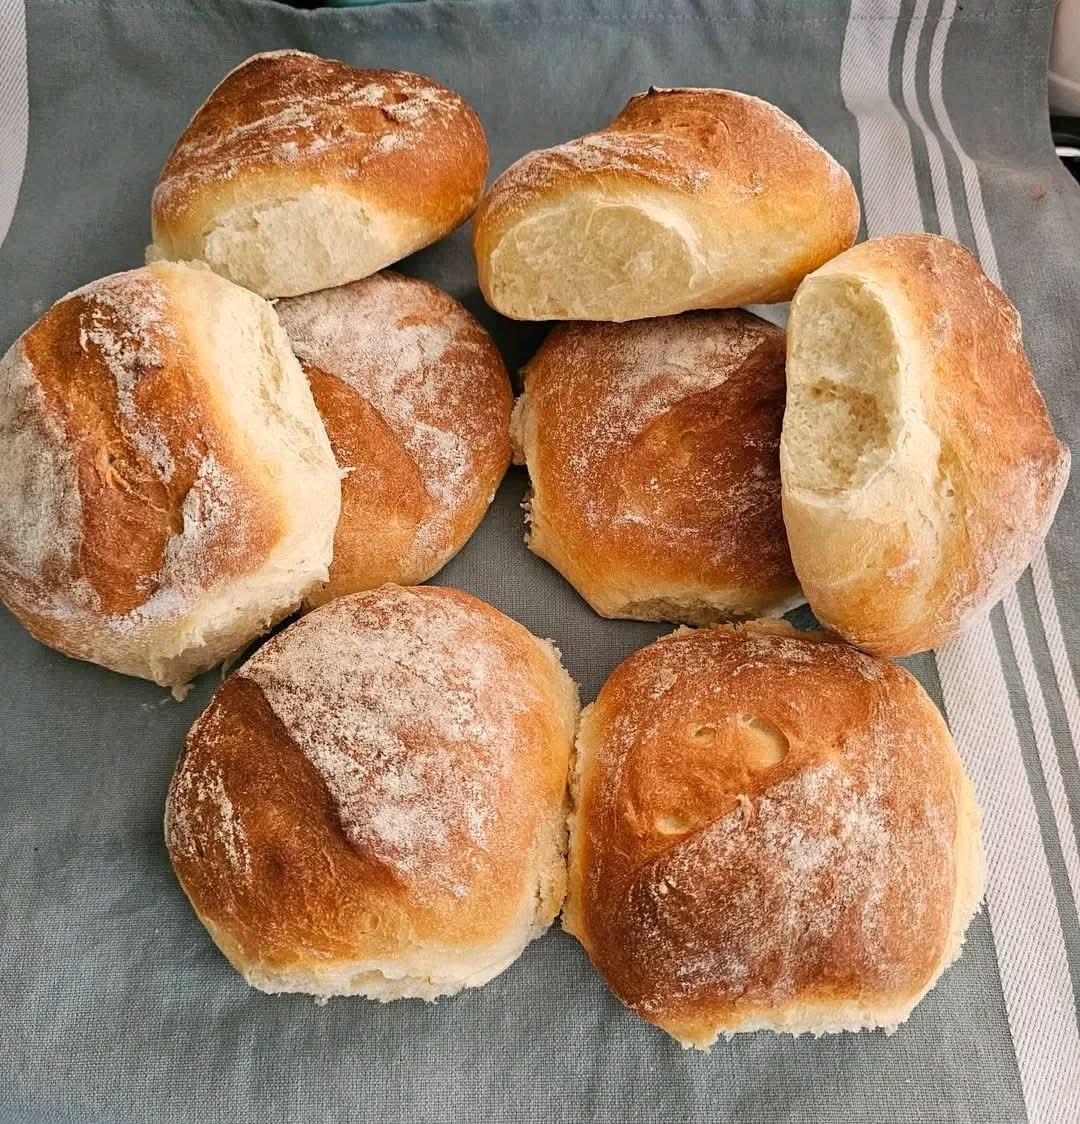
Homemade Milk and Honey Bread — A Classic Homemade Loaf
Introduction
There is something truly special about homemade bread. The comforting smell that fills the kitchen, the golden crust coming out of the oven, and the soft, warm center make every slice feel like a little piece of home.
After 54 years of cooking and baking, returning to bread-making can be a wonderful way to rediscover the simple pleasures of the kitchen. This homemade milk and honey bread is a beautiful recipe for beginners and experienced bakers alike. Made with bread flour, milk, water, butter, honey, yeast, and salt, it produces a soft, tender loaf with a lightly golden crust and a delicate sweetness.
Whether you enjoy it fresh from the oven with a little butter, toasted for breakfast, or served alongside a comforting bowl of soup, this traditional homemade bread is a recipe worth keeping.
Ingredients

For the bread dough
- 500 g bread flour
- 7 g salt
- 200 ml milk
- 160 ml water
- 10 g butter, softened
- 1 teaspoon honey
- 7 g instant yeast

Optional finishing ingredients
- A little milk for brushing the crust
- A small amount of butter for brushing the loaf after baking
- Extra flour for lightly dusting the work surface
Instructions
Step 1: Prepare the liquid mixture
Pour the milk and water into a small saucepan. Warm them gently until the mixture reaches approximately 30°C (86°F). It should feel slightly warm, never hot.
Add the butter and honey, stirring until the butter begins to soften and the honey dissolves.
Stir in the instant yeast and allow the mixture to stand for about five minutes. Instant yeast can usually be mixed directly with the flour, so blooming it in the liquid is optional, but this method is suitable for the recipe.
Step 2: Mix the dry ingredients
Place the bread flour in a large mixing bowl and add the salt. Mix thoroughly to distribute the salt evenly throughout the flour.
Pour the warm liquid mixture into the flour. Using a wooden spoon or sturdy spatula, stir until the ingredients come together into a rough, shaggy dough.
If the dough looks slightly sticky at this stage, do not immediately add more flour. The dough will become smoother as you knead it.
Step 3: Knead the dough
Transfer the dough to a lightly floured work surface.
Knead for approximately 8–12 minutes by pushing the dough away with the heel of your hand, folding it back toward yourself, and turning it a little before repeating.
Continue until the dough becomes smooth, elastic, and soft. It should stretch without tearing too easily.
If using a stand mixer, knead with a dough hook for approximately 6–8 minutes on low to medium-low speed, checking the texture as you go.
Step 4: Allow the dough to rise
Shape the dough into a ball and place it in a lightly greased bowl. Cover with a clean kitchen towel, reusable cover, or plastic wrap.
Leave it in a comfortably warm, draft-free place for approximately 60–90 minutes, or until it has roughly doubled in size.
Rising time depends on the room temperature and the activity of the yeast, so use the dough’s appearance rather than the clock alone.
Step 5: Shape the loaf
Gently press the dough to release the larger air bubbles.
Transfer it to your work surface and shape it into a rectangle. Fold the sides inward, then roll the dough into a firm loaf, pinching the seam closed.
Place the loaf seam-side down into a greased standard loaf pan, approximately 9 × 5 inches, or shape it into a free-standing loaf on a lined baking tray.
Cover loosely and allow it to rise again for 30–60 minutes, until noticeably puffy.
Step 6: Prepare the oven
Preheat the oven to 190°C (375°F).
If desired, brush the top of the loaf lightly with milk for a more evenly browned crust.
Make sure the oven is fully preheated before placing the bread inside.
Step 7: Bake the bread
Bake for approximately 30–40 minutes, depending on the shape of the loaf and your oven.
The bread should develop a beautiful golden-brown crust and sound hollow when tapped underneath. For a more precise check, the center should reach approximately 93–96°C (200–205°F).
If the crust browns too quickly, loosely cover the top with aluminum foil during the final part of baking.
Step 8: Cool before slicing
Remove the loaf from the pan and transfer it to a wire rack.
For a softer crust, brush the warm top with a little butter. Allow the bread to cool for at least 45–60 minutes before slicing.
Although the aroma may make it tempting to cut immediately, cooling helps the crumb finish setting and makes cleaner slices possible.
Methods and Techniques for Perfect Bread


The mixing method
The goal is to bring all the ingredients together evenly before kneading. Adding the salt to the flour and the yeast to the liquid mixture helps distribute everything throughout the dough.
The kneading method
Kneading develops gluten, which gives bread its structure and helps it rise. Properly kneaded dough should feel elastic and supple rather than rough and crumbly.
The first-rise method
The first rise allows yeast to produce carbon dioxide, creating air pockets inside the dough. These pockets help give the finished loaf its light texture.
The shaping method
Shaping creates surface tension across the dough, helping the loaf rise upward and maintain a pleasing shape during baking.
The second-rise method
The second rise gives the shaped loaf time to expand again. Avoid letting it rise too far, as over-proofed dough may collapse or produce a weaker structure in the oven.
The baking method
The oven’s heat expands the gases in the dough, sets its structure, and develops the crust. Milk, butter, and honey contribute to the loaf’s tenderness, flavor, and browning.
The History of Homemade Bread
Bread-making is one of the oldest culinary traditions in the world. For thousands of years, families have combined grain flour and water to create nourishing loaves, with yeast or other fermentation methods helping bread become lighter and more flavorful.
As bread-making developed, milk, butter, and sweeteners such as honey became common additions in many enriched bread recipes. These ingredients helped create softer loaves that were especially pleasant for breakfast, sandwiches, and afternoon tea.
Homemade sandwich bread became a familiar staple in many households because it was versatile, economical, and easy to adapt to different meals.
Today, even with commercial bakeries and packaged bread readily available, many people return to making their own loaves. The process offers control over ingredients and texture, while bringing back the traditional pleasure of baking from scratch.
The Formation of the Perfect Loaf
A good loaf is formed through several important stages.
- Gluten development: Bread flour contains proteins that form an elastic network when hydrated and kneaded.
- Fermentation: Yeast consumes available sugars and releases carbon dioxide, allowing the dough to expand.
- Dough structure: Shaping creates a more uniform loaf with a smooth surface and an organized crumb.
- Oven expansion: The dough rises further as its gases expand in the heat.
- Crust formation: The surface dries and browns, producing the loaf’s golden exterior.
- Crumb setting: Heat sets the interior structure, creating a soft slice that holds together when cut.
The milk and butter make the crumb tender, while the small amount of honey adds subtle sweetness and helps the crust brown.
Tips for the Best Homemade Bread
- Use a kitchen scale for the most consistent results.
- Keep the liquid close to 30°C; excessively hot liquid can damage the yeast.
- Do not add too much flour during kneading, as this can make the loaf dense.
- Give the dough enough time to rise, especially in a cool kitchen.
- Avoid cutting the loaf while it is still very hot.
- Store completely cooled bread in an airtight bag or bread container at room temperature for around 2–3 days.
- Freeze sliced bread in a freezer-safe bag for longer storage, ideally for up to 3 months for best quality.
Delicious Ways to Enjoy This Bread


For breakfast: Toast a slice and spread it with butter, jam, or honey.
For sandwiches: Use the soft slices for cheese sandwiches, egg sandwiches, chicken sandwiches, or classic lunchbox favorites.
For afternoon tea: Serve lightly toasted bread with butter and a warm cup of tea or coffee.
For family dinners: Pair the loaf with soup, stews, pasta dishes, or a fresh salad.
For a sweet treat: Turn leftover slices into French toast, bread pudding, or cinnamon toast.
Variations to Try
Whole-wheat blend: Replace up to 100–150 g of the bread flour with whole-wheat flour. You may need a little extra water.
Seeded loaf: Add 2–3 tablespoons of sunflower seeds, sesame seeds, or pumpkin seeds during kneading.
Herb bread: Add dried rosemary or thyme for a savory loaf that pairs beautifully with soups.
Soft dinner rolls: Divide the shaped dough into 10–12 equal pieces, arrange them in a greased baking dish, allow them to rise, and bake at 190°C (375°F) for approximately 15–22 minutes.
Frequently Asked Questions
Why is my bread dense?
Dense bread can result from insufficient kneading, under-proofing, too much added flour, or inactive yeast. Check that the dough rises properly before baking.
Can I use active dry yeast?
Yes. Use 7 g of active dry yeast, following the package instructions for activation. The rising times may vary.
Can I make the dough ahead of time?
Yes. After kneading, cover the dough and refrigerate it for a slow overnight rise. The next day, allow it to warm slightly, shape it, and complete the second rise before baking.
How do I know when the dough has risen enough?
It should be noticeably larger and airy. During the first rise, it will generally double in volume. During the second rise, it should look puffy and expanded without becoming fragile or collapsing.
Can I make this bread without honey?
Yes. You can omit the honey. The flavor and browning may change slightly, but the bread can still turn out well.
Conclusion
Homemade milk and honey bread is a reminder that some of the most satisfying recipes are also the simplest. With just a handful of everyday ingredients and a little patience, you can create a beautiful loaf with a golden crust, a tender crumb, and a comforting homemade flavor.
Whether you have been baking for decades or are just beginning to explore bread-making, this recipe is a wonderful addition to your kitchen collection. Enjoy it fresh, toasted, or shared around the family table.
For the Love of Homemade Bread
Bread is more than flour, water, and yeast. It is the pleasure of working with your hands, the anticipation of watching dough rise, and the unmistakable smell of a fresh loaf coming out of the oven.
After 54 years of cooking and baking, returning to bread-making is a lovely reminder that there is always something wonderful to rediscover in the kitchen. Sometimes the simplest loaf becomes the recipe we return to again and again.
If you love homemade bread, save this recipe and share it with someone who enjoys baking from scratch.