
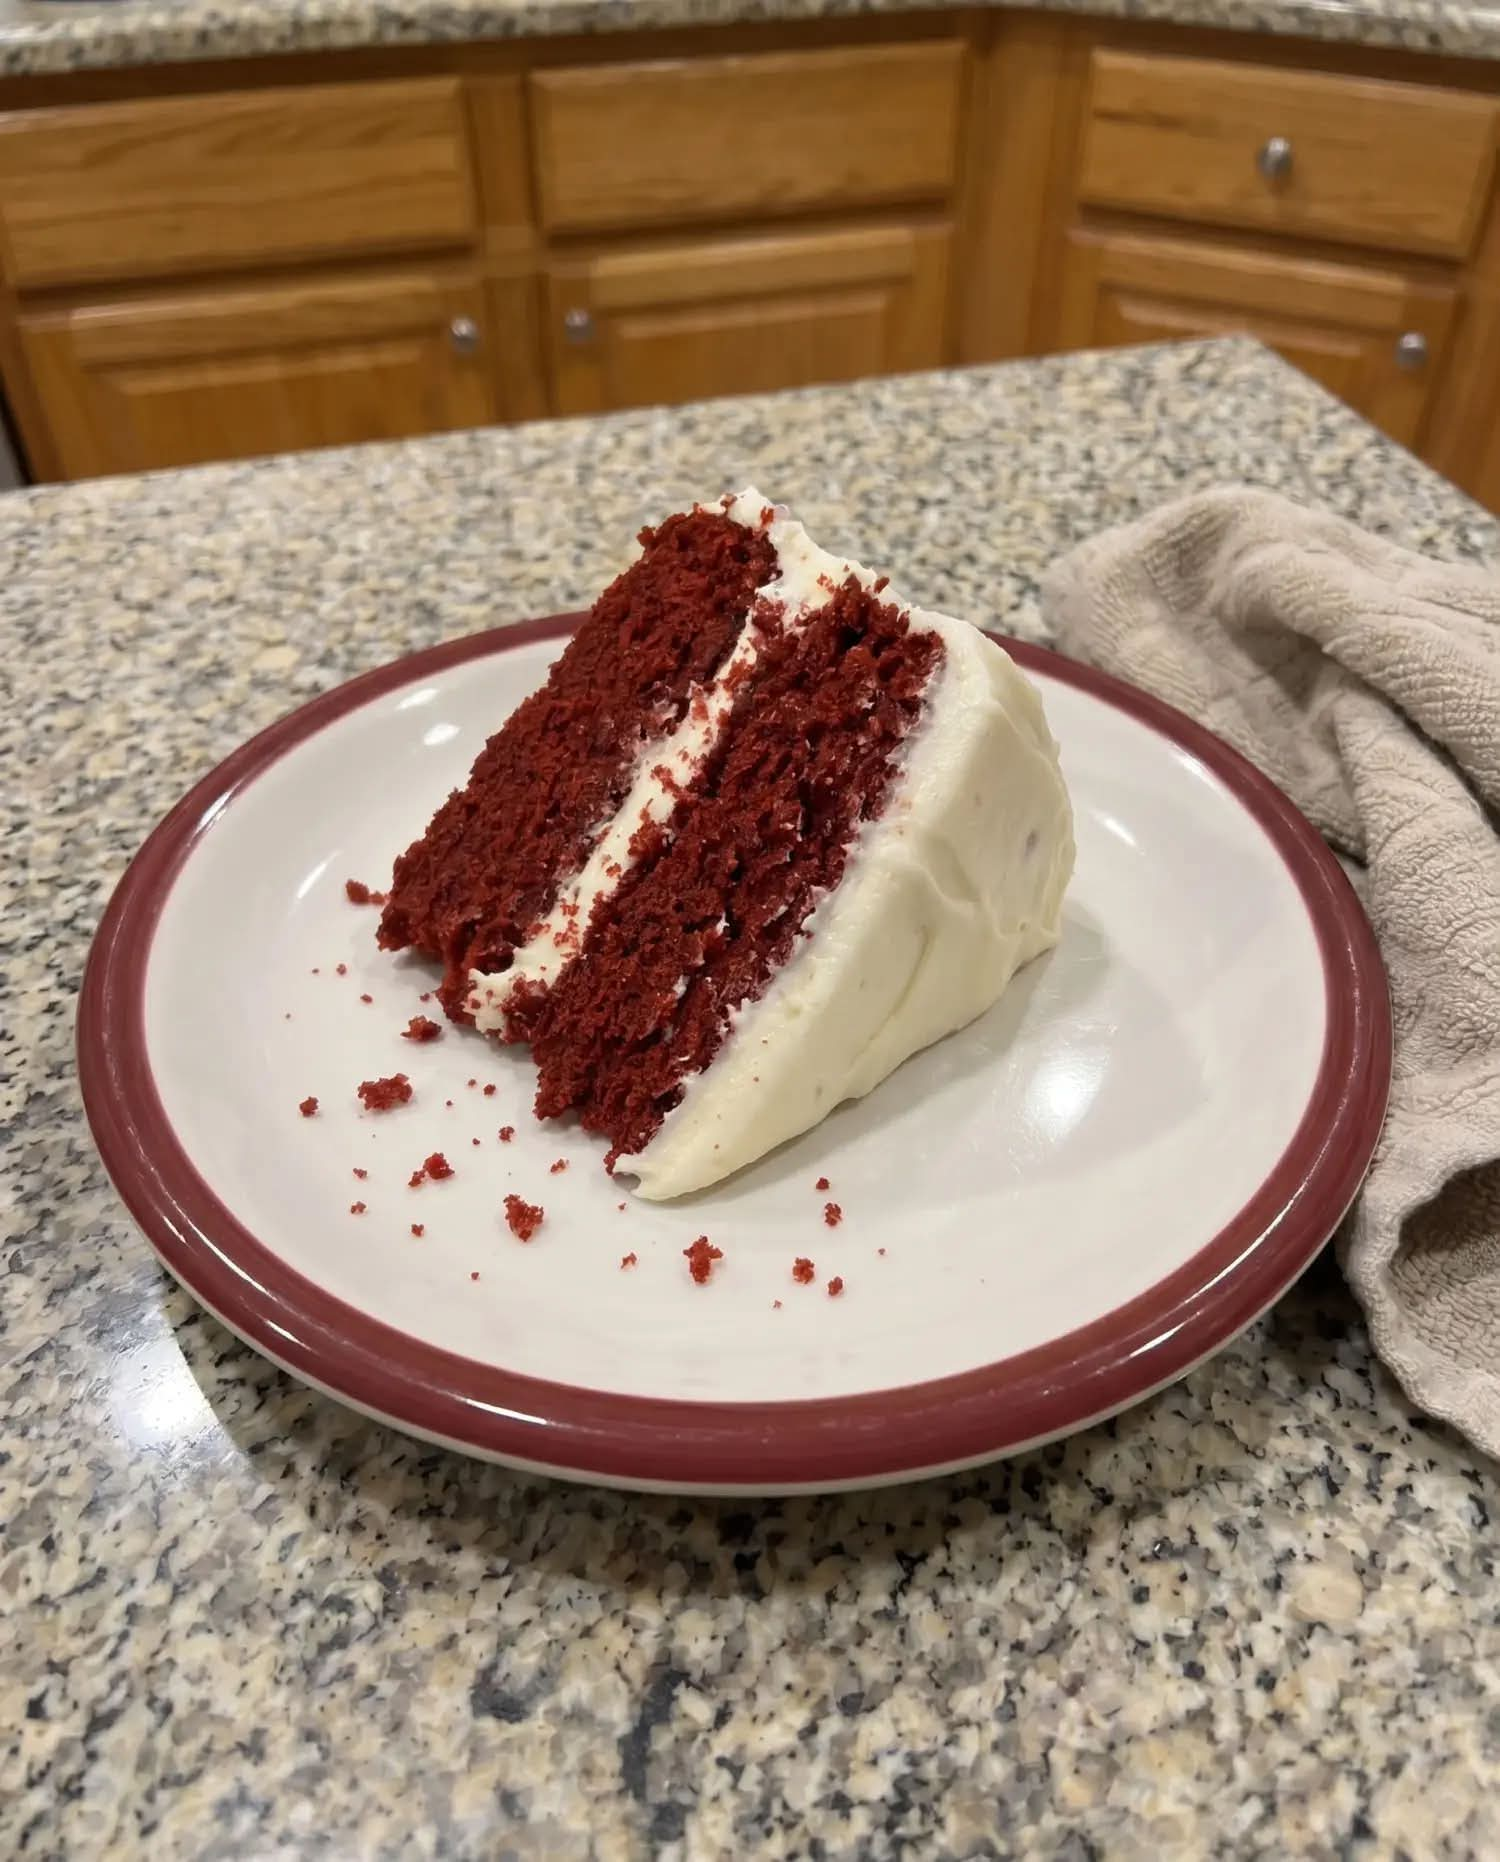
Mama’s Old-Fashioned Red Velvet Cake with Cream Cheese Frosting


Introduction
Some recipes are more than a list of ingredients. They are little pieces of our childhood, filled with memories of family celebrations, warm kitchens, and the people who made ordinary days feel special. Mama’s old-fashioned red velvet cake is one of those treasured desserts that brings back the sweetest memories with every slice.
I still remember the way Mama kept her birthday candles in the same drawer as her favorite cake knife. Whenever a birthday came around, the kitchen filled with the wonderful smell of freshly baked cake, and everyone seemed to find a reason to wander in and see how things were going. She would carefully spread the frosting over each layer, making sure every corner was covered in a thick, creamy blanket of white icing.
The best part was always waiting for her to finish cutting the cake. Mama had a special way of wiping the frosting from the blade before setting it down, and I would stand nearby, hoping she would let me have that little extra taste. It was a simple moment, but it became one of those childhood memories that never really leaves you.
This classic red velvet cake is soft, tender, lightly flavored with cocoa, and beautifully balanced by rich cream cheese frosting. Its striking red color makes it perfect for birthdays, Christmas gatherings, anniversaries, Valentine’s Day, or any occasion that deserves something special.
Whether you are baking it for your own family or recreating a recipe that reminds you of someone you love, this homemade red velvet cake is a wonderful way to bring a little nostalgia back to the table.
Ingredients
This recipe makes one beautiful three-layer red velvet cake, serving approximately 12–16 people.
For the red velvet cake
- 2 ½ cups all-purpose flour
- 2 tablespoons unsweetened cocoa powder
- 1 teaspoon baking soda
- ½ teaspoon salt
- 1 ½ cups granulated sugar
- ½ cup unsalted butter, softened
- ½ cup neutral vegetable oil
- 2 large eggs, at room temperature
- 1 cup buttermilk, at room temperature
- 2 teaspoons vanilla extract
- 1 teaspoon white vinegar
- 1–2 tablespoons red food coloring, or as needed for the desired color
For the cream cheese frosting
- 16 ounces (450 g) full-fat cream cheese, softened
- ½ cup (113 g) unsalted butter, softened
- 4 cups powdered sugar, sifted
- 2 teaspoons vanilla extract
- 1–2 tablespoons milk or heavy cream, only if needed
- A small pinch of salt, optional
For decorating
- Red velvet cake crumbs
- A few small frosting swirls, if desired
- Optional white chocolate shavings
Equipment Needed
- Three 8-inch round cake pans
- Mixing bowls
- Electric hand mixer or stand mixer
- Whisk
- Rubber spatula
- Measuring cups and spoons or a kitchen scale
- Parchment paper
- Cooling rack
- Offset spatula or butter knife
- Cake stand or serving plate
Instructions
Step 1: Prepare the oven and cake pans
Preheat your oven to 350°F (175°C).
Grease three 8-inch round cake pans with butter or baking spray. Line the bottoms with parchment paper to help the cakes release easily after baking.
If you do not have three pans, you can bake the layers in batches. Allow the pans to cool before adding the next portion of batter.
Step 2: Combine the dry ingredients
In a medium-sized bowl, whisk together the flour, cocoa powder, baking soda, and salt.
Whisking helps distribute the cocoa and leavening evenly throughout the flour, giving the cake a consistent texture.
Set the bowl aside while you prepare the wet ingredients.
Step 3: Cream the butter and sugar
Place the softened butter and granulated sugar in a large mixing bowl.
Beat with an electric mixer for approximately 2–3 minutes, until the mixture becomes lighter and creamy.
Add the vegetable oil and continue mixing until combined.
The butter provides a rich flavor, while the oil helps the cake stay moist even after refrigeration.
Step 4: Add the eggs and flavorings
Add the eggs one at a time, beating well after each addition.
Mix in the vanilla extract and red food coloring.
Begin with a smaller amount of coloring and add more until you achieve the shade of red you prefer. Gel food coloring can provide a strong color without adding much liquid.
Scrape down the sides of the bowl with a spatula to ensure everything is evenly incorporated.
Step 5: Add the buttermilk and dry ingredients
Pour the buttermilk into a measuring cup and stir in the vinegar.
Add approximately one-third of the dry ingredients to the butter mixture and mix on low speed. Follow with half of the buttermilk mixture.
Repeat, alternating the dry ingredients and remaining buttermilk, finishing with the dry ingredients.
Mix only until the flour disappears. Avoid overmixing, as this can make the cake dense instead of tender.
Step 6: Divide the batter
Divide the batter evenly among the three prepared pans.
Smooth the tops gently with a spatula so the layers bake evenly.
Tap each pan lightly on the counter to release any large air pockets.
Step 7: Bake the cake layers
Place the pans in the preheated oven and bake for approximately 22–28 minutes.
The cakes are ready when a toothpick inserted into the center comes out clean or with a few moist crumbs.
The edges should look set, and the centers should spring back lightly when touched.
Avoid overbaking, as red velvet cake is at its best when the crumb remains soft and moist.
Step 8: Cool the cakes completely
Allow the cakes to cool in their pans for 10–15 minutes.
Carefully turn them out onto cooling racks, remove the parchment paper, and let them cool completely before frosting.
This step is important. Warm cake can melt the frosting and cause the layers to slide.
If the cakes have domed tops, trim them gently with a serrated knife once completely cool. Save the crumbs for decorating.
Step 9: Prepare the cream cheese frosting
Place the softened cream cheese and butter in a large mixing bowl.
Beat until smooth and creamy, scraping down the sides as necessary.
Add the vanilla extract and a pinch of salt if desired.
Gradually add the sifted powdered sugar, mixing on low speed at first to prevent it from scattering. Increase the speed briefly once the sugar is incorporated.
If the frosting is too thick, add milk or cream a teaspoon at a time. If it seems too soft, refrigerate it for 15–20 minutes before assembling the cake.
The finished frosting should be smooth, creamy, and thick enough to hold its shape between the layers.
Step 10: Assemble the cake
Place the first cake layer on a serving plate or cake stand.
Spread an even layer of cream cheese frosting over the top, reaching close to the edges.
Place the second cake layer on top and repeat the frosting process.
Add the final cake layer, placing the flattest side upward for a neat finish.
Spread a thin layer of frosting over the top and sides to create a crumb coat. Refrigerate for approximately 20 minutes to help set this first layer.
Finish with the remaining frosting, smoothing the sides and top with an offset spatula.
Step 11: Decorate the cake
For a traditional homemade appearance, sprinkle a few red velvet crumbs around the top edge or press them gently against the sides.
You can also pipe small frosting swirls around the top or leave the cake simply frosted for an old-fashioned family-style presentation.
Do not worry about making every edge perfectly smooth. Sometimes the cakes that look most like the ones from our childhood are the ones that feel homemade.
Step 12: Chill and serve
Refrigerate the assembled cake for approximately 30 minutes to help the frosting settle.
For the best texture, allow each slice to sit at room temperature for about 15–20 minutes before serving.
Use a sharp cake knife to cut neat slices. For especially clean cuts, wipe the blade between slices, just as Mama did in the kitchen.
Methods for Making the Perfect Red Velvet Cake
1. The creaming method
Creaming the butter and sugar helps incorporate air into the batter. Combined with the baking soda and acidic buttermilk, this helps produce a soft cake with a delicate crumb.
2. The alternating mixing method
Adding the dry ingredients and buttermilk in stages helps the batter come together evenly without excessive mixing. It also helps prevent a tough texture.
3. The moisture-retaining method
Using both butter and oil gives the cake a balance of flavor and lasting moisture. Buttermilk contributes tenderness and a gentle tang that complements the sweetness of the frosting.
4. The layering method
Allowing the cakes to cool completely before frosting makes assembly much easier. A thin crumb coat traps loose crumbs and helps the final layer of frosting look cleaner.
5. The chilled-frosting method
Cream cheese frosting can soften in a warm kitchen. If it becomes difficult to spread, refrigerate it briefly instead of adding large amounts of powdered sugar.
The History of Red Velvet Cake
Red velvet cake has a long and fascinating history in American baking. Its exact origins are debated, but velvet-style cakes became known for their fine, soft texture during the nineteenth century, when bakers began distinguishing tender cakes from heavier traditional varieties.
The word velvet refers to the cake’s delicate crumb rather than simply its color.
Early velvet cakes were not always the bright red desserts we recognize today. Cocoa, acidic ingredients, and the chemistry of baking could produce subtle reddish or reddish-brown tones. Modern recipes often use red food coloring to achieve the vivid appearance associated with red velvet cake.
The cake became especially popular in the twentieth century. It developed a strong association with Southern American baking traditions, although its history is broader than any one region. Its distinctive appearance and contrasting white frosting helped make it a favorite for celebrations.
Cream cheese frosting became a popular pairing because its slight tang balances the sweetness of the cake. Other versions use butter-based or cooked-flour frostings, reflecting different family traditions.
Over time, red velvet cake became more than a dessert. For many families, it became the birthday cake, the Christmas cake, or the special treat reserved for the people who mattered most.
That is why recipes like this are so meaningful. Every household has its own way of making the cake, decorating it, and serving the first slice.
Formation and Texture: What Makes Red Velvet Special?
Red velvet cake is different from a standard chocolate cake because it uses only a modest amount of cocoa. The chocolate flavor is subtle rather than intense, allowing the vanilla, butter, and buttermilk to shine.
Its characteristic texture comes from several elements working together:
- Flour: Provides structure while allowing the cake to hold its shape.
- Butter and oil: Deliver flavor and help keep the crumb moist.
- Buttermilk: Adds tenderness and a pleasant tang.
- Cocoa powder: Contributes a gentle chocolate note.
- Baking soda and vinegar: Help with leavening and contribute to the batter’s acidity.
- Eggs: Bind the ingredients and support the cake’s structure.
- Red food coloring: Creates the familiar vivid red appearance.
The finished cake should have a fine, soft crumb that cuts easily without crumbling excessively. The frosting should be creamy rather than runny, creating a beautiful contrast against the red layers.
Helpful Tips for Success
Use room-temperature ingredients. Butter, eggs, cream cheese, and buttermilk blend more evenly when they are not cold.
Measure flour carefully. Too much flour can make the cake dry. If using measuring cups, spoon the flour into the cup and level it off instead of packing it down.
Do not overmix. Once the flour has been added, mix only until combined.
Check the cake early. Oven temperatures vary, so begin checking a few minutes before the estimated baking time ends.
Cool before frosting. Even slightly warm cake can cause the cream cheese frosting to melt.
Refrigerate leftovers. Because the frosting contains cream cheese, store the cake covered in the refrigerator and follow safe food-storage practices. For best quality, enjoy it within about 3–4 days.
Variations to Try

Red Velvet Cupcakes
Divide the batter among lined muffin cups and bake at 350°F (175°C) for approximately 18–22 minutes, checking for doneness.

Red Velvet Cake Roll
Bake the batter as a thin sheet in a suitable jelly-roll pan, then use a recipe designed for rolling to prevent cracking.

Simple Red Velvet Cake
Bake the batter in two deeper layers if your pans are suitable, adjusting the baking time and checking the centers carefully.
You can also make a red velvet sheet cake for potlucks, prepare mini cakes for individual servings, or decorate the cake with seasonal sprinkles for Christmas and Valentine’s Day.
Serving Suggestions
This cake is rich enough to stand on its own, but a few simple additions can make it feel even more special.
- Serve with freshly brewed coffee or black tea.
- Add fresh strawberries or raspberries alongside each slice.
- Offer smaller slices after a large family meal.
- Serve on a vintage cake plate for a nostalgic birthday presentation.
- Keep extra frosting available for anyone who loves a generous layer.
For birthdays, place candles across the top just before serving. Gather everyone around the table, sing the birthday song, and let the person celebrating make a wish before cutting the cake.
Those little traditions often become the memories people treasure for years.
Conclusion
Mama’s old-fashioned red velvet cake is a beautiful reminder that the most meaningful recipes are often the ones connected to people and places we love.
Its tender red layers, gentle cocoa flavor, and creamy white frosting make it a wonderful dessert for celebrations. Yet what makes it truly special is the feeling it brings to the table: the excitement of a birthday, the comfort of a familiar kitchen, and the happiness of sharing something homemade.
Perhaps you will bake this cake for your children, your parents, your partner, or a friend who deserves a special treat. Maybe it will become the cake everyone requests year after year.
And perhaps, when you finish frosting it and wipe the blade of your cake knife, you will remember someone who once stood beside you in the kitchen, waiting for that little taste of frosting.
Because some memories never fade. Sometimes, all it takes to bring them back is one slice of red velvet cake.
For the Lovers of Homemade Cakes
This recipe is especially for people who love:
- Old-fashioned cakes made from familiar kitchen ingredients.
- Cream cheese frosting with a rich, tangy flavor.
- Birthday cakes that bring the family together.
- Southern-inspired baking and traditional American desserts.
- Homemade treats that look beautiful without needing professional decorating skills.
- Recipes that carry stories from one generation to the next.
A little baking nostalgia: What cake did your mother or grandmother make for birthdays when you were growing up? Was it red velvet, chocolate, vanilla, or something else entirely? And did you also wait for that little swipe of frosting from the cake knife?
Those are the sweetest memories to share, and sometimes the best family recipes begin with a story just like yours.