
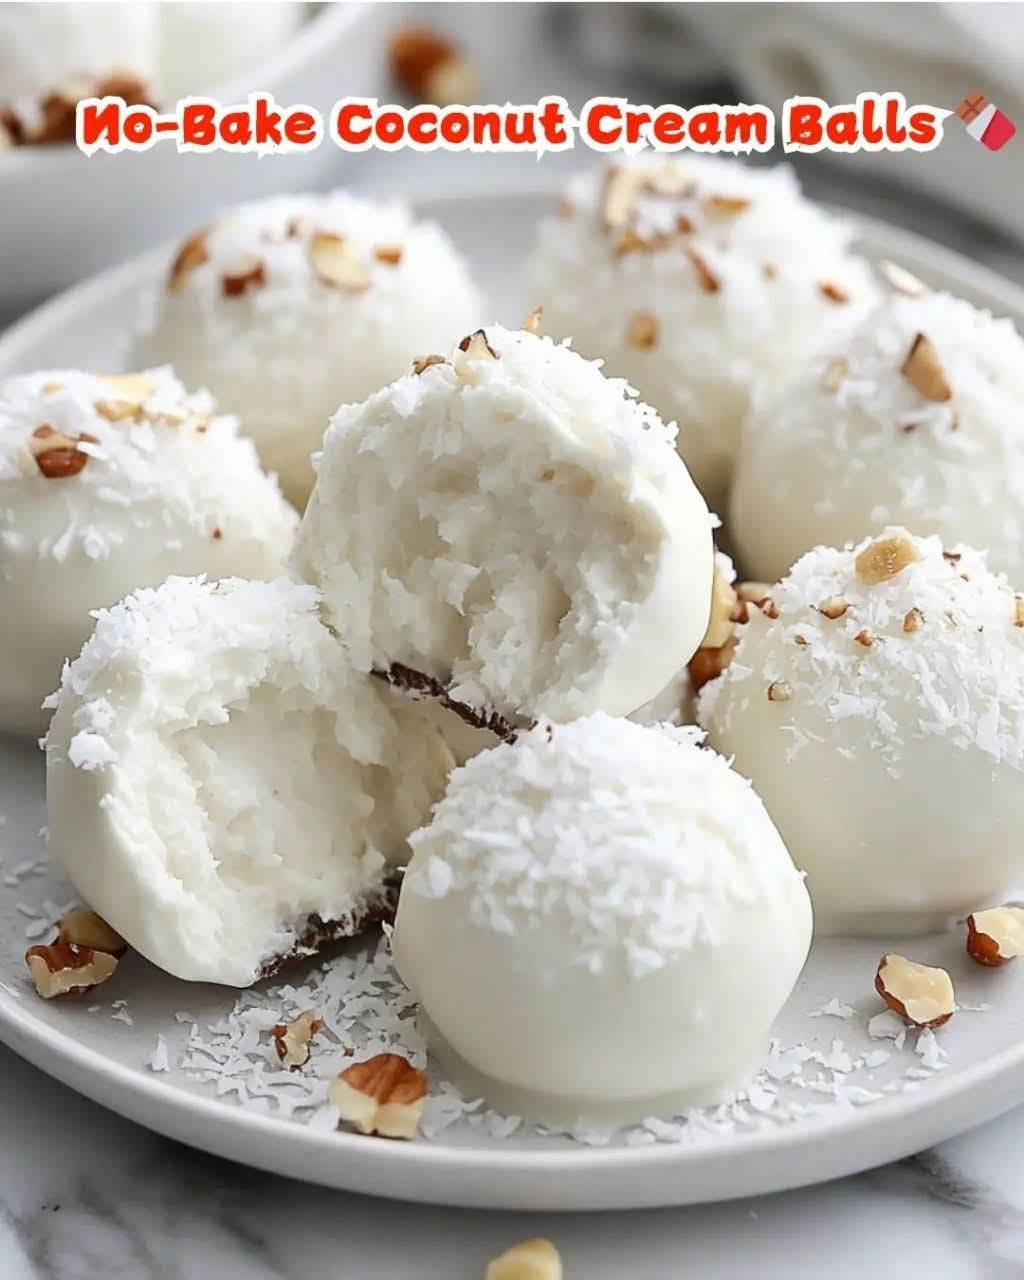
No-Bake Coconut Cream Balls
Introduction
No-Bake Coconut Cream Balls are a simple, creamy, and wonderfully indulgent treat made without turning on the oven. They combine sweet shredded coconut, rich sweetened condensed milk, powdered sugar, and vanilla into a soft coconut filling that can be shaped into bite-sized balls and finished with a smooth chocolate coating.
These little treats are especially appealing because they look elegant while requiring very little preparation. They are perfect for holiday dessert trays, family gatherings, parties, cookie exchanges, afternoon treats, or whenever you want something sweet without spending hours in the kitchen.
The combination of coconut and chocolate gives these candies a classic flavor that is both rich and comforting. Chopped nuts can also be added for a pleasant crunch and an extra layer of flavor.
Ingredients
For the Coconut Cream Filling
- 2 1/2 cups shredded coconut
- 1 cup sweetened condensed milk
- 1/2 teaspoon vanilla extract
- 1 cup powdered sugar
- 1/2 cup finely chopped nuts, optional
For the Chocolate Coating
- 2 cups chocolate chips or chopped chocolate
- 1 tablespoon coconut oil or shortening, optional
The coconut oil helps create a smoother, thinner chocolate coating and makes dipping the coconut balls easier.
Instructions
Step 1: Prepare the Coconut Mixture
Place the shredded coconut in a large mixing bowl. Add the powdered sugar and stir thoroughly so the sugar is evenly distributed throughout the coconut.
Pour in the sweetened condensed milk and add the vanilla extract. Stir everything together until the mixture becomes thick, moist, and sticky.
If you are using nuts, add the chopped nuts at this stage and mix them evenly throughout the coconut mixture.
Step 2: Check the Consistency
The mixture should be moist enough to hold together when pressed but firm enough to shape.
If it seems too wet, add a little more shredded coconut, one tablespoon at a time. If it seems too dry, add a small amount of sweetened condensed milk.
Avoid adding too much condensed milk at once because the mixture can quickly become difficult to shape.
Step 3: Chill the Mixture
Cover the bowl and refrigerate the coconut mixture for approximately 30 to 45 minutes.
Chilling makes the mixture firmer and much easier to roll. It also helps the finished coconut balls maintain their shape when dipped in chocolate.
Step 4: Form the Coconut Balls
Line a baking sheet or large plate with parchment paper.
Using a small cookie scoop or approximately one tablespoon of the mixture, portion out the coconut filling.
Roll each portion between your palms until it forms a compact ball.
Place the balls on the prepared baking sheet, leaving a little space between each one.
For a more polished appearance, try to make all the balls approximately the same size.
Step 5: Chill Again
Place the shaped coconut balls in the refrigerator for another 20 to 30 minutes.
This additional chilling helps them stay firm during the chocolate-coating process.
Step 6: Melt the Chocolate
Place the chocolate in a microwave-safe bowl.
Heat it in short intervals, stirring well between each interval, until the chocolate is smooth and completely melted.
If desired, stir in a small amount of coconut oil or shortening to make the chocolate easier to work with.
The chocolate should be smooth and fluid but not extremely hot.
Step 7: Coat the Coconut Balls
Using a fork, dipping tool, or small skewer, carefully place one chilled coconut ball into the melted chocolate.
Turn it gently until completely coated.
Lift it out and allow the excess chocolate to drip back into the bowl.
Place the coated coconut ball on the parchment-lined baking sheet.
Repeat with the remaining coconut balls.
Step 8: Add Finishing Touches
While the chocolate is still wet, you can sprinkle the tops with a little shredded coconut or finely chopped nuts.
For a simple finish, leave them completely covered in chocolate.
Step 9: Allow the Chocolate to Set
Place the finished coconut balls in the refrigerator for approximately 20 to 30 minutes, or until the chocolate coating is firm.
Once set, transfer them to an airtight container.
Method
The beauty of this recipe comes from its simple no-bake method. Instead of preparing a traditional baked dessert, the coconut filling is mixed, chilled, shaped, and coated.
The sweetened condensed milk acts as the rich binding ingredient, bringing the coconut and powdered sugar together while adding sweetness and creaminess. Vanilla adds warmth and helps balance the rich coconut flavor.
Chilling is an important part of the method. It firms the mixture enough to make rolling easier and helps the coconut balls keep their shape. The final chocolate coating creates a delicate shell around the creamy coconut center.
For the best texture, avoid making the balls too large. Smaller bite-sized pieces are easier to coat and make the finished dessert look more refined.
History and Inspiration
Coconut candies have been enjoyed in many forms around the world for generations. Coconut became especially popular in sweets because of its naturally rich flavor, pleasant texture, and ability to pair beautifully with ingredients such as chocolate, condensed milk, vanilla, and nuts.
No-bake coconut treats became popular in home kitchens because they offered a practical way to prepare homemade sweets without requiring complicated baking techniques.
Recipes using sweetened condensed milk also became common in family kitchens because the ingredient provides sweetness, richness, and moisture all at once. Combined with coconut, it creates a naturally creamy filling that can easily be shaped into candies.
Chocolate-covered coconut confections have remained popular because the contrast between the sweet, tender coconut center and the slightly firm chocolate shell makes every bite satisfying.
Formation of the Coconut Cream Balls
The formation process is simple but important.
First, the dry ingredients are combined so the powdered sugar coats the coconut. The sweetened condensed milk is then incorporated gradually, creating a thick mixture.
After chilling, the mixture becomes easier to handle. Each portion is pressed together before being rolled between the palms. Compressing the mixture slightly before rolling helps prevent cracks and loose coconut from falling away.
The shaped balls are then chilled once more before dipping. This creates a firmer center that is less likely to break apart in the melted chocolate.
The final result should be a compact, smooth coconut ball surrounded by an even chocolate shell.
Tips for Perfect Coconut Cream Balls
Use finely shredded coconut if you want a smoother, more delicate texture. Larger coconut flakes will give the candies a more pronounced texture.
Make sure the coconut mixture is properly chilled before shaping. If it feels sticky, refrigerate it longer rather than adding large amounts of extra coconut.
Keep the coconut balls relatively small so they are easy to dip and comfortable to serve as bite-sized candies.
Do not overheat the chocolate. Excessive heat can make chocolate thick, dull, or difficult to work with.
If the chocolate becomes too thick during dipping, gently warm it again and stir thoroughly.
For a festive presentation, finish the chocolate-coated balls with shredded coconut, chopped nuts, or a very light drizzle of contrasting chocolate.
Storage
Store the finished coconut cream balls in an airtight container in the refrigerator.
They can be prepared ahead of time, making them particularly convenient for parties and holidays. Allow them to sit at room temperature for a few minutes before serving if you prefer a softer coconut center.
Place parchment paper between layers if you are stacking them to help prevent the chocolate coating from sticking.
Serving Suggestions
No-Bake Coconut Cream Balls are excellent served alongside coffee, tea, hot chocolate, or a glass of cold milk.
They can also be arranged on a dessert platter with cookies, brownies, chocolate truffles, and other homemade candies.
For holidays, place them in small paper candy cups. Their bite-sized appearance makes them especially attractive on dessert tables and gift trays.
They also make a thoughtful homemade food gift when packaged in a decorative container or small treat box.
For Coconut Lovers
For anyone who loves coconut, these little treats offer plenty of coconut flavor in every bite. The creamy center has a soft, rich texture, while the chocolate coating provides a satisfying contrast.
Adding chopped nuts gives the recipe another dimension, but the nuts can easily be left out for a pure coconut-and-chocolate combination.
You can also experiment with different types of chocolate. Dark chocolate creates a deeper contrast against the sweet coconut filling, while milk chocolate produces a sweeter and creamier candy.
Conclusion
No-Bake Coconut Cream Balls are proof that an impressive homemade dessert does not need to be complicated. With a handful of simple ingredients, a little chilling time, and a smooth chocolate coating, you can create beautiful bite-sized treats that are perfect for sharing.
The creamy coconut center, sweet condensed milk, vanilla, optional crunchy nuts, and chocolate shell come together to create a classic combination that is easy to love.
Whether prepared for a holiday gathering, a family dessert table, a special occasion, or simply a homemade sweet craving, these coconut cream balls are an easy recipe worth keeping in your collection.