
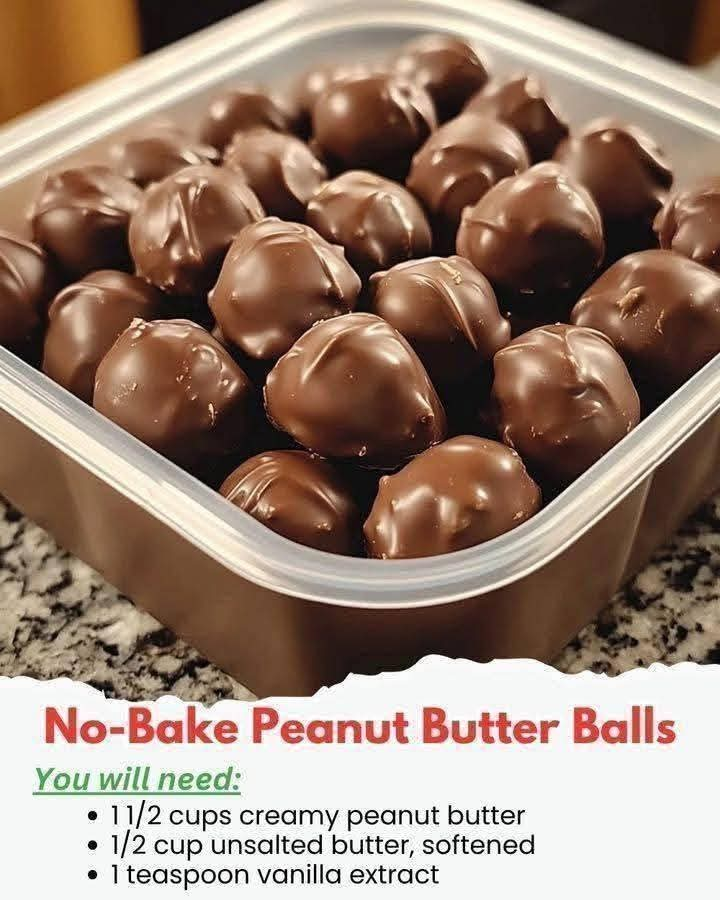
No-Bake Peanut Butter Balls
Introduction
No-Bake Peanut Butter Balls are a classic homemade treat that combines the rich, creamy flavor of peanut butter with a sweet, buttery texture. They are incredibly simple to prepare because there is no oven, no complicated baking technique, and no long preparation time required.
These little peanut butter treats are perfect for holidays, family gatherings, dessert tables, afternoon snacks, parties, or whenever you want something sweet and homemade. They can be enjoyed plain, or they can be dipped in melted chocolate to create an especially delicious peanut butter and chocolate combination.
One of the best things about this recipe is how easy it is to customize. You can make the balls small or large, add different toppings, use crunchy peanut butter instead of creamy, or coat them with chocolate for an elegant finish.
Ingredients
For the Peanut Butter Mixture
- 1 1/2 cups creamy peanut butter
- 1/2 cup unsalted butter, softened
- 1 teaspoon vanilla extract
- 2 to 2 1/2 cups powdered sugar
Optional Chocolate Coating
- 2 cups chocolate chips
- 1 tablespoon shortening or coconut oil, optional
Optional Toppings
- Finely chopped peanuts
- Shredded coconut
- Crushed graham crackers
- Chocolate sprinkles
- Melted white chocolate for drizzling
Instructions
1. Prepare the Peanut Butter Base
Place the softened butter and creamy peanut butter into a large mixing bowl.
Beat the two ingredients together with an electric mixer until they are completely combined and smooth. Scrape down the sides of the bowl as needed.
Add the vanilla extract and mix again until evenly incorporated.
2. Add the Powdered Sugar
Begin adding the powdered sugar gradually.
Start with approximately 2 cups and mix thoroughly. The mixture should become thick enough to hold its shape when pressed together.
If the mixture is still very soft or sticky, gradually add more powdered sugar, a few tablespoons at a time.
Avoid adding too much powdered sugar at once because the mixture can become dry and difficult to roll.
3. Chill the Mixture
Cover the bowl and place it in the refrigerator for approximately 20 to 30 minutes.
This step makes the mixture firmer and much easier to shape.
4. Form the Peanut Butter Balls
Line a baking sheet or large tray with parchment paper or wax paper.
Using a small cookie scoop or tablespoon, portion out the peanut butter mixture.
Roll each portion between your palms until it becomes a smooth, round ball.
Place the finished balls onto the prepared baking sheet.
Continue until all the mixture has been used.
For smaller treats, use approximately 2 teaspoons of mixture per ball. For more substantial dessert portions, use approximately 1 tablespoon.
5. Chill the Formed Balls
Once all the balls have been shaped, place the tray in the refrigerator for another 20 to 30 minutes.
The additional chilling time helps the balls become firm and makes them easier to coat with chocolate.
Chocolate Coating Method
For a richer version, these peanut butter balls can be covered with chocolate.
Place the chocolate chips in a microwave-safe bowl.
Heat the chocolate in 15- to 20-second intervals, stirring thoroughly between each interval.
Continue until the chocolate is almost completely melted. Stir continuously until the remaining chocolate melts from the residual heat.
If desired, add a tablespoon of shortening or coconut oil. This helps make the chocolate smoother and easier to use for dipping.
Take one chilled peanut butter ball and place it into the melted chocolate.
Use a fork to gently turn the ball until it is completely covered.
Lift it out and allow excess chocolate to drip back into the bowl.
Place the coated ball back onto the parchment-lined tray.
Repeat with the remaining peanut butter balls.
If you want to add chopped peanuts, coconut, or another topping, sprinkle it over the chocolate while it is still soft.
Final Chilling Method
Place the chocolate-coated peanut butter balls in the refrigerator.
Allow them to chill for approximately 30 minutes, or until the chocolate has completely hardened.
Once firm, transfer them to an airtight container.
For the best texture, allow them to sit at room temperature for several minutes before serving.
Formation and Texture
The consistency of the peanut butter mixture is one of the most important parts of this recipe.
The mixture should be firm enough to roll but soft enough to remain creamy inside.
If the mixture feels too sticky, add a little more powdered sugar.
If it becomes too dry or crumbly, add a small amount of peanut butter and mix again.
Chilling also plays an important role. A cold mixture is easier to shape and produces peanut butter balls that hold their form much better.
When finished, the center should have a rich, creamy peanut butter texture. If chocolate is added, the outside becomes slightly crisp once chilled while the center remains soft and satisfying.
A Brief History of Peanut Butter Treats
Peanut butter has been a popular ingredient in American kitchens for generations. Its creamy texture, rich nutty flavor, and versatility have made it a favorite ingredient for sandwiches, cookies, candies, bars, and desserts.
Simple peanut butter candies became especially popular in home kitchens because they could be prepared with inexpensive pantry ingredients and required little specialized equipment.
The combination of peanut butter and chocolate became a particularly beloved pairing. The sweetness of chocolate complements the slightly salty and nutty character of peanut butter, creating a flavor combination that continues to appear in homemade candies and desserts.
No-bake peanut butter balls fit perfectly into this tradition. They are simple enough for everyday preparation while also being attractive enough for holiday dessert trays and special occasions.
Helpful Tips
Use softened butter rather than melted butter. Soft butter blends smoothly with the peanut butter while helping the mixture maintain its structure.
Add the powdered sugar gradually. You may need slightly more or less depending on the consistency of your peanut butter.
Chill the mixture before rolling if it feels too soft.
Keep your hands slightly cool while shaping the balls. If the mixture begins sticking excessively, refrigerate it again for a few minutes.
For evenly sized treats, use a cookie scoop.
When melting chocolate, avoid overheating it. Chocolate can become thick or grainy if exposed to excessive heat.
Allow chocolate-coated balls to set completely before placing them into a storage container.
Delicious Variations
Crunchy Peanut Butter Balls
Use crunchy peanut butter instead of creamy peanut butter for a little extra texture.
Chocolate Peanut Butter Balls
Dip every peanut butter ball completely in melted chocolate and refrigerate until firm.
Peanut and Chocolate Balls
After dipping the balls in chocolate, sprinkle finely chopped roasted peanuts over the top.
Coconut Peanut Butter Balls
Add finely shredded coconut to the peanut butter mixture or sprinkle coconut over the chocolate coating.
White Chocolate Drizzle
After the chocolate coating has hardened, drizzle melted white chocolate across the tops for a beautiful contrast.
Graham Cracker Version
Add finely crushed graham crackers to the peanut butter mixture for a slightly different texture and flavor.
Serving Suggestions
Serve these peanut butter balls chilled or slightly softened at room temperature.
They are excellent on holiday cookie trays, dessert platters, birthday tables, family gatherings, and potluck dessert tables.
For a simple presentation, place each ball in a small paper candy cup.
You can also arrange several varieties together, using different chocolate coatings and toppings to create an attractive homemade candy assortment.
They pair especially well with coffee, tea, hot chocolate, or a cold glass of milk.
Storage
Place the finished peanut butter balls in an airtight container and store them in the refrigerator.
If stacking several layers, place parchment paper between the layers to prevent them from sticking together.
For longer storage, the peanut butter balls can be frozen in a well-sealed freezer-safe container.
When ready to serve, allow frozen peanut butter balls to thaw gradually in the refrigerator.
For Peanut Butter Lovers
If you love peanut butter, this is the kind of recipe that is easy to keep coming back to.
There is something especially satisfying about biting into a small homemade ball with a creamy peanut butter center. When chocolate is added, the contrast between the smooth peanut butter filling and the firm chocolate coating makes the treat even more indulgent.
The recipe is also flexible enough to make your own. You can experiment with different chocolates, toppings, textures, and sizes until you find your favorite combination.
Conclusion
No-Bake Peanut Butter Balls are a wonderfully simple homemade dessert that requires no oven and only a few basic ingredients. The preparation is straightforward: combine the peanut butter, softened butter, vanilla, and powdered sugar, chill the mixture, shape it into balls, and chill again.
For an extra-special treat, cover the balls with melted chocolate and add your favorite toppings.
This is an excellent recipe to keep on hand for holidays, unexpected guests, family gatherings, or those moments when you want a homemade dessert without spending hours in the kitchen.
Once you make these easy peanut butter balls, they can become one of those dependable recipes that everyone asks you to make again.
Recipe Summary
Prep Time: About 15 minutes
Chilling Time: About 50 to 60 minutes
Total Time: Approximately 1 hour
Yield: About 30 to 40 balls, depending on size
Difficulty: Easy
Main Ingredients: Peanut butter, butter, vanilla, powdered sugar
Optional Finish: Chocolate coating and toppings
These No-Bake Peanut Butter Balls are simple, creamy, rich, and easy to prepare, making them a wonderful homemade treat for both everyday snacking and special occasions.