
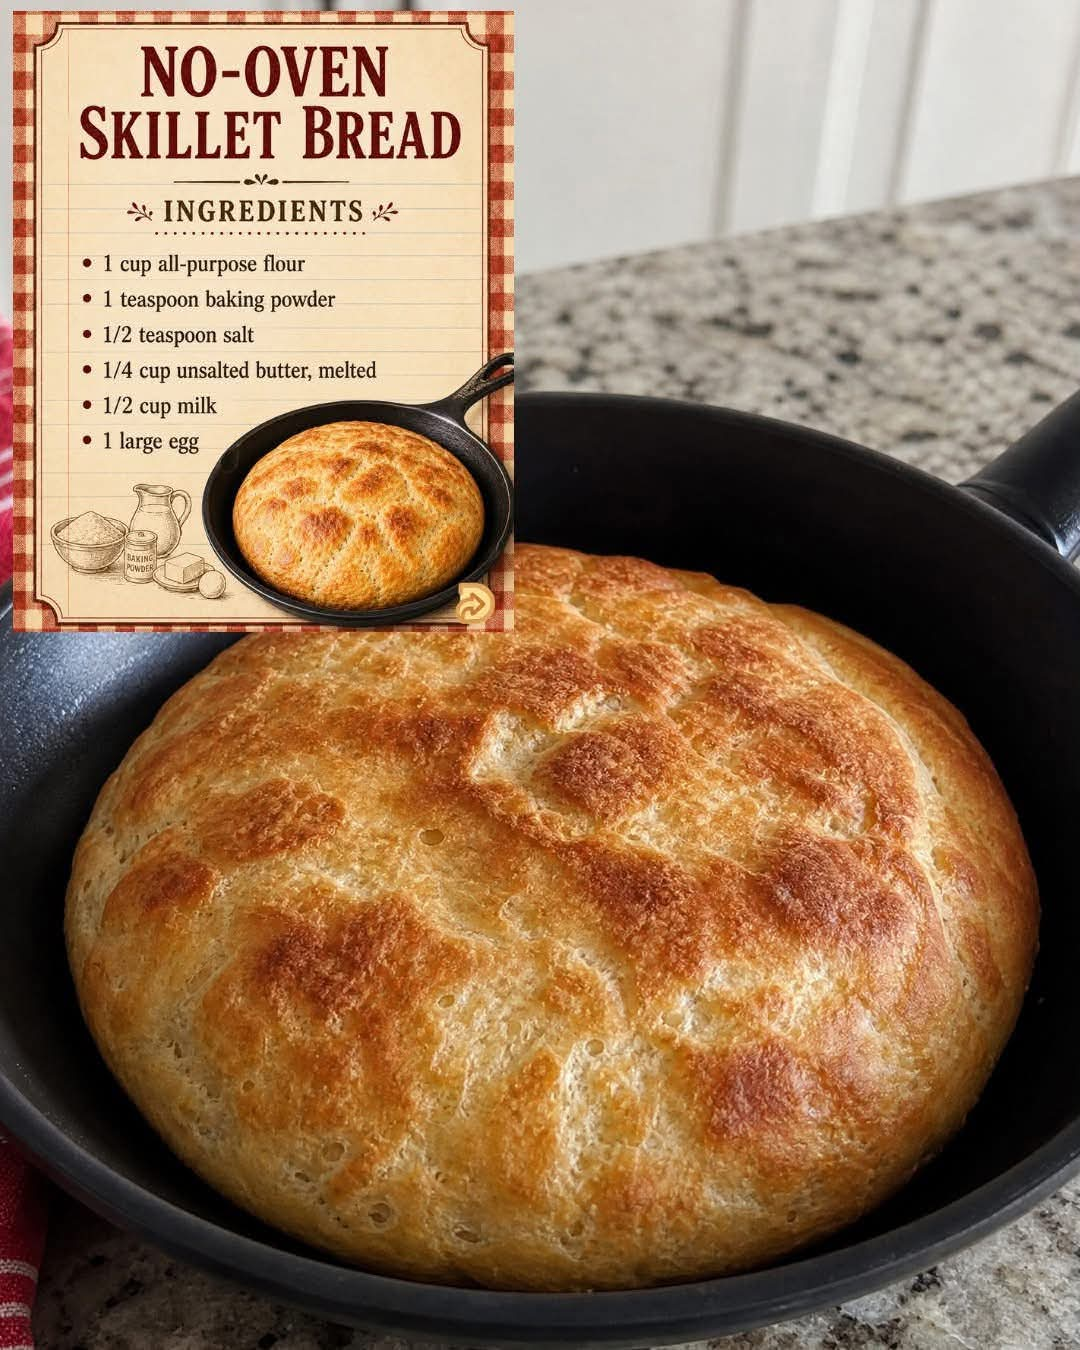
No-Oven Skillet Bread
Introduction
There is something wonderfully comforting about making fresh bread without turning on the oven. This No-Oven Skillet Bread is simple, tender, buttery, and practical, especially when you want homemade bread without complicated kneading, rising, or baking equipment.
The batter comes together in just a few minutes using everyday ingredients. The most important part of the preparation is not overmixing. A few small lumps in the batter are completely fine. Once the flour has disappeared, stop stirring. This gentle approach helps keep the finished bread soft and tender rather than dense or tough.
Cooked slowly in a covered skillet, the bread develops a lightly golden crust while the inside becomes soft and moist. It makes a wonderful addition to breakfast, lunch, dinner, soups, stews, or simple family meals.
Ingredients
- 1 cup all-purpose flour
- 1 teaspoon baking powder
- 1/2 teaspoon salt
- 1/4 cup unsalted butter, melted and slightly cooled
- 1/2 cup milk
- 1 large egg
Optional Additions
For different flavors, you can add:
- 1 tablespoon chopped fresh parsley
- 1/2 teaspoon garlic powder
- 1/2 teaspoon dried oregano
- 2 tablespoons grated cheese
- A small pinch of black pepper
- 1 tablespoon finely chopped green onions
These additions are optional and can be adjusted according to your taste.
Instructions
1. Prepare the Skillet
Choose a good-quality nonstick skillet with a lid. A skillet approximately 8 to 10 inches in diameter works well for this amount of batter.
Place the skillet nearby so the batter can be transferred into it as soon as it is mixed.
2. Mix the Dry Ingredients
In a medium mixing bowl, whisk together the flour, baking powder, and salt.
Whisking helps distribute the baking powder and salt evenly throughout the flour so the bread rises consistently during cooking.
3. Mix the Wet Ingredients
In a separate bowl, combine the melted butter, milk, and egg.
Whisk until the mixture is smooth and the egg is fully incorporated.
Allow the melted butter to cool slightly before adding the egg so that the egg does not begin to cook from the heat.
4. Combine the Batter
Pour the wet ingredients into the bowl containing the dry ingredients.
Using a spoon, spatula, or whisk, gently stir everything together.
Do not try to make the batter perfectly smooth. Stop mixing as soon as you can no longer see dry flour.
A few small lumps are completely acceptable.
Overmixing can develop the gluten in the flour and make the finished bread heavier and less tender.
5. Transfer to the Skillet
Pour the batter into the nonstick skillet and spread it gently into an even layer.
If necessary, lightly grease the skillet before adding the batter, although a good nonstick pan may not require additional butter.
6. Cook Slowly
Cover the skillet with a lid and place it over very low heat.
Cook slowly for approximately 12 to 18 minutes, depending on the thickness of the bread and the heat of your stovetop.
The low temperature is important. Cooking over high heat may brown the bottom too quickly while leaving the center uncooked.
The top should gradually become firm and nearly set.
7. Check the Bottom
Carefully lift one edge of the bread with a spatula.
The bottom should be lightly golden and firm enough to support the bread when flipped.
If the bottom is becoming dark too quickly while the top is still wet, reduce the heat even further.
8. Flip the Bread
Once the first side is golden and the top is nearly set, carefully loosen the bread from the skillet.
Place a large plate over the skillet and carefully turn the bread onto the plate if that makes flipping easier.
Then slide the bread back into the skillet with the uncooked side facing down.
9. Finish Cooking
Cover the skillet again and cook for another 4 to 7 minutes, or until the second side is golden and the center is completely cooked.
A toothpick inserted into the middle should come out without wet batter attached.
10. Rest Before Serving
Remove the bread from the skillet and allow it to rest for several minutes.
This short resting period allows the interior to finish setting and makes the bread easier to slice.
Serve warm with butter, cheese, eggs, soup, stew, or your favorite spread.
Cooking Method
The secret to this bread is gentle skillet cooking.
Unlike traditional yeast bread, this recipe does not require kneading or a long rising period. Baking powder provides the leavening, while the egg, milk, and melted butter give the bread moisture and richness.
The covered skillet creates a warm environment that allows the top of the bread to cook while the bottom develops a golden crust.
Keeping the heat very low is essential. Think of the process as gently baking the bread inside a covered pan rather than frying it.
The batter should also be handled lightly. Once the flour disappears, stop stirring. Small lumps will disappear during cooking, while excessive mixing can make the bread unnecessarily firm.
Formation and Texture
When the wet and dry ingredients are combined, the baking powder becomes evenly distributed through the batter. As the skillet heats, the baking powder releases gas, helping the bread become lighter.
The egg contributes structure, while the milk keeps the crumb soft. Melted butter adds richness and helps create a tender texture.
Because the bread is cooked slowly under a lid, moisture is retained inside the skillet. This helps produce a soft center surrounded by a lightly golden exterior.
The finished bread should be tender enough to pull apart easily but firm enough to slice.
History and Tradition
Skillet breads have a long place in home cooking because they offer a practical alternative to oven baking. Across many cooking traditions, people have prepared breads and quick breads directly on stovetops, griddles, cast-iron pans, and other heated surfaces.
Before modern kitchens made ovens common and convenient, cooking directly over a fire or on a heated surface was an important part of everyday bread preparation.
This particular version follows the same practical idea in a modern kitchen. It uses baking powder instead of yeast, requires no kneading or proofing, and can be prepared with a simple covered skillet.
The result is the kind of uncomplicated homemade bread that fits naturally into everyday family cooking.
Tips for the Best Skillet Bread
Do Not Overmix
This is the most important rule. Mix only until the flour disappears. A slightly lumpy batter is better than a perfectly smooth but overworked batter.
Keep the Heat Low
Low heat gives the center enough time to cook before the bottom becomes too dark.
Use a Lid
The lid traps heat and helps cook the top of the bread. Without a lid, the bottom may brown before the center has properly set.
Cool the Butter Slightly
Very hot butter can affect the egg when the ingredients are combined. Let the melted butter cool for a few minutes before mixing.
Check the Center
Skillet cooking can sometimes brown the outside before the center is ready. Always check the middle before removing the bread.
Let It Rest
Allowing the bread to rest for several minutes makes the crumb more stable and improves the texture when sliced.
Serving Ideas
This bread is extremely versatile.
Serve it warm with butter for breakfast, or pair it with scrambled eggs, omelets, or cheese.
For lunch or dinner, serve slices alongside soup, chili, beans, roasted vegetables, grilled meat, chicken, or hearty stews.
You can also split the bread horizontally and use it as a simple sandwich base.
For a savory version, add garlic powder, herbs, cheese, or chopped green onions directly to the batter.
For a richer finish, brush the warm bread with a little melted butter immediately after cooking.
Recipe Variations
Garlic Herb Skillet Bread
Add garlic powder, dried oregano, parsley, and a little black pepper to the batter. This version pairs especially well with soups and pasta dishes.
Cheesy Skillet Bread
Fold 2 to 4 tablespoons of grated cheese into the batter before cooking. Cheddar, mozzarella, or another melting cheese can work well.
Green Onion Bread
Add finely chopped green onions and a small amount of black pepper for a fresh savory variation.
Breakfast Skillet Bread
Keep the basic recipe simple and serve it warm with butter, eggs, cheese, or a savory breakfast spread.
Conclusion
No-Oven Skillet Bread proves that homemade bread does not always require an oven, yeast, kneading, or hours of preparation.
With only a handful of everyday ingredients, you can create a warm, tender bread directly on the stovetop. The key is patience: mix gently, cook slowly, keep the skillet covered, and give the bread enough time to cook through.
Most importantly, do not worry about making the batter perfectly smooth. Those few little lumps are harmless, and stopping as soon as the flour disappears is one of the secrets to keeping this bread tender.
It is an easy recipe to keep on hand whenever you want something homemade, warm, and comforting without turning on the oven.
For Bread Lovers
If you love homemade bread but prefer simple recipes, this skillet bread is a wonderful recipe to add to your collection.
It is especially useful when you want fresh bread quickly, when the oven is unavailable, or when you simply do not want to heat the kitchen.
Serve it warm from the skillet, spread with butter, alongside a comforting meal, or enjoy a slice on its own. Its simple ingredients and tender texture make it an easy recipe to return to again and again.