
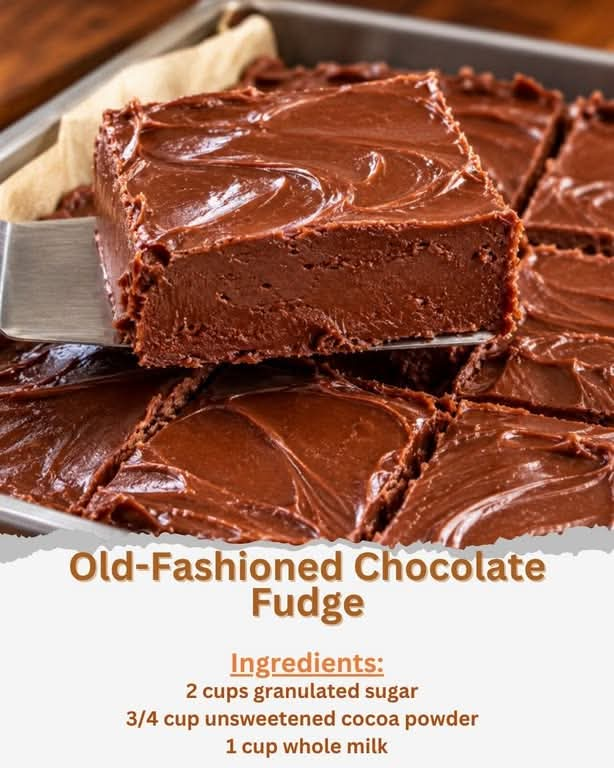
Old-Fashioned Chocolate Fudge
Introduction
There is something timeless about a pan of old-fashioned chocolate fudge cooling on the kitchen counter. Rich, deeply chocolatey, creamy, and wonderfully nostalgic, this classic homemade fudge brings back memories of holiday candy trays, family kitchens, and simple desserts made from pantry staples.
Unlike many modern fudge recipes that rely on marshmallow creme or condensed milk, this traditional version is made with sugar, cocoa powder, milk, butter, vanilla, and a little salt. The magic comes from cooking the mixture to the correct temperature and then beating it until it transforms into a thick, smooth fudge with a beautiful creamy texture.
This recipe is perfect for Christmas, birthdays, family gatherings, bake sales, homemade gifts, or simply whenever you want an old-fashioned chocolate treat.
Ingredients
- 2 cups granulated sugar
- 3/4 cup unsweetened cocoa powder
- 1 cup whole milk
- 4 tablespoons unsalted butter
- 1 teaspoon vanilla extract
- 1/4 teaspoon salt
- Butter or cooking spray, for greasing the pan
Equipment
- Medium heavy-bottomed saucepan
- Wooden spoon or sturdy spatula
- Candy thermometer, preferably
- 8 x 8-inch baking dish
- Mixing spoon
- Measuring cups and spoons
Instructions
1. Prepare the Baking Dish
Grease an 8 x 8-inch baking dish with a thin layer of butter or cooking spray. You can also line the dish with parchment paper, leaving some overhang on the sides. This makes it easier to lift the finished fudge from the pan.
Set the prepared dish aside while you make the fudge.
2. Combine the Dry Ingredients
Place the granulated sugar, unsweetened cocoa powder, and salt in a heavy-bottomed saucepan.
Whisk the ingredients together until the cocoa powder is evenly distributed throughout the sugar. Breaking up any cocoa lumps at this stage will help create a smoother fudge.
3. Add the Milk
Gradually pour the whole milk into the cocoa and sugar mixture while stirring continuously.
Continue stirring until everything is well combined and you have a smooth, dark chocolate mixture.
4. Bring the Mixture to a Boil
Place the saucepan over medium heat.
Cook the mixture while stirring constantly until it reaches a full boil. Once it begins boiling, avoid scraping the sides of the pan excessively, as sugar crystals can affect the final texture.
For the most reliable results, attach a candy thermometer to the saucepan.
5. Cook to the Soft-Ball Stage
Continue cooking until the mixture reaches approximately 234 to 240°F, the traditional soft-ball stage.
This temperature is important because it determines the final texture of the fudge. If the mixture is undercooked, the fudge may remain too soft. If it is overcooked, the finished candy can become dry, crumbly, or overly firm.
The cooking time may vary depending on your saucepan, stove, and altitude, so temperature is more reliable than time.
6. Remove From the Heat
Once the mixture reaches the proper temperature, immediately remove the saucepan from the heat.
Add the butter and vanilla extract.
Allow the butter to melt into the hot chocolate mixture, then gently stir until everything is completely incorporated and smooth.
7. Allow the Fudge to Cool
Let the mixture cool at room temperature without stirring.
This step is essential. Allowing the mixture to cool before beating helps the sugar crystals form correctly and contributes to the classic creamy texture.
Let it cool until it is no longer hot and has thickened slightly.
8. Beat the Fudge
Using a sturdy wooden spoon, beat the cooled mixture vigorously.
Continue beating until the fudge becomes noticeably thicker and begins to lose its glossy appearance. This may require several minutes of vigorous stirring.
The transformation can happen fairly quickly, so keep an eye on the texture.
9. Transfer to the Pan
Immediately pour the thickened fudge into the prepared 8 x 8-inch baking dish.
Use a spatula or the back of a spoon to spread it evenly into the corners.
Work quickly because the fudge will continue to set as it cools.
10. Let It Set
Allow the fudge to sit at room temperature for several hours until completely firm.
If you prefer, you can refrigerate it to speed up the setting process.
Once firm, lift the fudge from the pan if parchment was used and cut it into small squares.
Traditional Method
The traditional method of making chocolate fudge is all about controlling sugar crystallization.
First, the sugar, cocoa, milk, and salt are cooked together until they reach the soft-ball stage. The mixture is then removed from the heat and enriched with butter and vanilla.
The most important part comes afterward. The mixture must cool before it is beaten. Vigorous beating encourages the formation of very small sugar crystals. These tiny crystals are what give traditional fudge its characteristic smooth, creamy, slightly firm texture.
This is why rushing the cooling or beating stages can change the finished result.
History of Old-Fashioned Fudge
Fudge became popular in the United States during the late nineteenth century. Its exact origin is debated, but stories about early batches of fudge are connected with American colleges and home candy making.
As its popularity grew, fudge became a favorite homemade confection because it could be prepared with relatively simple ingredients. Chocolate fudge became especially popular, with cocoa powder providing an affordable and intensely chocolatey flavor.
Before modern shortcuts such as marshmallow creme, condensed milk, and chocolate chips became common, traditional fudge depended on careful cooking and beating. Home cooks learned to recognize the soft-ball stage and developed their own methods for achieving the perfect texture.
Today, old-fashioned fudge remains popular because it combines simple ingredients with a satisfying hands-on candy-making process.
Formation and Texture
The formation of fudge is a fascinating part of the recipe.
When sugar dissolves in the milk and is heated, the mixture becomes a concentrated sugar syrup. As it reaches the soft-ball stage, much of the water has evaporated.
After cooling, the mixture is beaten. This encourages controlled crystallization of the sugar.
The goal is to create tiny crystals rather than large crystals. Large sugar crystals can make fudge grainy, while very small crystals create the smooth, creamy texture associated with traditional fudge.
The butter adds richness and helps create a tender mouthfeel, while vanilla enhances the chocolate flavor without making the fudge taste strongly of vanilla.
Tips for Perfect Old-Fashioned Fudge
Use a heavy-bottomed saucepan.
A heavy pan distributes heat more evenly and reduces the chance of scorching.
Use a candy thermometer.
For consistent results, cook the fudge to approximately 234 to 240°F.
Do not rush the cooling stage.
Allow the mixture to cool before beating. This is one of the most important steps for achieving the proper texture.
Beat thoroughly.
The mixture should become thicker and lose much of its glossy appearance before you transfer it to the pan.
Work quickly after beating.
Once the fudge begins setting, it can become difficult to spread smoothly.
Cut when completely firm.
Let the fudge set fully before slicing for clean, attractive squares.
Store properly.
Keep the finished fudge in an airtight container at room temperature for several days. For longer storage, refrigerate it in a tightly sealed container.
Serving Ideas
Old-fashioned chocolate fudge is delicious on its own, but it can also be served as part of a larger dessert spread.
Cut it into small squares and arrange it on a holiday candy platter. It also makes a wonderful homemade gift when placed in a decorative tin or wrapped individually.
For an extra-special dessert, serve a square of fudge alongside vanilla ice cream, fresh berries, whipped cream, or a cup of coffee.
You can also add chopped walnuts or pecans if you enjoy a little crunch, although the classic version is delicious without any additions.
For Chocolate Fudge Lovers
Chocolate lovers will appreciate how intense this simple recipe tastes. The unsweetened cocoa gives the fudge a deep chocolate flavor, while the sugar balances its natural bitterness.
This is the kind of dessert that does not need elaborate decoration. Each little square is rich enough to satisfy a chocolate craving, making smaller portions perfect for serving.
For those who love traditional homemade sweets, this recipe is especially appealing because it tastes like something made generations ago in a family kitchen.
Make-Ahead Method
Old-fashioned fudge is an excellent make-ahead dessert.
Prepare it several hours before serving and allow it to set completely. Once firm, cut it into squares and store it in an airtight container.
For holidays and gatherings, the fudge can be prepared a day or two ahead of time, allowing you to spend less time in the kitchen on the day of the event.
Conclusion
Old-Fashioned Chocolate Fudge proves that some of the best desserts come from simple ingredients and traditional techniques. With cocoa powder, sugar, milk, butter, vanilla, and salt, you can create a rich homemade confection with a smooth texture and deep chocolate flavor.
The key is patience: cook the mixture carefully, reach the correct temperature, let it cool properly, and beat it until the texture changes. Once you understand those few important steps, homemade fudge becomes a wonderfully rewarding treat.
Whether served during the holidays, shared with family, packed into a homemade gift box, or enjoyed quietly with a cup of coffee, this classic chocolate fudge is the kind of recipe worth keeping and making again and again.