
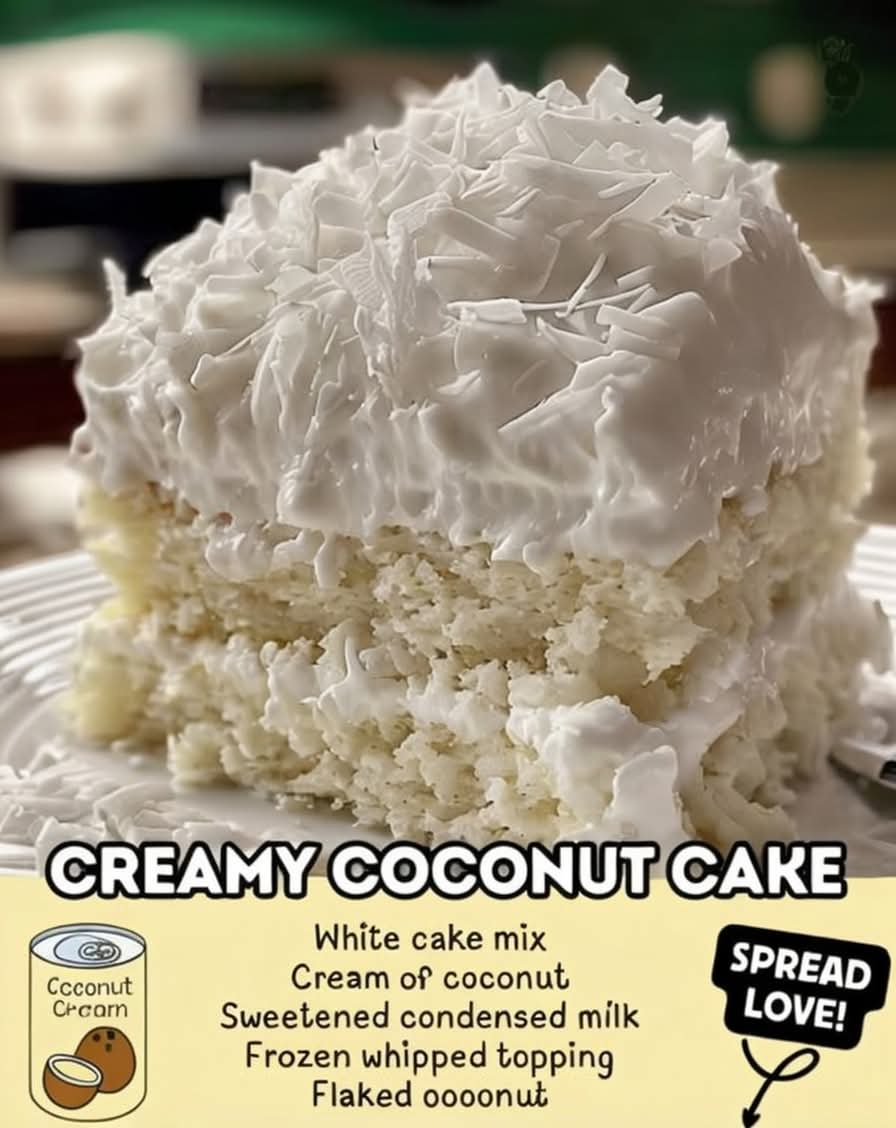
Old-Fashioned Coconut Cream Poke Cake
Introduction
There are some desserts that taste like a particular season, a particular kitchen, and a particular moment in time. For me, this coconut cream poke cake has always been one of those desserts. My mom used to make it every Easter, and the moment the sweet smell of coconut began drifting through the kitchen, it felt like spring had officially arrived.
I had not made this cake in years. Then, last weekend, I was looking through the pantry and discovered a can of cream of coconut tucked away on a back shelf. The sight of it immediately brought back memories of my mother’s kitchen, family gatherings, Easter celebrations, and a dessert that was always one of the first things to disappear from the table.
I decided to make it again, and the first bite took me right back to those days.
This cake is wonderfully simple, but the result tastes anything but ordinary. A soft white cake is baked until tender, then covered with small holes that allow a rich mixture of cream of coconut and sweetened condensed milk to soak deep into every part of the cake. Once chilled, it is covered with a thick layer of fluffy whipped topping and finished with toasted coconut flakes.
The result is incredibly moist, creamy, sweet, and full of coconut flavor.
The toasted coconut adds another dimension. Its golden edges provide a delicate crunch against the soft, creamy cake underneath. Every bite combines fluffy cake, silky coconut cream, airy topping, and fragrant toasted coconut.
It is the kind of dessert that becomes even better after spending a few hours in the refrigerator. In fact, making it the day before serving is one of the best ways to enjoy it.
Ingredients
For the Cake
- 1 box white cake mix
- Eggs, oil, and water according to the cake mix package directions
- 1 9 x 13-inch baking pan
For the Coconut Cream Soak
- 1 can cream of coconut, approximately 14 ounces
- 1 can sweetened condensed milk, approximately 14 ounces
For the Topping
- 1 container frozen whipped topping, approximately 16 ounces, completely thawed
- 1 1/2 to 2 cups sweetened flaked coconut
Optional Additions
For an even more pronounced coconut flavor, you can add a small amount of coconut extract to the cake or topping. A little goes a long way, so begin with about 1/2 teaspoon.
You can also reserve a small amount of toasted coconut for sprinkling over individual servings.
Instructions
Step 1: Prepare the Cake
Preheat your oven according to the directions printed on the white cake mix package.
Prepare the cake batter using the eggs, oil, and water specified on the box. Mix until the batter is smooth and evenly combined, being careful not to overmix.
Pour the batter into a greased 9 x 13-inch baking pan.
Bake according to the package directions, or until the center is fully set and a toothpick inserted into the middle comes out clean or with only a few moist crumbs attached.
Remove the cake from the oven and place it on a cooling rack.
Do not let it cool completely before adding the coconut mixture. The cake should still be warm when you poke the holes and add the soak.
Step 2: Make the Coconut Cream Mixture
While the cake is baking, prepare the coconut cream mixture.
Place the cream of coconut and sweetened condensed milk in a medium bowl. Whisk thoroughly until the two ingredients are completely combined and the mixture is smooth.
Cream of coconut is naturally thick and sweet, so make sure it is well stirred before combining it with the condensed milk.
Step 3: Poke the Cake
While the cake is still warm, use the handle of a wooden spoon or another rounded utensil to poke holes throughout the entire surface.
Make the holes fairly evenly spaced so the coconut mixture can reach different parts of the cake.
Do not make the holes so large that the cake falls apart. The goal is to create channels that allow the coconut mixture to travel down into the cake.
Step 4: Add the Coconut Soak
Slowly pour the cream of coconut and condensed milk mixture over the warm cake.
Take your time with this step. Pour gradually instead of dumping everything into one place.
Use the back of a spoon or a spatula to gently spread the mixture across the surface if necessary.
The warm cake will absorb the sweet coconut mixture through the holes, creating the rich, moist texture that makes this dessert so special.
Step 5: Cool the Cake
Allow the cake to cool completely.
Once it has reached room temperature, cover the pan and place it in the refrigerator for at least 2 hours.
For the best texture and flavor, refrigerate the cake overnight.
This resting time allows the coconut mixture to distribute throughout the cake and gives the dessert its signature soft, creamy consistency.
Step 6: Toast the Coconut
While the cake is chilling, prepare the coconut topping.
Place the sweetened flaked coconut in a dry skillet over medium heat.
Stir constantly as the coconut warms. It can go from pale to golden very quickly, so do not walk away from the pan.
After approximately 3 to 4 minutes, the coconut should become lightly golden and fragrant.
Immediately remove it from the heat and transfer it to a plate or shallow bowl to cool.
Allowing the coconut to cool outside the hot skillet prevents it from continuing to brown.
Step 7: Add the Whipped Topping
Once the cake has completely chilled, spread the thawed whipped topping evenly over the entire surface.
Use a spatula to create a smooth layer, or gently swirl the topping for a more homemade appearance.
Make sure the cake is cold before adding the topping so it remains light and fluffy.
Step 8: Finish With Toasted Coconut
Generously sprinkle the cooled toasted coconut over the whipped topping.
Cover the cake evenly, or use more coconut in the center if you prefer a thicker topping.
For an especially beautiful presentation, reserve a small amount of coconut to add immediately before serving.
Step 9: Chill Before Serving
Return the finished cake to the refrigerator until you are ready to serve it.
Keep the cake refrigerated because of the whipped topping and creamy filling.
The flavor becomes even more developed as the cake rests, making this an excellent make-ahead dessert for holidays, potlucks, birthdays, family dinners, and spring celebrations.
Method
The magic of this dessert comes from the poke-cake method.
Instead of simply spreading frosting over a traditional cake, small holes are made throughout the warm cake. A sweet coconut mixture is then poured over the surface, allowing it to travel into the interior.
This creates pockets of coconut cream throughout the cake rather than leaving all of the flavor on top.
The warm cake is especially important because it absorbs the coconut mixture more readily. As the cake cools and chills, the coconut cream settles throughout the crumb, creating a texture that is exceptionally moist and tender.
The final layer of whipped topping provides a light contrast to the rich coconut-soaked cake, while the toasted coconut adds fragrance and texture.
The combination is simple but extremely effective.
History and Inspiration
Poke cakes became popular because they offered a simple way to transform an ordinary cake into a much more moist and flavorful dessert.
The basic idea is straightforward: bake a cake, poke holes into it, and pour a flavorful filling over the surface. The filling seeps into the holes, creating a dessert with layers of flavor and texture without requiring complicated pastry techniques.
Coconut has long been a favorite ingredient in American holiday and Southern-style desserts. Sweetened coconut, coconut cream, condensed milk, and whipped toppings became especially popular in easy family desserts because they could create rich, celebratory flavors without requiring an elaborate recipe.
This coconut cream poke cake brings those traditions together.
It has the convenience of a boxed cake mix, the richness of coconut cream and condensed milk, and the familiar comfort of a chilled family-style dessert.
It is also exactly the kind of recipe that gets passed from one generation to another, often with small changes along the way.
One family might use homemade cake. Another might add coconut extract. Someone else might cover the top with untoasted coconut instead of toasted coconut.
The recipe can change slightly, but the memory remains the same.
Formation and Texture
The structure of this cake is built in several layers.
First comes the soft white cake. Because it is poked while warm, the cake becomes ready to absorb the coconut mixture.
Next comes the coconut cream soak. The combination of cream of coconut and sweetened condensed milk is thick, sweet, and intensely creamy. As it sinks into the cake, it changes the texture from an ordinary cake into something much softer and richer.
The whipped topping creates the next layer. It is light, airy, and smooth, balancing the density of the coconut-soaked cake.
Finally, the toasted coconut provides texture. Toasting brings out the natural aroma of the coconut and gives the flakes a golden color and lightly crisp texture.
The contrast between the soft cake and slightly crunchy coconut is one of the best parts of the dessert.
Why This Cake Gets Better Overnight
One of the biggest advantages of this recipe is that it improves with resting time.
Immediately after adding the coconut mixture, some areas of the cake may seem wetter than others. As the cake sits in the refrigerator, the liquid continues to spread through the crumb.
After several hours, the flavor becomes more balanced and the texture becomes consistently moist.
For this reason, making the cake the day before a gathering is highly recommended.
The next day, all you have to do is take it from the refrigerator, slice it, and serve.
Tips for Perfect Coconut Cream Cake
Use the right cream of coconut
Cream of coconut is a sweetened coconut product and is different from unsweetened canned coconut milk. Make sure you are using cream of coconut for the intended sweetness and texture.
Do not skip the holes
The holes are what allow the coconut mixture to penetrate the cake. Spread them throughout the entire surface rather than concentrating them in the center.
Pour slowly
Pouring the coconut mixture slowly gives it time to enter the holes instead of simply running toward the edges of the pan.
Toast the coconut carefully
Coconut can burn quickly. Keep the heat moderate and stir constantly. Remove it from the skillet as soon as it reaches a light golden color.
Let the cake chill
Do not rush the refrigeration step. At least 2 hours is recommended, but overnight chilling gives the best texture.
Keep it refrigerated
Because the finished cake contains whipped topping and a creamy soak, it should remain refrigerated until serving.
Serving Suggestions
This coconut cake is wonderful served cold and sliced directly from the refrigerator.
For a family gathering, cut it into generous squares and place each piece on a dessert plate with extra toasted coconut scattered around the edge.
For an elegant presentation, add a small spoonful of whipped topping and a sprinkle of toasted coconut just before serving.
A few thin curls of fresh coconut can also be used as decoration if desired.
The cake pairs especially well with coffee, tea, or a glass of cold milk.
Variations
Double Coconut Cake
Add 1/2 teaspoon coconut extract to the cake batter for an even stronger coconut flavor.
Coconut Cream Cheesecake Style
Add a thin layer of softened cream cheese blended with powdered sugar beneath the whipped topping for a richer dessert.
Almond Coconut Cake
Add a small amount of almond extract to the cake batter. Coconut and almond complement each other beautifully.
Untoasted Coconut Version
If you prefer a softer topping, simply sprinkle sweetened coconut directly over the whipped topping without toasting it.
Extra Toasted Coconut
For serious coconut lovers, use the full 2 cups of coconut and toast all of it until lightly golden.
For Coconut Lovers
If you love coconut, this is the kind of dessert that is difficult to resist.
The coconut flavor does not come from only one ingredient. It appears in several forms throughout the cake, creating a deep and unmistakable coconut character.
The cream of coconut provides sweetness and richness. The flaked coconut adds texture and additional flavor. Toasting those flakes brings out a warm, nutty aroma that makes the entire dessert smell incredible.
Every forkful has something different to offer: soft white cake, creamy coconut filling, fluffy topping, and golden toasted coconut.
It is sweet without being complicated, rich without requiring hours in the kitchen, and nostalgic enough to make it feel like a family recipe even when prepared from a few simple ingredients.
Conclusion
Some recipes are memorable because they are difficult or impressive. Others are memorable because they remind us of someone.
This coconut cream poke cake belongs to the second category.
It is the kind of dessert that can sit quietly in the refrigerator while the flavors come together, then suddenly become the centerpiece of a family meal.
The recipe is simple enough for a weekday dessert but special enough for Easter, spring celebrations, potlucks, birthdays, Sunday dinners, and family reunions.
Most importantly, it carries that old-fashioned quality that makes certain desserts unforgettable. A soft cake, a creamy coconut filling, fluffy topping, and toasted coconut are all it takes to create something that tastes like home.
And if your family loves coconut, do not be surprised if the entire pan disappears faster than expected.
Sometimes the simplest desserts are the ones people remember for years.