
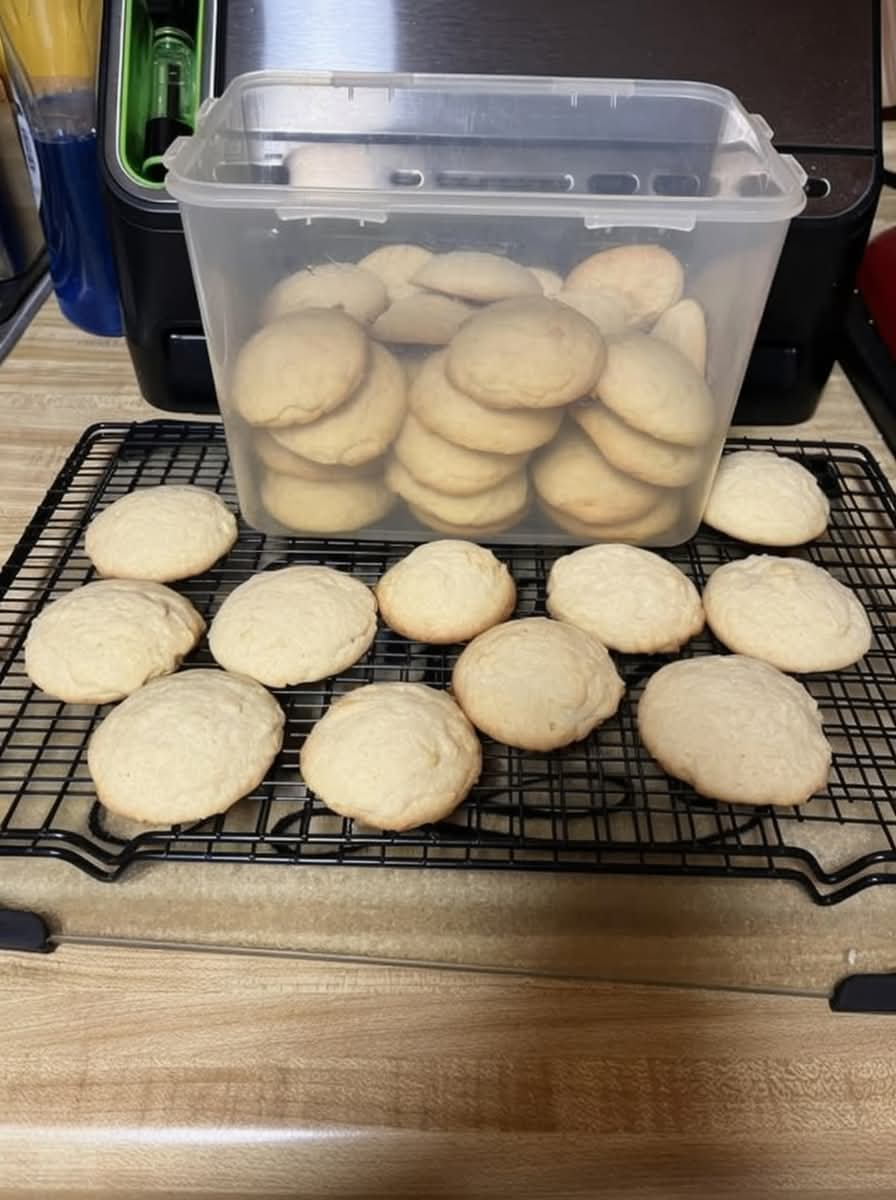
Old-Fashioned Soft Sugar Cookies
Introduction
There are some recipes that seem to carry an entire childhood inside them. You can make them years later, in a completely different kitchen, and somehow the first bite takes you right back to where you started.
These old-fashioned soft sugar cookies are exactly that kind of recipe.
My grandmother used to make them on Sunday afternoons, when the house was quiet and there was plenty of time for something homemade. The smell of butter and vanilla would slowly fill the kitchen as the cookies baked. I would always find a reason to wander into the kitchen, hoping she might let me have one before they had completely cooled. She knew exactly what I was doing, of course, but she always pretended not to notice.
The cookies themselves are wonderfully simple. There are no chocolate chips, frosting, sprinkles, or complicated decorations. They are made with basic pantry ingredients, but the result is anything but ordinary.
Each cookie has lightly golden edges and a soft, pillowy center. The texture is tender enough to practically melt in your mouth, while the combination of real butter, vanilla, and sugar gives them that unmistakable old-fashioned flavor.
I made a batch recently, and the first warm cookie brought back memories I had not thought about in years. Even my daughter noticed the familiar smell and said that the kitchen smelled like Nana’s house.
That is what makes recipes like this special. They are not simply something to eat. They become part of family memories.
Ingredients
For the Cookies
- 1 cup unsalted butter, softened
- 1 cup granulated sugar
- 1 large egg
- 1 teaspoon pure vanilla extract
- 2 1/2 cups all-purpose flour
- 1 teaspoon baking powder
- 1/2 teaspoon salt
- 2 tablespoons milk or buttermilk
For Rolling and Flattening
- 2 to 3 tablespoons granulated sugar, for dipping the glass
Ingredient Notes
Butter
Butter is one of the most important ingredients in this recipe because there are so few ingredients overall. Use good-quality unsalted butter if possible. Allow it to soften naturally at room temperature so it can be properly creamed with the sugar.
Avoid melting the butter. Melted butter will change the consistency of the dough and can cause the cookies to spread too much.
Sugar
Regular granulated sugar provides sweetness and helps create the delicate surface of the cookies. A little extra sugar on the bottom of the glass gives the finished cookies a lightly sweet, classic sugar-cookie exterior.
Egg
The egg helps bind the ingredients together while adding richness and structure.
Vanilla
Vanilla gives these cookies their familiar bakery-style aroma. Because the recipe is so simple, the vanilla flavor is noticeable, so pure vanilla extract is especially nice when available.
Flour
All-purpose flour provides the structure for the cookies. Measure the flour carefully. Too much flour can make the cookies dense instead of soft and tender.
Milk or Buttermilk
Just a small amount of milk helps bring the dough together and contributes to the soft texture. Buttermilk can be used when you want an especially tender cookie with a subtle richness.
Instructions
Step 1: Prepare the Butter
Place the softened butter in a large mixing bowl. Add the granulated sugar.
Using an electric mixer, cream the butter and sugar together for approximately 3 minutes, or until the mixture becomes noticeably lighter, fluffy, and smooth.
Do not rush this step. Properly creamed butter and sugar help give the cookies their delicate texture.
Step 2: Add the Egg and Vanilla
Add the egg to the butter mixture and beat until completely incorporated.
Add the vanilla extract and mix again until the batter is smooth and evenly combined.
Scrape down the sides of the bowl if necessary.
Step 3: Combine the Dry Ingredients
In a separate bowl, whisk together the all-purpose flour, baking powder, and salt.
This helps distribute the baking powder and salt evenly throughout the flour so that every cookie bakes consistently.
Step 4: Make the Dough
Gradually add the dry ingredients to the butter mixture.
Mix on low speed or stir gently by hand until most of the flour has been incorporated.
Add the milk or buttermilk and mix just until a soft cookie dough forms.
Do not overmix the dough. Once the ingredients come together, stop mixing.
Step 5: Chill the Dough
Cover the bowl and refrigerate the dough for approximately 30 minutes.
This short chilling period makes the dough easier to handle and helps the cookies maintain their shape during baking.
Step 6: Prepare the Oven
Preheat the oven to 350°F (175°C).
Line one or two baking sheets with parchment paper.
If you do not have parchment paper, lightly grease the baking sheets.
Step 7: Shape the Cookies
Scoop approximately 1 tablespoon of dough for each cookie.
Roll each portion gently between your hands to form a small ball.
Place the dough balls on the prepared baking sheet, leaving enough space between them for the cookies to spread.
Step 8: Flatten the Cookies
Place a small amount of granulated sugar in a shallow dish.
Dip the bottom of a drinking glass into the sugar, then gently press it onto each dough ball.
The cookies should become slightly flattened but remain fairly thick.
If the glass begins sticking to the dough, dip it into the sugar again.
Step 9: Bake
Place the cookies in the preheated oven and bake for approximately 10 to 12 minutes.
Watch them carefully near the end of the baking time.
The edges should just begin turning a delicate golden color, while the centers should still appear pale and soft.
Do not wait for the entire cookie to become golden brown. Overbaking is one of the easiest ways to lose the soft texture that makes these cookies special.
Step 10: Cool
Allow the cookies to remain on the baking sheet for about 5 minutes.
They will continue setting as they cool.
After 5 minutes, carefully transfer them to a wire rack to cool completely.
If you happen to eat one while it is still warm, that is perfectly understandable.
Method
The secret to these cookies is not a complicated technique. It is patience and attention to a few simple details.
Start with properly softened butter. Creaming the butter and sugar until light and fluffy creates the foundation for the tender texture.
When adding the flour, mix only until the ingredients are combined. Overworking the dough can develop too much gluten and produce cookies that are tougher than intended.
The 30-minute chilling period is another important part of the method. It makes the dough easier to shape and helps the cookies bake into thick, soft rounds rather than spreading excessively.
Finally, pay close attention to the baking time. These cookies should look slightly underdone in the center when they first come out of the oven. They will continue cooking from the residual heat of the baking sheet as they rest.
That is how you get the contrast between lightly golden edges and cloud-soft centers.
The History of Homemade Sugar Cookies
Sugar cookies have long been associated with simple home baking because their basic ingredients are staples in many kitchens: flour, butter, sugar, eggs, and flavoring.
Over generations, families have developed their own versions. Some recipes produce crisp cookies, while others create thick, soft cookies like these.
Older family recipes were often written down without precise instructions. Instead of saying exactly how long to cream butter or how the dough should look, grandmothers and mothers frequently relied on experience.
A recipe might simply say, “Mix until light,” or “Bake until golden.”
The baker learned to recognize the correct texture by sight and touch.
That is one reason old-fashioned cookies can feel so personal. Two families can start with nearly identical ingredients and still produce cookies that taste slightly different because of the techniques passed down through their kitchens.
Formation and Texture
The formation of these cookies begins with creaming butter and sugar together.
As the butter becomes lighter and incorporates air, the mixture creates the foundation for a tender cookie. The egg adds structure, while the flour provides enough strength for the cookies to hold their shape.
Baking powder gives the cookies a gentle lift rather than making them flat and dense.
The small amount of milk or buttermilk contributes moisture and tenderness.
Once the dough is chilled, it is divided into small portions and rolled into balls. Flattening them with a sugar-dipped glass gives the cookies their familiar round shape and slightly textured surface.
During baking, the edges cook first and develop a delicate golden color while the thicker centers remain soft.
After the cookies are removed from the oven, they continue to set as they cool.
The finished result is a cookie that is tender, buttery, lightly sweet, and soft enough to practically disappear with every bite.
Tips for Perfect Soft Sugar Cookies
Use softened, not melted, butter
The butter should be soft enough to press with your finger but should not be oily or liquid.
Do not add too much flour
Extra flour can make the cookies dry and heavy. Measure carefully, preferably by spooning the flour into a measuring cup and leveling it.
Chill the dough
Even 30 minutes in the refrigerator can make the dough easier to work with and help control spreading.
Do not overbake
The cookies should still look soft in the middle when they come out of the oven. If you wait until the centers are deeply golden, the finished cookies may be firmer than intended.
Let them rest
The cookies are fragile when they first leave the oven. Give them several minutes on the baking sheet before transferring them to a cooling rack.
How to Store Them
Once completely cooled, store the cookies in an airtight container at room temperature.
They should remain soft for several days when properly sealed.
For longer storage, the baked cookies can also be frozen. Place them in an airtight freezer-safe container with parchment paper between layers.
You can also freeze portions of the unbaked dough. Shape the dough into balls, freeze them on a tray, then transfer them to a freezer bag or container.
When you are ready to bake them, allow the dough to soften slightly before flattening and baking.
Serving Ideas
These cookies are wonderful on their own, especially while slightly warm.
They can also be served alongside:
- A cup of coffee
- Hot tea
- Cold milk
- Hot chocolate
- Vanilla ice cream
- Fresh berries
- A simple fruit dessert
For a nostalgic presentation, arrange them on a simple serving plate and let everyone help themselves.
There is no need for frosting or decoration. Their simplicity is part of their charm.
Why Cookie Lovers Will Love Them
Cookie lovers who appreciate classic homemade desserts will find a lot to enjoy here.
These cookies have the buttery flavor of traditional sugar cookies without being overly sweet. Their edges have just enough golden color to provide a gentle bite, while the centers remain soft and tender.
They are also wonderfully versatile.
They are simple enough for an ordinary weekday afternoon but comforting enough for holidays, family gatherings, bake sales, Sunday dinners, or a plate of cookies left on the kitchen counter for everyone to discover.
Most importantly, they taste homemade.
There is something comforting about a cookie made from ingredients that have been sitting in the pantry and refrigerator all along.
A Recipe Worth Passing Down
Some recipes become family recipes because they are complicated or impressive.
Others become family recipes because everyone keeps asking for them.
These soft sugar cookies belong to the second category.
They are the cookies you make when you want something familiar. The cookies you remember seeing on a cooling rack. The cookies that disappear from a plate before anyone has had the chance to count them.
And sometimes, the simplest recipes create the strongest memories.
A batch of these cookies can fill a kitchen with the smell of butter and vanilla, bring people to the counter before dinner, and remind you of someone who used to make them long before you knew how special those ordinary afternoons really were.
Conclusion
There is nothing extravagant about these old-fashioned soft sugar cookies, and that is exactly why they are so wonderful.
They rely on simple ingredients, careful mixing, a short chill, and a gentle bake. The result is a classic cookie with lightly golden edges, soft centers, and a rich buttery vanilla flavor.
They are the kind of cookies that belong in a family recipe box.
Make them for a rainy afternoon, a Sunday gathering, a holiday cookie tray, or simply because you are craving something warm and homemade.
And if you find yourself standing beside the oven waiting for them to cool, remember that you do not have to wait too long.
Grandmothers have been sneaking warm cookies from the baking sheet for generations.