
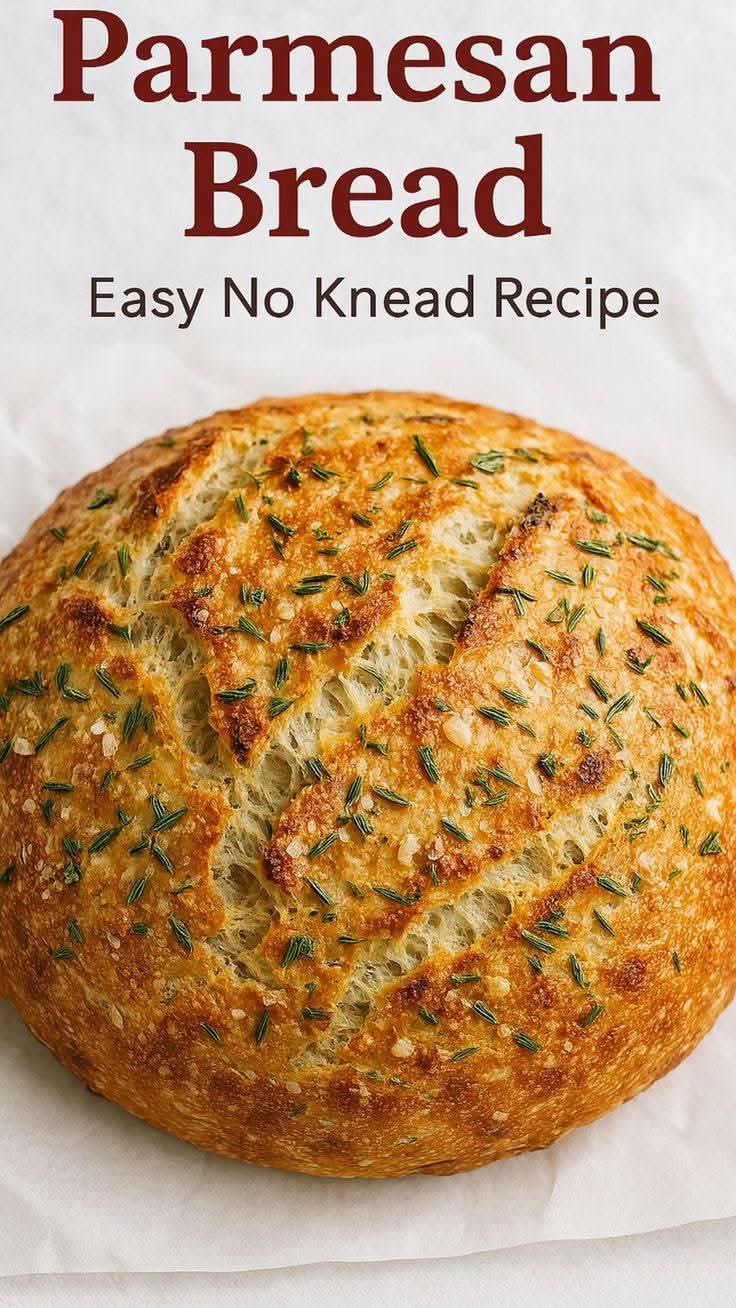
Parmesan Rosemary Bread – Easy No-Knead Artisan Bread
Introduction
There is nothing quite like the smell of freshly baked homemade bread filling your kitchen. This Easy No-Knead Parmesan Rosemary Bread is a delicious combination of a golden, crispy crust, a soft and airy center, savory Parmesan cheese, and fragrant fresh rosemary. Every slice offers a wonderful balance of cheesy richness and earthy herbal flavor.
The best part is that you do not need a stand mixer, special equipment, or hours of kneading. With just a few simple ingredients and a little patience, you can make beautiful artisan-style bread right at home.
This rustic bread is perfect for family dinners, holiday gatherings, weekend baking, or a cozy afternoon snack. Serve it warm with butter, alongside a bowl of soup, or dipped in olive oil. Once you try this simple recipe, it may become one of your favorite homemade breads.
Ingredients
Preparation time: 15 minutes
Rising time: 8–18 hours
Baking time: 35–45 minutes
Total time: Approximately 9–19 hours
Yield: 1 rustic loaf, about 8–10 slices
Main Ingredients
- 3 cups all-purpose flour
- 1 teaspoon salt
- 1/2 teaspoon instant yeast
- 1 1/2 cups warm water
- 1 cup freshly grated Parmesan cheese
- 2 tablespoons fresh rosemary, finely chopped
- 1 tablespoon olive oil, optional
- Coarse sea salt, for topping
Optional Additions
- 1/2 teaspoon freshly ground black pepper
- 1 teaspoon garlic powder
- 1 tablespoon extra grated Parmesan for the crust
- A little extra olive oil for brushing after baking
Freshly grated Parmesan provides excellent flavor, while fresh rosemary gives the loaf its distinctive aroma. If you only have dried rosemary, use approximately 2 teaspoons instead of 2 tablespoons of fresh rosemary.
Instructions
Step 1: Prepare the Dry Ingredients
In a large mixing bowl, combine the all-purpose flour, salt, and instant yeast. Stir everything together until evenly distributed.
Add the grated Parmesan cheese and chopped fresh rosemary. Mix thoroughly so the cheese and herbs are spread throughout the flour.
If you enjoy a little extra flavor, add the optional black pepper or garlic powder at this stage.
Step 2: Add the Warm Water
Pour the warm water into the dry ingredients. Add the olive oil if desired.
Using a wooden spoon or sturdy spatula, mix until all the flour is moistened and a sticky, rough dough forms.
The dough should look shaggy and slightly wet. It will not resemble a smooth, traditional bread dough, and that is perfectly normal. There is no need to knead it.
If the dough seems unusually dry, add a tablespoon of water at a time until the flour is incorporated.
Step 3: Let the Dough Rise
Cover the bowl tightly with plastic wrap or a clean kitchen towel.
Leave the dough at room temperature for approximately 8–18 hours. During this time, the yeast will slowly ferment the dough, developing flavor and creating air bubbles.
The dough should become noticeably larger, bubbly, and stretchy. Depending on your kitchen temperature, it may rise more quickly in a warm room or more slowly in a cool room.
For the best flavor and texture, avoid rushing this step.
Step 4: Prepare the Dough for Baking
Lightly flour a clean work surface. Carefully turn the dough onto the surface, using a spatula if necessary.
Sprinkle a little flour over the dough and gently fold the edges toward the center several times to form a loose ball.
Avoid pressing out all the air bubbles. These bubbles help create the bread’s open, airy interior.
Place the dough seam-side down on a piece of parchment paper. Cover it with a clean towel and let it rest for another 30–45 minutes.
Step 5: Preheat the Oven
About 30 minutes before baking, place a heavy Dutch oven with its lid inside your oven.
Preheat the oven to 450°F (230°C).
Heating the Dutch oven thoroughly helps produce a beautifully crisp crust and encourages the loaf to rise during the first part of baking.
Be careful when handling the hot cookware, and use oven mitts.
Step 6: Add the Topping
Carefully remove the hot Dutch oven from the oven.
Using the parchment paper, lift the dough and lower it into the Dutch oven.
Sprinkle a little coarse sea salt over the top. If you love an extra-cheesy crust, add a small amount of grated Parmesan.
You can also brush the top lightly with olive oil, although this is optional.
Step 7: Bake the Bread
Cover the Dutch oven with its lid and bake for 30 minutes.
The covered environment traps steam, helping the loaf expand while keeping the crust from hardening too quickly.
After 30 minutes, carefully remove the lid. Continue baking for another 10–15 minutes, or until the bread develops a deep golden-brown crust.
The Parmesan should smell fragrant, and the crust should feel firm and crisp.
If the bread is browning too quickly, reduce the oven temperature slightly and continue baking until done.
Step 8: Cool Before Slicing
Remove the loaf from the Dutch oven and transfer it to a wire rack.
Allow it to cool for at least 30–60 minutes before slicing. Although the aroma may make it tempting to cut immediately, cooling helps the crumb finish setting.
Slice with a serrated bread knife and serve.
Detailed Cooking Methods
The No-Knead Method
This recipe uses time instead of physical effort. During the long resting period, the flour absorbs water, gluten develops naturally, and yeast fermentation creates flavor and structure.
Gentle folding before baking is enough to help shape the loaf without extensive kneading.
The Slow-Fermentation Method
A longer rise allows the yeast to develop a deeper, more complex flavor. It also helps create the irregular air pockets associated with rustic artisan bread.
Keep the dough covered while it rises to prevent the surface from drying out.
The Dutch Oven Baking Method
A preheated Dutch oven creates a hot, enclosed baking environment. Steam released by the dough remains trapped beneath the lid, helping the loaf expand before the crust becomes firm.
Removing the lid toward the end of baking allows moisture to escape and the crust to become beautifully golden and crunchy.
The Alternative Baking Method
If you do not have a Dutch oven, you can bake the loaf on a preheated baking sheet or in an oven-safe baking pot with a lid.
For a baking sheet, place a separate oven-safe pan on a lower rack and carefully add hot water to it when the bread goes into the oven to create steam. Use equipment rated for this purpose, and never pour water onto the oven floor or onto hot glass cookware.
Bake at 425–450°F (220–230°C), checking the loaf regularly until it is deeply golden and cooked through. The crust may be slightly different without the enclosed Dutch oven environment.
The History of Parmesan Rosemary Bread
Bread has been a staple of human cooking for thousands of years, with different cultures developing their own techniques, shapes, and flavors. Rustic European breads are particularly appreciated for their simple ingredients and satisfying crusts.
Italy is famous for its many regional breads and its use of aromatic herbs, olive oil, and flavorful cheeses. Parmesan, traditionally associated with the Emilia-Romagna region, is known for its savory, nutty taste. Rosemary is another popular Mediterranean ingredient, valued for its strong fragrance and ability to complement savory foods.
No-knead bread became especially popular among home bakers because it offers an accessible way to produce artisan-style loaves without specialized equipment or extensive kneading.
This Parmesan Rosemary Bread brings together those familiar flavors in a convenient modern recipe. It is inspired by rustic bread-making traditions rather than one specific historical recipe.
Formation and Texture: What Makes This Bread Special?
The formation of this loaf depends on three important elements: hydration, fermentation, and heat.
1. Hydration
The relatively high amount of water creates a sticky dough. This moisture helps the flour hydrate properly and contributes to the bread’s soft interior.
2. Fermentation
The small amount of yeast works gradually during the long resting period. As fermentation progresses, carbon dioxide forms bubbles throughout the dough, helping it expand.
3. Gluten development
Even without kneading, flour proteins form a gluten network as they absorb water and the dough rests. This network helps trap the gas produced by the yeast.
4. Parmesan cheese
Parmesan adds savory flavor and small pockets of cheesy richness. Some cheese near the outside of the loaf may become toasted during baking.
5. Rosemary
Fresh rosemary brings a fragrant, earthy aroma that complements the cheese without overpowering the bread.
6. The crust
The initial covered bake helps the loaf expand, while the uncovered bake allows the exterior to dry and brown.
Together, these elements create a rustic loaf with a crisp exterior, a tender center, and a delicious combination of cheese and herbs.
Helpful Tips for Perfect Results
- Measure the flour carefully. Too much flour can make the dough dense. Measuring by weight is ideal; 3 cups of all-purpose flour typically weighs approximately 360 grams, depending on how it is measured.
- Use warm, not hot, water. Water that is too hot can damage the yeast.
- Choose good Parmesan. Freshly grated cheese usually provides a better texture and flavor than very finely powdered cheese.
- Do not shorten the rising time too much. The long fermentation is an important part of this recipe.
- Handle the dough gently. Excessive handling can knock out some of the gas that helps make the bread airy.
- Preheat the Dutch oven. A properly heated pot helps develop the crust.
- Allow the loaf to cool. Cutting too early can leave the interior gummy.
- Watch the salt. Parmesan is naturally salty, so avoid adding extra salt beyond the recipe unless you prefer a saltier loaf.
Serving Suggestions
This homemade bread is wonderfully versatile.
With soups: Serve thick slices alongside tomato soup, creamy mushroom soup, vegetable soup, or chicken soup.
With pasta: Pair it with spaghetti, lasagna, baked ziti, or creamy Alfredo pasta to soak up the sauce.
As an appetizer: Slice the bread and serve it with olive oil, balsamic vinegar, or a bowl of herb-infused dipping oil.
For breakfast: Toast a slice and serve it with scrambled eggs or an omelet.
For sandwiches: Use thicker slices for grilled cheese, roasted vegetables, or turkey sandwiches.
For a family dinner: Place the warm loaf in a bread basket and serve it with butter or olive oil.
Storage and Reheating
At Room Temperature
Once completely cooled, store the bread in a paper bag or a bread box for up to 2 days. A breathable covering helps preserve the crust better than an airtight plastic bag.
In the Refrigerator
Refrigeration is generally unnecessary and may cause bread to stale more quickly. If your kitchen is particularly hot or humid, freeze the bread for longer storage instead.
In the Freezer
Slice the cooled loaf and place the slices in a freezer-safe bag. Freeze for up to 2–3 months for best quality.
You can toast individual slices directly from frozen or thaw them at room temperature.
To Refresh the Crust
Warm the loaf in a 350°F (175°C) oven for approximately 8–12 minutes. For frozen slices, use a toaster or warm them in the oven until heated through.
Frequently Asked Questions
Can I prepare the dough the night before?
Yes. That is one of the best features of this recipe. Mix the dough in the evening and allow it to rise overnight. Check its progress in the morning, since warmer rooms can speed up fermentation.
Can I use dried rosemary?
Yes. Use approximately 2 teaspoons of dried rosemary in place of 2 tablespoons of fresh rosemary.
Can I use a different cheese?
Yes. A firm, flavorful cheese such as aged Asiago or a suitable hard Italian cheese can work. Keep in mind that different cheeses melt and brown differently.
Why is my dough so sticky?
This is normal for a high-hydration no-knead dough. Use lightly floured hands and a scraper when shaping rather than adding large amounts of extra flour.
Why did my bread turn out dense?
Possible causes include insufficient rising, old or inactive yeast, too much flour, or cutting the loaf before it has cooled.
Can I make this recipe without a Dutch oven?
Yes. Use a baking sheet or an appropriate oven-safe pot and create steam with a separate oven-safe pan. The crust may not be exactly the same, but the bread can still be delicious.
How do I know when the bread is done?
The crust should be deeply golden brown, and the loaf should sound hollow when tapped on the bottom. If using a thermometer, the center will generally register approximately 200–210°F (93–99°C).
Conclusion
This Easy No-Knead Parmesan Rosemary Bread proves that homemade artisan-style bread does not need to be complicated. With flour, yeast, water, salt, Parmesan, and rosemary, you can create a beautiful loaf that looks impressive and tastes wonderful.
The crispy crust, soft interior, savory cheese, and aromatic herbs make it a perfect addition to everyday meals and special occasions alike. The simple preparation also makes it an excellent recipe for beginners who want to experience the pleasure of baking fresh bread at home.
Prepare the dough ahead of time, let it rise slowly, and enjoy the reward of a warm, golden loaf straight from your oven.
For the Love of Homemade Bread
There is something special about sharing homemade bread with the people you love. The simple act of slicing a warm loaf, passing it around the dinner table, and watching everyone reach for another piece can turn an ordinary meal into a memorable moment.
This Parmesan Rosemary Bread is made for those moments: family dinners, quiet weekends, friendly gatherings, and comforting meals when you want something homemade and satisfying.
If you love crispy crusts, savory cheese, fragrant herbs, and easy baking recipes, this loaf deserves a place in your kitchen.