
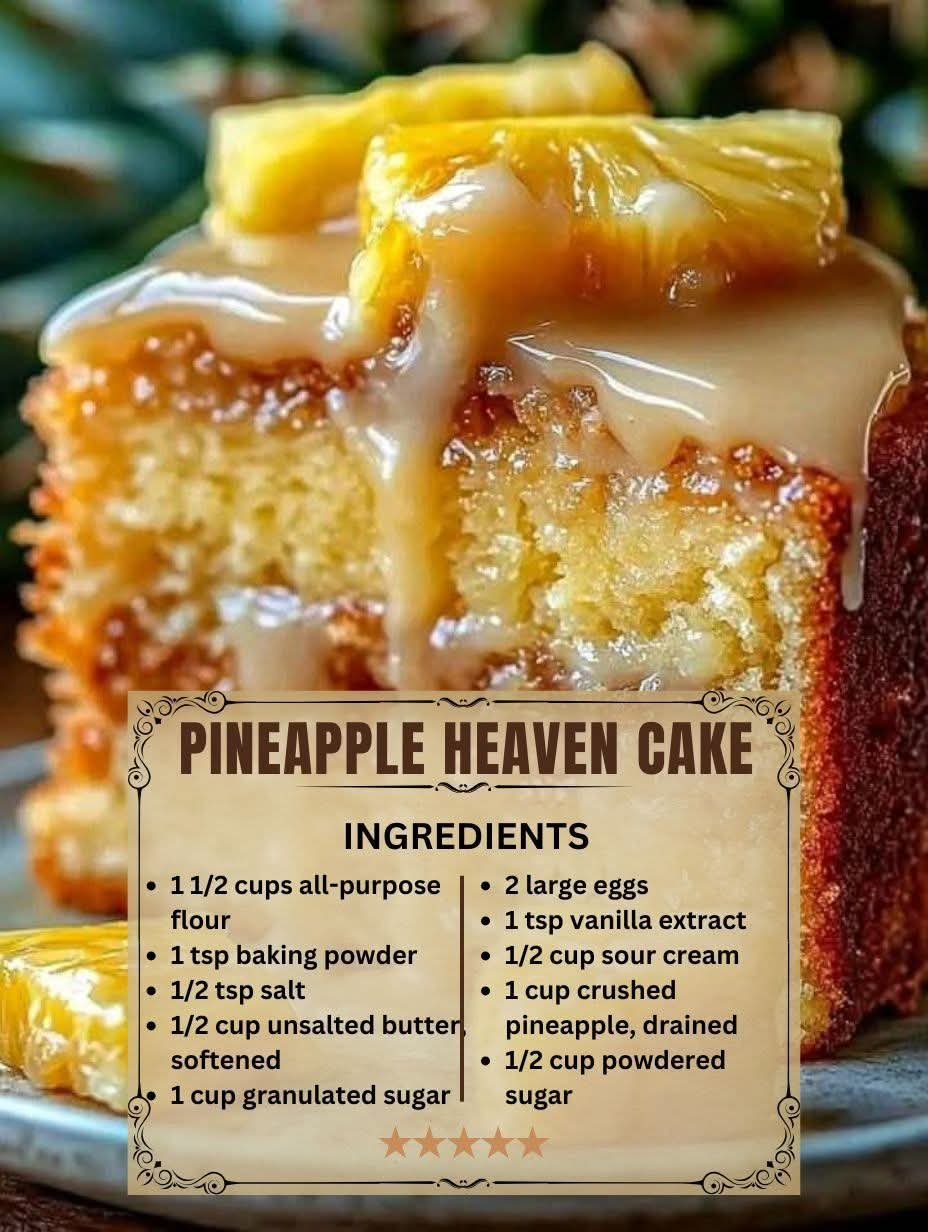
Pineapple Heaven Cake
Introduction
Pineapple Heaven Cake is a tender, buttery dessert that combines the comforting richness of a homemade vanilla cake with the bright, tropical flavor of pineapple. It is the kind of cake that feels simple enough for an ordinary afternoon but special enough to serve at birthdays, family gatherings, potlucks, holidays, and Sunday dinners.
The cake begins with a soft butter-based batter that bakes into a delicate golden layer. Crushed pineapple is then incorporated to provide moisture and fruity sweetness, while a creamy topping gives the finished dessert a cool, silky contrast. The result is a cake that is sweet without being heavy, fruity without being overwhelming, and wonderfully soft after chilling.
Ingredients
For the Cake
- 1 1/2 cups all-purpose flour
- 1 teaspoon baking powder
- 1/2 teaspoon salt
- 1/2 cup unsalted butter, softened
- 1 cup granulated sugar
- 2 large eggs
- 1 teaspoon vanilla extract
- 1/2 cup milk
- 1 cup crushed pineapple, well drained
For the Pineapple Filling
- 1 can crushed pineapple, approximately 20 ounces, with juice
- 1/3 cup granulated sugar
- 2 tablespoons cornstarch
- 1 tablespoon lemon juice
- 1/2 teaspoon vanilla extract
For the Creamy Topping
- 8 ounces cream cheese, softened
- 1/3 cup powdered sugar
- 1 teaspoon vanilla extract
- 1 cup heavy whipping cream
- 2 tablespoons powdered sugar
- 1/2 cup finely shredded coconut, optional
- Pineapple pieces or cherries for decoration, optional
Instructions
Step 1: Prepare the Oven and Pan
Preheat the oven to 350°F (175°C).
Grease a 9-inch round cake pan or a 9-inch square baking pan. For easier removal, line the bottom with parchment paper and lightly grease the parchment.
Set the prepared pan aside while you make the batter.
Step 2: Combine the Dry Ingredients
In a medium bowl, whisk together the flour, baking powder, and salt.
Mixing these ingredients separately helps distribute the baking powder evenly throughout the flour and promotes a more uniform rise.
Step 3: Cream the Butter and Sugar
Place the softened butter in a large mixing bowl. Beat until smooth and creamy.
Gradually add the granulated sugar and continue beating for several minutes until the mixture becomes lighter and fluffy.
This step is important because incorporating air into the butter helps create a tender cake.
Step 4: Add the Eggs and Vanilla
Add the eggs one at a time, mixing well after each addition.
Add the vanilla extract and mix until incorporated.
If the mixture looks slightly curdled, do not worry. It will come together when the dry ingredients and milk are added.
Step 5: Make the Cake Batter
Add approximately one-third of the flour mixture to the butter mixture and mix gently.
Add half of the milk and mix again.
Continue alternating the flour mixture and milk, beginning and ending with the dry ingredients.
Do not overmix. Stop as soon as the batter is smooth.
Fold in the well-drained crushed pineapple using a spatula.
Step 6: Bake the Cake
Pour the batter into the prepared pan and smooth the surface.
Bake for approximately 30 to 38 minutes, or until the center is set and a toothpick inserted into the middle comes out clean or with only a few moist crumbs.
Avoid opening the oven repeatedly during baking because sudden temperature changes can affect the cake’s rise.
Remove the cake from the oven and allow it to cool in the pan for about 10 minutes.
Transfer it to a wire rack and allow it to cool completely before adding the filling and topping.
Method for the Pineapple Filling
While the cake is cooling, prepare the pineapple filling.
Place the crushed pineapple with its juice, sugar, cornstarch, and lemon juice in a medium saucepan.
Whisk everything together while the mixture is still cold to prevent lumps from forming.
Place the saucepan over medium heat and cook, stirring constantly.
As the mixture heats, the cornstarch will begin to thicken the pineapple juices.
Continue cooking for several minutes until the mixture becomes thick and glossy.
Remove from the heat and stir in the vanilla extract.
Transfer the filling to a bowl and allow it to cool completely.
For the best cake texture, the filling should be cool before it is spread over the cake.
Method for the Creamy Topping
Beat the softened cream cheese with 1/3 cup powdered sugar and vanilla extract until completely smooth.
In a separate bowl, whip the heavy cream with the remaining 2 tablespoons powdered sugar until firm peaks form.
Gently fold the whipped cream into the cream cheese mixture.
Continue folding until the topping is smooth, creamy, and light.
Do not overmix the whipped cream because you want to preserve its airy texture.
Formation and Assembly
Once the cake has completely cooled, place it on a serving plate.
Spread the cooled pineapple filling evenly over the top of the cake.
Leave a small border around the edge if desired so the filling stays neatly in place.
Carefully spread the cream cheese topping over the pineapple layer.
Smooth the top with a spatula.
For a more traditional tropical finish, sprinkle shredded coconut over the topping.
You can also decorate the cake with small pieces of pineapple or a few well-drained cherries.
Cover the cake loosely and refrigerate for at least 2 hours before serving.
Chilling allows the layers to firm up and gives the pineapple flavor time to blend with the buttery cake and creamy topping.
Baking Method
The most important part of making this cake is controlling moisture.
Pineapple contains a considerable amount of liquid, so crushed pineapple should be drained thoroughly before being added to the cake batter. Excess liquid can make the cake dense or prevent the center from baking properly.
The butter should be softened rather than melted. Softened butter creams properly with the sugar, while melted butter produces a different cake texture.
The batter should also be mixed gently once the flour has been added. Overmixing develops gluten and can make the finished cake less tender.
Make-Ahead Method
Pineapple Heaven Cake is particularly convenient as a make-ahead dessert.
The cake layer can be baked one day in advance and stored tightly covered at room temperature once completely cooled.
The pineapple filling can also be prepared ahead of time and refrigerated.
For the best texture, assemble the complete cake several hours before serving and keep it refrigerated.
Allow the cake to sit at room temperature for approximately 10 to 15 minutes before slicing.
Storage
Store the finished cake covered in the refrigerator because it contains cream cheese and whipped cream.
It is best enjoyed within approximately 3 to 4 days.
If you want to freeze the cake, freeze the plain cake layer without the creamy topping. Wrap it tightly and freeze for up to several weeks. Thaw it completely before adding the pineapple filling and topping.
Variations
Coconut Pineapple Heaven Cake
Add 1/2 to 3/4 cup shredded coconut to the cake batter for a stronger tropical flavor.
Pineapple Cream Cake
Add a thin layer of homemade whipped cream between the cake and pineapple filling for an even softer dessert.
Pineapple Upside-Down Version
Arrange pineapple rings and cherries in the bottom of the pan before adding a suitable cake batter. Once baked, carefully invert the cake for a classic pineapple presentation.
Lemon Pineapple Cake
Add a little finely grated lemon zest to the cake batter and an extra teaspoon of lemon juice to the pineapple filling.
Toasted Coconut Version
Toast the shredded coconut lightly in a dry skillet until golden, allow it to cool, and sprinkle it over the finished cake.
History and Inspiration
Pineapple cakes belong to a long tradition of American home baking in which canned tropical fruit was used to add sweetness, moisture, and a distinctive flavor to everyday cakes.
Pineapple became especially popular in American desserts during the twentieth century as canned pineapple became widely available. It appeared in upside-down cakes, sheet cakes, cream desserts, salads, pies, and other family-style recipes.
Pineapple Heaven Cake follows that tradition by pairing pineapple with familiar pantry ingredients such as flour, butter, sugar, eggs, and milk. Its appeal comes from the contrast between a rich homemade cake and the refreshing character of pineapple.
The name “Heaven Cake” reflects the dessert’s soft, creamy, indulgent style rather than referring to one universally standardized historical recipe. Like many treasured home recipes, variations can differ from one family kitchen to another.
Why People Love This Cake
People love Pineapple Heaven Cake because it offers several textures in every bite.
The cake is soft and buttery.
The pineapple layer is fruity, sweet, and slightly tangy.
The cream cheese topping is smooth and creamy.
The optional coconut adds a delicate chewiness and tropical character.
It is also versatile. The same cake can be served after a family dinner, brought to a potluck, prepared for a birthday, or made ahead for a holiday gathering.
Serving Suggestions
Serve chilled slices on their own for a simple presentation.
For a more elaborate dessert, add a small spoonful of whipped cream, a few pieces of fresh pineapple, or toasted coconut.
A cup of coffee, tea, or cold milk pairs particularly well with the buttery sweetness of the cake.
Conclusion
Pineapple Heaven Cake is a beautiful example of simple ingredients coming together to create a memorable homemade dessert. The buttery cake provides a comforting foundation, the pineapple brings brightness and moisture, and the creamy topping creates a smooth finish.
The recipe is easy enough for a home baker while still looking impressive on a dessert table. With its tropical flavor, soft texture, and make-ahead convenience, it is a cake that can easily become a favorite family recipe.
For Pineapple Cake Lovers
If you love pineapple desserts, this cake gives you everything you want in one slice: tender homemade cake, sweet pineapple, creamy topping, and optional coconut for an extra tropical touch.
For an especially beautiful presentation, prepare the cake the day before serving, refrigerate it overnight, and decorate it shortly before bringing it to the table. The flavors become wonderfully blended while the chilled layers become easier to slice.
The result is a creamy, fruity, old-fashioned dessert that is simple to prepare and memorable enough to make again and again.