
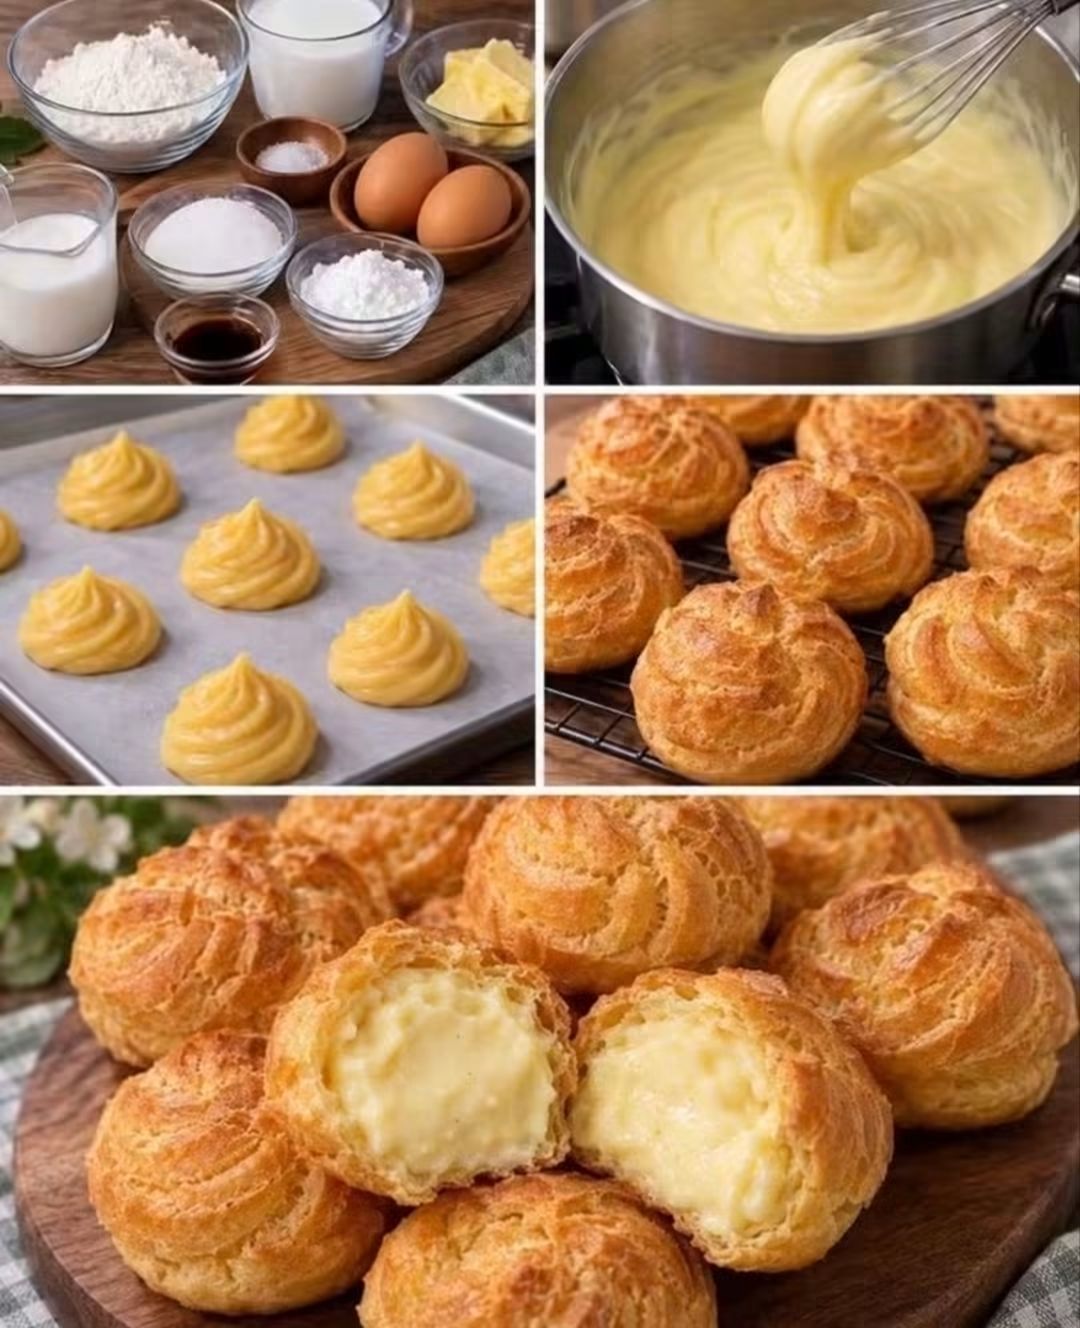
Vanilla Cream Puffs
Introduction
Vanilla Cream Puffs are a classic French-inspired pastry made from delicate choux pastry filled with a smooth, rich vanilla cream. The pastry is light and airy on the inside, golden and slightly crisp on the outside, and perfectly complemented by the cool, creamy filling.
Although cream puffs may look elegant and complicated, the basic technique is surprisingly simple. The choux pastry does not require yeast or a traditional rising agent. Instead, the high moisture content in the dough creates steam during baking, which causes the pastry to expand and form its characteristic hollow center.
These homemade cream puffs are wonderful for afternoon tea, family gatherings, birthdays, celebrations, dessert tables, or simply when you want something special with a cup of coffee. The combination of crisp pastry and vanilla cream makes every bite delicate, creamy, and satisfying.
Ingredients
For the Choux Pastry
- 60 g margarine or unsalted butter
- 110 ml water
- 1/6 teaspoon salt
- 60 g medium-protein all-purpose flour
- 20 g high-protein bread flour
- 2 eggs, lightly beaten
For the Vanilla Cream Filling
- 2 egg yolks
- 15 g cornstarch
- 60 g granulated sugar
- 250 ml liquid milk
- 150 ml whipping cream
- 1 teaspoon vanilla extract
Equipment
- Medium saucepan
- Wooden spoon or heat-resistant spatula
- Mixing bowl
- Whisk
- Piping bag
- Large round piping tip
- Baking sheet
- Parchment paper
- Cooling rack
Instructions
Step 1: Prepare the Oven
Preheat the oven to 190–200°C. Line a baking sheet with parchment paper.
It is important to have the oven fully preheated before the choux pastry goes inside. A properly heated oven helps the pastry rise quickly and develop a hollow center.
Step 2: Make the Choux Dough
Place the water, margarine or butter, and salt into a saucepan.
Heat the mixture over medium heat until it reaches a full boil and the butter or margarine has completely melted.
Remove the saucepan from the heat immediately.
Add the all-purpose flour and bread flour all at once. Stir vigorously with a wooden spoon or spatula until the flour absorbs the liquid and a thick dough forms.
Return the saucepan to low or medium-low heat and continue stirring for about 1–2 minutes. The dough should become smooth and pull away from the sides of the pan.
This step is important because cooking the flour helps remove some moisture and develops the structure needed for the pastry to puff properly.
Step 3: Cool the Dough Slightly
Transfer the dough to a clean mixing bowl.
Allow it to cool for several minutes. It should be warm but not extremely hot.
If the dough is too hot when the eggs are added, the eggs may begin to cook prematurely.
Step 4: Add the Eggs
Lightly beat the two eggs in a separate bowl.
Add the beaten egg gradually, a little at a time, mixing thoroughly after each addition.
At first, the dough may look separated or slippery. Continue mixing until the egg is completely incorporated before adding more.
The finished dough should be smooth, glossy, and thick enough to hold its shape when piped.
You may not need every drop of the beaten egg. The exact amount can vary depending on the flour and how much moisture remains in the cooked dough. The consistency is more important than using every gram of egg.
Step 5: Pipe the Pastry
Transfer the choux dough into a piping bag fitted with a round tip.
Pipe small, evenly sized rounds onto the prepared baking sheet, leaving enough space between each one for the pastries to expand.
If small peaks remain on top of the piped dough, gently smooth them with a damp fingertip.
Try to keep all the pastries approximately the same size so they finish baking at the same time.
Step 6: Bake the Cream Puffs
Place the tray in the fully preheated oven.
Bake at 190–200°C for approximately 30–35 minutes, or until the cream puffs are well risen, golden brown, and feel firm.
Do not open the oven door during the early stages of baking. Opening the door too soon can cause the pastries to lose their steam and collapse.
Once the pastries are deeply golden and appear completely cooked, turn off the oven. You can leave them inside for a few additional minutes with the door slightly open to help dry the centers.
Transfer the finished pastries to a cooling rack and allow them to cool completely.
Method for the Vanilla Cream
Step 1: Combine the Ingredients
Place the egg yolks, granulated sugar, and cornstarch in a saucepan or heatproof bowl.
Whisk until the mixture becomes smooth and slightly lighter in color.
Gradually add the milk while whisking continuously to prevent lumps.
Add the vanilla extract.
Step 2: Cook the Custard
Place the mixture over medium-low heat.
Stir constantly with a whisk or spatula, making sure to scrape the bottom and corners of the pan.
As the mixture heats, the cornstarch will begin to thicken the custard.
Continue cooking until the vanilla cream becomes thick, smooth, and creamy.
Do not leave the mixture unattended because the bottom can scorch quickly.
Step 3: Cool the Custard
Remove the thickened custard from the heat.
Transfer it to a clean bowl.
Cover the surface directly with plastic wrap to prevent a skin from forming.
Allow the custard to cool completely.
For the best result, refrigerate it until thoroughly chilled.
Step 4: Whip the Cream
Place the whipping cream in a chilled mixing bowl.
Whip until soft peaks form.
The cream should be fluffy but not over-whipped.
Step 5: Combine the Creams
Once the cooked vanilla custard is completely cool, whisk it briefly to loosen it.
Gradually fold the whipped cream into the custard using a spatula.
Fold gently until the mixture becomes smooth, light, and creamy.
Avoid vigorous mixing because you want to preserve the airiness of the whipped cream.
Filling the Cream Puffs
Make sure the baked choux pastries are completely cool before filling them.
There are two simple methods.
Method One: Bottom-Filled Cream Puffs
Use a small knife or piping tip to make a small hole in the bottom of each pastry.
Fill a piping bag with the vanilla cream.
Insert the tip into the opening and gently squeeze until the pastry feels pleasantly full.
Do not overfill, as too much filling can cause the pastry to split.
Method Two: Cut-Open Cream Puffs
Use a serrated knife to carefully cut each cream puff horizontally.
Pipe or spoon the vanilla cream into the bottom half.
Place the top half back over the filling.
This method is especially attractive when serving the cream puffs on a dessert platter.
Important Methods and Techniques
The Panade Method
The cooked mixture of water, butter or margarine, salt, and flour is known as the panade. Cooking this mixture before adding the eggs is one of the essential techniques in choux pastry.
The flour absorbs the hot liquid and develops a structure that can hold the steam produced during baking.
Gradual Egg Addition
Eggs should always be incorporated gradually.
Adding them all at once can make the dough too loose, while adding them slowly allows you to control the final consistency.
The correct choux dough should be glossy and pipeable but should not spread excessively after being piped.
Proper Baking
Choux pastry needs enough heat to generate steam.
That steam expands inside the pastry and creates the hollow cavity needed for the filling.
The pastries must also be baked long enough for their structure to set. If they are removed too early, they may collapse as they cool.
Drying the Pastry
A fully baked cream puff should not feel wet or heavy inside.
If necessary, after baking, turn off the oven and leave the pastries inside for several minutes with the oven door slightly open.
This helps excess moisture escape and reduces the risk of the pastries becoming soft or collapsing.
History of Cream Puffs
Cream puffs belong to the long culinary tradition of French choux pastry, known as pâte à choux.
The technique is associated with French pastry-making and became an important foundation for many classic desserts. Unlike yeast-based doughs, choux pastry rises primarily because of steam created from its high moisture content.
The same basic pastry technique is used for several famous desserts, including profiteroles, éclairs, gougères, and Paris-Brest.
Over time, cream puffs became popular far beyond France. Bakers around the world developed their own versions, changing the fillings, toppings, shapes, and flavors.
Vanilla remains one of the most traditional and popular fillings because its delicate flavor pairs beautifully with the lightly crisp pastry.
Formation of the Cream Puff
The formation of a cream puff happens through several important stages.
First, the water and butter or margarine are heated together. Flour is then added and cooked to form a smooth paste.
Next, eggs are incorporated. The eggs provide additional moisture, richness, color, and structure.
During baking, the water contained in the dough turns into steam. Because the pastry surface begins to set while the steam continues expanding, the dough rises and creates a hollow interior.
Once the pastry is completely baked and dried, it becomes strong enough to hold the vanilla cream.
The result is a pastry with a lightly crisp exterior and a hollow, airy interior that is perfect for filling.
Serving Suggestions
Vanilla Cream Puffs can be served in many different ways.
They are delicious on their own, but they can also be finished with:
- A light dusting of powdered sugar
- Melted white chocolate
- Vanilla glaze
- Caramel sauce
- Chocolate drizzle
- Fresh berries
- Sliced strawberries
- Toasted almonds
- A little extra whipped cream
For a simple presentation, arrange the filled cream puffs on a serving platter and dust lightly with powdered sugar just before serving.
Storage
Unfilled baked cream puffs can be stored in an airtight container for a short period.
If they become soft, place them in a warm oven for a few minutes to help restore some crispness. Allow them to cool completely before filling.
Filled cream puffs should be refrigerated because the vanilla cream contains dairy and eggs.
For the best texture, fill the pastries relatively close to serving time. The longer the pastry sits with the filling, the softer the shell can become.
Tips for Perfect Vanilla Cream Puffs
- Make sure the water, butter, and salt reach a proper boil before adding the flour.
- Cook the flour mixture long enough for the dough to become smooth and pull away from the sides of the pan.
- Let the dough cool slightly before adding the eggs.
- Add the eggs gradually rather than all at once.
- Do not make the choux dough too thin. It should hold its shape after piping.
- Preheat the oven completely before baking.
- Avoid opening the oven during the early baking period.
- Bake until the pastries are deeply golden and feel firm.
- Allow the baked shells to cool completely before filling.
- Make sure the vanilla custard is completely cool before folding in the whipped cream.
- Do not over-whip the cream.
- Fill the pastries just before serving whenever possible for the best texture.
Common Problems and Solutions
Why did my cream puffs collapse?
They may have been underbaked or contained too much moisture. Make sure the shells are thoroughly golden and dry before removing them from the oven.
Why didn’t my cream puffs rise?
The oven may not have been hot enough, the dough may have been too loose, or the pastry may have been removed from the oven too early.
Why are the centers wet?
The pastries probably need more baking or drying time. A cream puff should have a hollow interior that is suitable for filling.
Why is my vanilla cream lumpy?
The custard may not have been whisked continuously while heating. Straining the cooked custard through a fine sieve can help produce an especially smooth filling.
Why did my filling become too runny?
Make sure the custard is cooked until properly thickened and cooled completely before combining it with whipped cream.
Conclusion
Homemade Vanilla Cream Puffs are an elegant dessert that combines simple ingredients with classic pastry-making techniques. The choux pastry is light and delicate, while the vanilla cream provides a rich, smooth contrast.
The key to success is patience. Cook the flour mixture properly, add the eggs gradually, bake the pastry until it is completely set, and allow both the pastry and custard to cool before assembling.
Once you master the basic technique, this recipe becomes a wonderful foundation for countless variations. You can change the filling, add different toppings, or create larger or smaller pastries depending on the occasion.
For Vanilla Cream Puff Lovers
For anyone who loves classic bakery-style desserts, these cream puffs are especially satisfying. They have the elegance of a French pastry while remaining approachable enough to make at home.
The contrast between the crisp golden shell and the soft vanilla cream makes them irresistible when freshly filled. They are perfect for celebrations, afternoon tea, family gatherings, holidays, or simply as a homemade treat when you want something special.
A platter of freshly filled Vanilla Cream Puffs can turn an ordinary dessert table into something memorable. Once you learn the method, you may find yourself returning to this recipe whenever you want a light, creamy, and beautifully presented homemade pastry.