
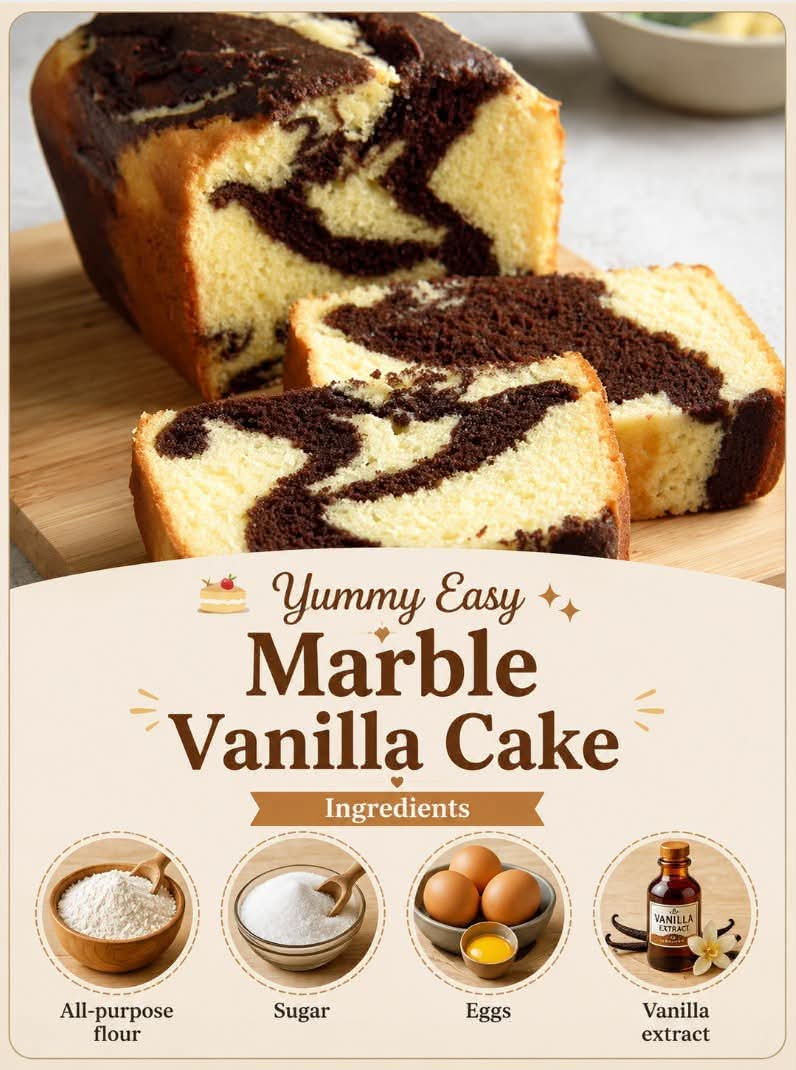
Yummy Easy Marble Vanilla Cake – A Soft, Moist, and Beautiful Homemade Dessert
Introduction
There is something truly special about a homemade marble vanilla cake. With its soft, fluffy texture, sweet vanilla aroma, and beautiful swirls of chocolate running through a golden cake, this classic dessert is perfect for almost any occasion. Whether you are preparing an afternoon treat for your family, serving dessert after Sunday dinner, or baking something delicious for a birthday celebration, marble cake is always a wonderful choice.
This easy marble vanilla cake combines the delicate sweetness of vanilla with rich chocolate ribbons to create a dessert that looks impressive but is surprisingly simple to prepare. Every slice reveals a unique pattern, making each piece beautiful in its own way.
The best part is that you can prepare this cake with everyday baking ingredients. You do not need special equipment or professional baking skills. With a few simple steps, you can create a delicious homemade cake that is soft, tender, and full of flavor.
Serve it with a cup of coffee, a glass of milk, or your favorite tea, and enjoy a timeless homemade dessert that brings comfort and happiness to every table.
Ingredients
For the Vanilla Cake
- 2 cups all-purpose flour (250 g)
- 1 cup granulated sugar (200 g)
- 3 large eggs, at room temperature
- 1/2 cup unsalted butter, softened (115 g)
- 1/2 cup milk (120 ml)
- 2 teaspoons vanilla extract
- 2 teaspoons baking powder
- 1/4 teaspoon salt
For the Chocolate Marble Swirl
- 2 tablespoons unsweetened cocoa powder
- 2 tablespoons milk
- 1 tablespoon sugar, optional
Optional Decoration
- Powdered sugar for dusting
- Melted chocolate for drizzling
- A few chocolate shavings for serving
Instructions
Step 1: Prepare the Oven and Cake Pan
Preheat your oven to 350°F (175°C). Grease a 9-by-5-inch loaf pan or an 8-inch round cake pan with butter or nonstick baking spray.
Lightly dust the pan with flour, shaking out any excess. You can also line the bottom with parchment paper to make removing the finished cake easier.
Preparing the pan before mixing the batter helps ensure that the cake releases cleanly after baking.
Step 2: Mix the Dry Ingredients
In a medium bowl, combine the all-purpose flour, baking powder, and salt.
Whisk the ingredients together until evenly distributed. This step helps prevent pockets of baking powder or salt from forming in the finished cake.
Set the bowl aside while you prepare the wet ingredients.
Step 3: Cream the Butter and Sugar
In a large mixing bowl, beat the softened butter and granulated sugar together for approximately 3–4 minutes, until the mixture becomes pale, light, and fluffy.
This step incorporates air into the batter, helping create a soft and tender cake.
Add the eggs one at a time, beating well after each addition. Scrape down the sides of the bowl as needed to ensure everything mixes evenly.
Add the vanilla extract and mix until fragrant and fully incorporated.
Step 4: Combine the Wet and Dry Ingredients
Add about one-third of the flour mixture to the butter mixture and mix gently.
Pour in half of the milk and stir until combined. Continue alternating between the remaining flour mixture and milk, finishing with the flour.
Mix just until no dry flour remains. Avoid overmixing, as excessive mixing can develop gluten and make the cake dense rather than tender.
The batter should be smooth, creamy, and thick enough to hold its shape when spooned into the pan.
Step 5: Prepare the Chocolate Batter
Transfer approximately one-third of the vanilla batter into a separate bowl.
Add the cocoa powder, two tablespoons of milk, and optional tablespoon of sugar. Stir gently until the chocolate mixture is smooth and evenly colored.
If the chocolate batter seems too thick, add a small splash of milk. It should have a consistency similar to the vanilla batter so that the two mixtures can swirl together easily.
Keep the remaining batter plain to preserve the sweet vanilla flavor.
Step 6: Create the Marble Pattern
Spoon alternating portions of vanilla and chocolate batter into the prepared cake pan.
You can begin with a spoonful of vanilla batter, followed by chocolate batter, and continue layering until both mixtures are used.
Take a butter knife or wooden skewer and gently draw a few large zigzag or circular lines through the batter.
Do not swirl too much. A few gentle movements are enough to create beautiful marble patterns. Overmixing the two colors will cause the batter to become mostly one shade instead of showing distinct ribbons.
Smooth the top lightly if necessary.
Step 7: Bake the Cake
Place the pan on the middle rack of the preheated oven.
Bake for approximately 40–50 minutes for a loaf cake, or around 30–40 minutes for an 8-inch round cake. The exact baking time depends on the pan, oven, and thickness of the batter.
Begin checking the cake near the lower end of the suggested baking time.
Insert a toothpick into the center. If it comes out clean or with a few moist crumbs, the cake is ready. If wet batter remains on the toothpick, bake for another 5 minutes and check again.
The top should be lightly golden, and the kitchen should smell wonderfully of vanilla and chocolate.
Step 8: Cool the Cake
Remove the cake from the oven and let it rest in the pan for approximately 10–15 minutes.
Carefully loosen the edges with a knife if needed, then transfer the cake to a wire rack to cool completely.
Allowing the cake to cool before slicing helps preserve its shape and reveals the beautiful marble design inside.
Step 9: Decorate and Serve
Once the cake has cooled, dust the top with powdered sugar for a simple, elegant finish.
For a richer dessert, drizzle melted chocolate over the top or add a light chocolate glaze.
Slice with a sharp knife and serve at room temperature. Each slice will have its own unique combination of vanilla cake and chocolate swirls.
Methods for Making the Perfect Marble Vanilla Cake
1. The Creaming Method
The creaming method is used to create a light and tender cake. Softened butter and sugar are beaten together until fluffy, then eggs and the remaining ingredients are added.
This method works especially well for traditional butter cakes because it incorporates air into the mixture before baking.
2. The Alternating Mixing Method
Adding the flour mixture and milk in alternating portions helps maintain a smooth batter. It also reduces the risk of overmixing, which can make the cake tough.
Always mix gently once the flour has been added.
3. The Chocolate Swirling Method
The marble effect comes from combining two contrasting batters without fully mixing them.
Use a knife or skewer to make only a few sweeping movements. The goal is to create visible ribbons of chocolate throughout the vanilla cake.
4. The Gentle Baking Method
Bake the cake at a moderate temperature so the center has enough time to cook without the outside becoming too dark.
Avoid opening the oven door repeatedly during the first 25–30 minutes, because sudden temperature changes may affect how the cake rises.
5. The Proper Cooling Method
Allowing the cake to cool gradually helps it set and makes slicing easier. Cutting it while hot may cause the delicate crumb to break apart.
For the cleanest slices, wait until the cake is completely cool.
The History of Marble Cake
Marble cake has a long tradition in European and American baking. Cakes made with contrasting light and dark batters became especially popular during the nineteenth century, when cocoa and chocolate were increasingly used in home baking.
German baking traditions included marbled cakes, and the idea became popular in the United States through German immigrants. Early versions often used molasses, spices, or other ingredients to create the darker portion of the cake.
As cocoa powder became more widely available, chocolate and vanilla became a familiar combination. Bakers discovered that lightly swirling the two batters together created an attractive pattern without requiring complicated decoration.
Over time, marble cake became a favorite homemade dessert because it combined two popular flavors in one simple recipe.
Today, marble cake can be found in many forms, including loaf cakes, bundt cakes, cupcakes, birthday cakes, and layered celebration cakes. Although ingredients and techniques vary from family to family, the basic idea remains the same: a soft cake with beautiful contrasting swirls.
The Formation of the Marble Pattern
The distinctive appearance of marble cake comes from the way the two batters interact before baking.
The vanilla batter provides a light-colored base, while cocoa powder gives the chocolate batter its darker appearance. When spoonfuls of the two mixtures are placed together and gently swirled, they form irregular ribbons and curves.
As the cake bakes, the baking powder releases gas that helps the batter rise. The structure gradually sets, preserving the swirls in place.
Because the two batters are not completely mixed together, the finished cake displays a pattern similar to natural marble stone.
No two cakes need to look exactly alike. Some slices may contain large chocolate ribbons, while others may show delicate streaks running through the vanilla crumb. This natural variation is part of the charm of homemade marble cake.
Tips for the Best Results
- Use room-temperature eggs and milk to help the ingredients combine evenly.
- Make sure the butter is softened but not melted.
- Measure the flour carefully. Too much flour can make the cake dry.
- Sift the cocoa powder if it contains lumps.
- Do not overmix the batter after adding the flour.
- Keep the vanilla and chocolate batters similar in consistency.
- Use only a few swirling movements to preserve the marble pattern.
- Check the cake with a toothpick before removing it from the oven.
- Let the cake cool before slicing for the best texture.
- Store leftovers in an airtight container to maintain freshness.
Variations to Try
Vanilla Marble Cake with Chocolate Chips
Fold a small handful of chocolate chips into the chocolate batter before layering it into the pan. This creates extra chocolate flavor and little pockets of melted chocolate.
Almond Vanilla Marble Cake
Replace half a teaspoon of the vanilla extract with almond extract for a subtle nutty aroma. Use almond extract sparingly because its flavor can be strong.
Orange and Chocolate Marble Cake
Add one teaspoon of finely grated orange zest to the vanilla batter. The citrus aroma complements the chocolate and gives the cake a fresh, fragrant flavor.
Marble Cupcakes
Divide the two batters between lined muffin cups, adding a little vanilla and chocolate batter to each. Swirl gently with a toothpick and bake at 350°F (175°C) for approximately 18–23 minutes, checking for doneness.
Marble Cake with Chocolate Glaze
Once the cake has cooled, pour a simple glaze made from melted chocolate and a little warm cream over the top. Allow the glaze to set before serving.
Lemon Vanilla Marble Cake
Add a teaspoon of lemon zest and a little lemon juice to the vanilla batter. Keep the chocolate portion unchanged for a bright, lightly citrus-flavored variation.
How to Store Marble Vanilla Cake
At room temperature: Store the completely cooled cake in an airtight container for up to 3 days in a cool environment.
In the refrigerator: Keep the cake covered for up to 5 days. Allow individual slices to come closer to room temperature before serving for a softer texture.
In the freezer: Wrap individual slices or the whole cooled cake tightly in plastic wrap, then place them in a freezer-safe container. Freeze for up to 3 months for best quality.
To serve frozen slices, thaw them in the refrigerator or at room temperature while covered.
Serving Suggestions
Marble vanilla cake is delicious on its own, but it can also be served with a variety of accompaniments.
- Enjoy a slice with freshly brewed coffee or tea.
- Serve with a cold glass of milk.
- Add fresh strawberries, raspberries, or sliced bananas.
- Pair with a scoop of vanilla ice cream for a special dessert.
- Serve with whipped cream and chocolate shavings.
- Warm a slice slightly and drizzle it with chocolate sauce.
For birthdays and family gatherings, arrange the slices on a serving platter and add a light dusting of powdered sugar for a simple homemade presentation.
Conclusion
This easy marble vanilla cake proves that a beautiful dessert does not have to be complicated. With a soft vanilla crumb, delicate chocolate swirls, and a wonderfully fragrant flavor, it is the kind of cake that belongs in every home baker’s collection.
The simple ingredients make it practical for everyday baking, while the attractive marble pattern gives it a special touch suitable for holidays, birthdays, afternoon tea, and family celebrations.
Whether you enjoy it plain, dusted with powdered sugar, or finished with a rich chocolate glaze, every slice offers a delicious combination of two timeless flavors.
Bake it once, share it with your loved ones, and you may find yourself returning to this recipe whenever you want a dependable homemade treat.
For the Lovers of Homemade Cakes
If you love traditional cakes that are easy to prepare and beautiful to serve, this marble vanilla cake is a recipe worth keeping.
It is perfect for vanilla lovers who appreciate a little chocolate, chocolate lovers who enjoy a softer and sweeter cake, and anyone who believes that homemade desserts create some of the happiest memories.
The next time you want to fill your kitchen with the comforting smell of freshly baked cake, gather your ingredients, prepare your two batters, and create your own beautiful marble design.
A simple cake, a few everyday ingredients, and a little care are all you need to make something truly special.
Recipe Name: Yummy Easy Marble Vanilla Cake
Preparation Time: 20 minutes
Baking Time: 30–50 minutes, depending on the pan
Cooling Time: 45–60 minutes
Total Time: Approximately 1 hour 35 minutes to 2 hours 10 minutes
Servings: 8–10 slices
Difficulty: Easy
Main Flavors: Vanilla and chocolate
Texture: Soft, tender, and moist
Best For: Breakfast treats, afternoon tea, family desserts, birthdays, and celebrations