
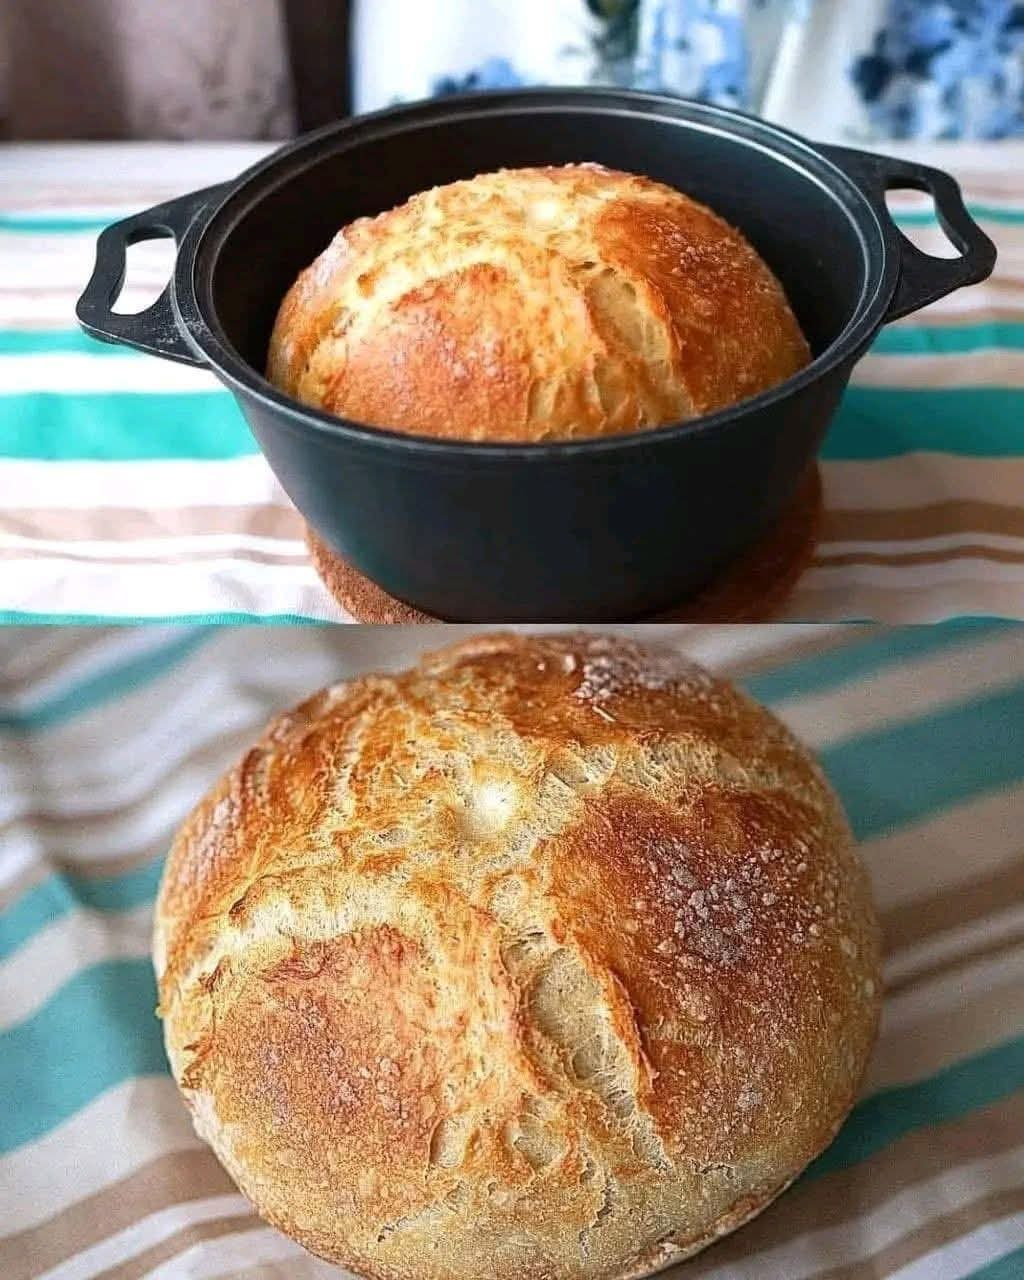
🍞 4-Ingredient Homemade Bread — Simple, Rustic & Delicious!
😍 Only 4 ingredients! Everyone can make this homemade bread!
There is something incredibly comforting about making bread from scratch. The smell of yeast, the soft dough beneath your hands, and the golden crust coming out of the oven can make even an ordinary day feel special.
And the best part? You don’t need a long ingredient list or complicated equipment. This simple homemade bread uses just four basic ingredients: flour, water, yeast, and salt.
The dough comes together easily, rises beautifully, and bakes into a rustic loaf with a crisp golden crust and a soft, tender interior. It’s wonderful for breakfast, sandwiches, soups, dipping into sauces, or simply enjoying warm with butter.
If you’ve never made homemade bread before, this is a fantastic recipe to start with!
🥖 RECIPE AT A GLANCE
Preparation: 15–20 minutes
Rising: About 1½–2 hours
Baking: 30–40 minutes
Total: About 2½–3 hours
Yield: 1 large loaf
❤️ INGREDIENTS
For the Bread
- 1½ cups (370 ml) warm water
- 2 tablespoons (10 g) dry yeast
- 4 cups (500 g) all-purpose flour
- 1 teaspoon salt
Optional for serving
- Butter
- Olive oil
- Honey
- Jam
- Cheese
- Garlic butter
- Soup or stew for dipping
That’s it! Just four simple ingredients.
🌾 A LITTLE HISTORY OF HOMEMADE BREAD
Bread is one of the oldest prepared foods in human history. Long before modern kitchens, people discovered that grains could be ground into flour, mixed with water, and cooked into a simple form of bread.
The discovery of fermentation transformed bread-making. Natural yeasts could make dough rise, creating a lighter, softer loaf rather than a dense flatbread.
Over centuries, bread became an essential part of cuisines around the world. Every region developed its own traditions, techniques, shapes, and flavors.
This four-ingredient loaf follows that beautiful tradition: flour, water, yeast, and salt.
Sometimes the simplest recipes are the ones that connect us most strongly to the history of cooking.
🥣 STEP 1 — PREPARE THE YEAST
Pour the warm water into a large mixing bowl.
The water should feel comfortably warm, not hot. Water that is excessively hot can damage the yeast.
Add the dry yeast and gently stir.
Let it stand for approximately 5–10 minutes.
If your yeast is active, you may notice a light foam or bubbles forming on the surface.
Bread Tip ❤️
Don’t rush this stage. Yeast is what gives the bread its beautiful rise and airy texture.
🌾 STEP 2 — ADD THE FLOUR AND SALT
Add the flour gradually to the yeast mixture.
Add the salt.
Using a wooden spoon, spatula, or your hands, mix everything together until a rough dough forms.
At first, the dough may look shaggy and uneven.
That’s perfectly fine!
You are looking for a dough that comes together without being completely dry.
If it seems extremely dry, add a tiny amount of water.
If it is excessively sticky, add a small amount of flour.
Avoid adding too much flour because this can make the finished bread dense and dry.
✋ STEP 3 — FORM THE DOUGH
Transfer the dough to a lightly floured work surface.
Knead the dough for approximately 8–10 minutes.
Push the dough away from you with the heel of your hand, fold it back toward you, turn it slightly, and repeat.
As you knead, the dough should gradually become smoother and more elastic.
What are you looking for?
The dough should feel:
- Soft
- Elastic
- Slightly tacky
- Smooth
- Flexible
It doesn’t need to be perfectly smooth.
The goal is to develop enough gluten to give your loaf structure.
🫶 STEP 4 — FIRST RISE
Place the dough into a lightly greased bowl.
Cover it with a clean kitchen towel, plastic wrap, or another suitable cover.
Place the bowl somewhere warm and draft-free.
Allow the dough to rise for approximately 1–2 hours, depending on the temperature of your kitchen.
The dough should become noticeably larger—ideally close to double its original size.
Formation of the Dough
This is where the magic happens.
The yeast consumes available sugars from the flour and produces carbon dioxide. Those tiny gas bubbles become trapped within the developing gluten structure.
As the dough rises, those bubbles expand.
That’s what helps create the beautiful texture inside your bread.
🍞 STEP 5 — SHAPE THE LOAF
Once the dough has risen, gently press it down to release some of the larger air pockets.
Turn it onto a lightly floured surface.
Shape it into a round or oval loaf.
Try not to handle the dough too aggressively.
You want to preserve some of the fermentation that has already taken place.
Place the shaped loaf onto a parchment-lined baking sheet or into a suitable loaf/baking pan.
⏰ STEP 6 — SECOND RISE
Cover the shaped loaf again.
Allow it to rest for approximately 30–45 minutes.
During this time, it will become lighter and puffier.
This second rise helps develop a softer crumb and better volume.
🔪 STEP 7 — SCORE THE BREAD
Before baking, use a sharp knife or bread lame to make one or several shallow cuts across the top of the loaf.
This is called scoring.
Scoring gives the expanding bread a controlled place to open while baking.
It also gives homemade bread that beautiful bakery-style appearance. ❤️
🔥 STEP 8 — BAKE
Preheat your oven to approximately 220°C / 425°F.
Place the bread into the preheated oven.
Bake for approximately 30–40 minutes, or until the crust is beautifully golden brown.
The exact baking time will depend on the shape and size of your loaf and your particular oven.
How do you know it’s ready?
The crust should be:
✔️ Golden brown
✔️ Firm
✔️ Crisp
The loaf should sound somewhat hollow when tapped underneath.
🌬️ STEP 9 — LET IT COOL
This is one of the hardest parts!
Take the bread out of the oven and place it on a cooling rack.
Allow it to cool before slicing.
Although the smell will make you want to cut into it immediately, cooling allows the interior to finish setting.
If you slice it while it’s extremely hot, the crumb can become gummy or compressed.
🔪 THE PERFECT SLICE
Once cooled, use a serrated bread knife.
Cut gently with a sawing motion rather than pressing straight down.
Inside, you should have a soft, tender crumb surrounded by a delicious crust.
🧈 HOW TO SERVE THIS BREAD
There are so many ways to enjoy a simple homemade loaf!
❤️ Classic
Serve warm with butter.
🫒 Mediterranean Style
Dip slices into good olive oil with a little salt.
🧄 Garlic Bread
Spread with butter, add garlic and herbs, then toast until fragrant.
🧀 Cheese Lover’s Bread
Serve with your favorite cheeses for an easy snack or appetizer.
🍯 Sweet Breakfast
Toast it and serve with butter and honey or jam.
🍲 Soup Companion
Use thick slices for dipping into tomato soup, vegetable soup, stew, or other hearty dishes.
🥪 Sandwiches
Once completely cooled, slice the loaf and use it for sandwiches.
💡 TIPS FOR PERFECT HOMEMADE BREAD
1. Don’t make the water too hot
Warm water is ideal. Extremely hot water can interfere with the yeast.
2. Don’t overload the dough with flour
A little stickiness is perfectly normal.
Too much flour can create a heavy loaf.
3. Give the dough enough time
Bread cannot always be rushed.
If your kitchen is cool, the dough may need longer to rise.
4. Knead properly
Kneading develops gluten, which helps the bread hold the gases produced during fermentation.
5. Don’t skip the second rise
That short resting period after shaping can make a noticeable difference in the final loaf.
6. Preheat the oven completely
A properly heated oven helps the loaf rise dramatically during the first part of baking.
7. Let the bread cool
As difficult as it is, give your loaf time to cool before slicing.
❤️ FOR THE BREAD LOVERS
There is a special kind of satisfaction that comes from making bread with your own hands.
You begin with four humble ingredients.
Flour.
Water.
Yeast.
Salt.
Then, with time, patience, warmth, and a little work, those ingredients become something completely different.
The dough rises.
The crust turns golden.
The kitchen fills with the smell of freshly baked bread.
And suddenly, a simple loaf feels like something extraordinary.
That’s the beauty of homemade bread. 🍞❤️
🥖 METHODS FOR DIFFERENT RESULTS
For a softer crust
Brush the hot loaf lightly with butter immediately after baking and allow it to cool under a clean towel.
For a crispier crust
Allow the bread to cool uncovered on a wire rack.
For a more rustic loaf
Shape it into a free-form round or oval and bake it on a preheated baking surface if you have one.
For more flavor
You can allow the dough to rise more slowly in the refrigerator. Longer fermentation can produce a deeper, more developed bread flavor.
🌟 CONCLUSION
This 4-ingredient homemade bread proves that you don’t need expensive ingredients or complicated techniques to make something delicious.
With just flour, water, yeast, and salt, you can create a beautiful homemade loaf with a golden crust and soft interior.
It’s inexpensive, satisfying, versatile, and perfect for beginners.
So gather your ingredients, warm up the kitchen, and give homemade bread a try.
Your first loaf doesn’t have to be perfect. It just has to be homemade. ❤️🍞
And once you smell that first loaf coming out of the oven, don’t be surprised if you want to make another one tomorrow!
😍 BREAD LOVERS, SAY HELLO!
If you love homemade bread, fresh-from-the-oven recipes, and simple family-friendly baking, leave a ❤️, “YUM,” or “I LOVE BREAD!” in the comments.
Must express something to keep getting my recipes… Thank you! 😍🍞❤️