
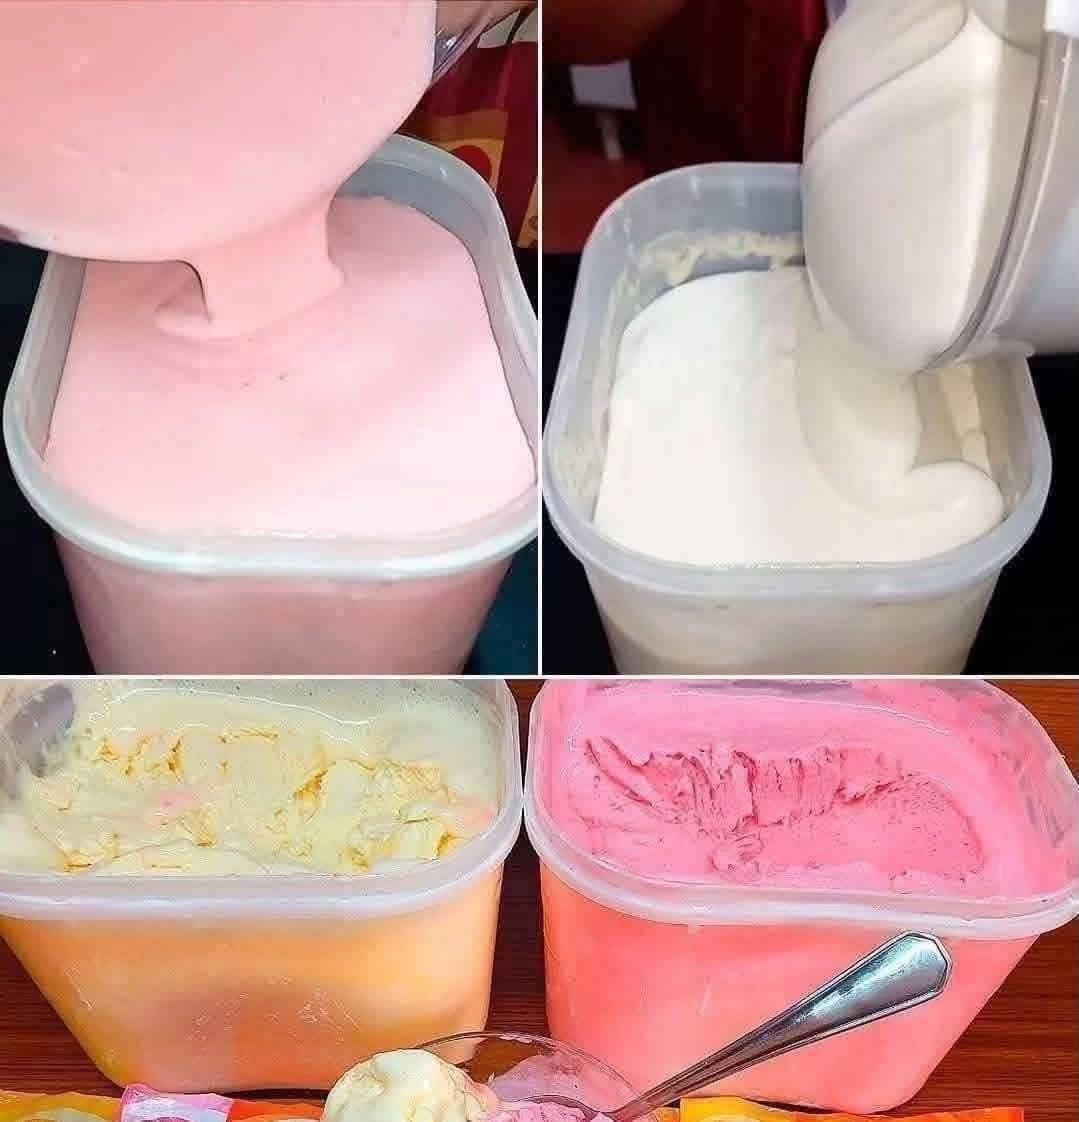
Here is a complete, creamy four-ingredient homemade ice cream recipe that is simple enough for beginners and rich enough to feel like a special dessert. It requires no complicated custard, no ice-cream machine, and only a few basic ingredients. The result is smooth, soft, creamy, and easy to scoop after a little time at room temperature.
Easy Four-Ingredient Homemade Ice Cream
Introduction
Homemade ice cream has a special quality that makes it different from many store-bought versions. It can be prepared with simple ingredients, adjusted to your preferred sweetness, and served with all kinds of toppings and flavors.
This four-ingredient version is especially convenient because it uses a simple whipped-cream base combined with sweetened condensed milk. Whipping the cream incorporates air into the mixture, while the condensed milk provides sweetness and helps create a rich, smooth texture.
It is an excellent recipe for summer gatherings, family desserts, birthdays, celebrations, or simply when you want something cold and creamy without spending hours in the kitchen.
Ingredients
Makes approximately 1.5 to 2 quarts, depending on the container and how much air is incorporated.
- 2 cups cold heavy whipping cream
- 1 can sweetened condensed milk, approximately 14 ounces
- 1 teaspoon pure vanilla extract
- 1 small pinch of salt
Optional additions
Although the basic recipe contains only four ingredients, you can customize it with additional ingredients if desired:
- Chocolate chips
- Crushed cookies
- Chopped nuts
- Caramel sauce
- Chocolate sauce
- Fresh strawberries
- Blueberries
- Chopped peaches
- Toasted coconut
- Peanut butter
- Fruit preserves
Equipment
- Large mixing bowl
- Electric mixer or stand mixer
- Rubber spatula
- Freezer-safe loaf pan or airtight container
- Plastic wrap or a tightly fitting lid
Instructions
Step 1: Chill the equipment
For the best whipped cream, place your mixing bowl and beaters in the refrigerator or freezer for about 10 to 15 minutes before beginning.
The heavy cream should also be very cold.
Cold cream whips more easily and produces a lighter, thicker mixture.
Step 2: Whip the heavy cream
Pour the cold heavy whipping cream into the chilled bowl.
Using an electric mixer, beat the cream on medium speed until it becomes thick and forms stiff peaks.
Do not continue beating once the cream reaches stiff peaks. Overbeating can cause the cream to become grainy and eventually turn into butter.
Step 3: Prepare the condensed milk mixture
In another bowl, combine the sweetened condensed milk, vanilla extract, and pinch of salt.
Stir until everything is evenly incorporated.
The vanilla adds a warm flavor, while the small amount of salt balances the sweetness.
Step 4: Combine the mixtures
Add about one-third of the condensed milk mixture to the whipped cream.
Gently fold it in using a rubber spatula.
Continue adding the remaining condensed milk mixture in two more additions, folding gently after each addition.
The goal is to keep as much air as possible in the whipped cream.
Do not vigorously stir or beat the mixture.
Step 5: Transfer to the container
Pour the finished ice cream mixture into a freezer-safe container.
A shallow container is ideal because the ice cream will freeze more quickly and evenly.
Smooth the surface with a spatula.
If you want toppings or mix-ins, gently fold them into the mixture before freezing or scatter them over the top.
Step 6: Cover
Cover the container tightly with a lid.
If your container does not have a lid, place plastic wrap directly over the surface of the ice cream before covering the container.
This helps reduce the formation of ice crystals.
Step 7: Freeze
Place the container in the freezer.
Freeze for approximately 6 to 8 hours, or preferably overnight, until completely firm.
Freezer temperatures vary, so the exact freezing time can differ.
Step 8: Serve
Remove the ice cream from the freezer approximately 5 to 10 minutes before serving.
Allowing it to sit briefly at room temperature makes scooping easier and gives the ice cream a softer, creamier consistency.
Scoop into bowls or cones and serve immediately.
Method
The main method behind this recipe is whipping and folding.
First, the heavy cream is whipped until it becomes thick and holds its shape. This incorporates tiny air bubbles throughout the cream.
The sweetened condensed milk is then folded into the whipped cream rather than aggressively mixed. This preserves the air that was created during whipping.
Finally, the mixture is frozen until firm.
This simple method creates an ice cream texture without requiring an ice-cream machine.
How to Make It Extra Creamy
Use heavy whipping cream with a good fat content and make sure it is very cold before whipping.
Do not under-whip the cream because the mixture needs enough structure to maintain its airiness.
At the same time, avoid over-whipping.
When combining the condensed milk with the whipped cream, fold slowly and gently.
Freezing the mixture in a shallow, well-covered container can also help it freeze more evenly.
For the smoothest serving texture, let the container sit at room temperature for several minutes before scooping.
Flavor Variations
Chocolate Ice Cream
Add 3 to 4 tablespoons of unsweetened cocoa powder to the condensed milk mixture.
For an even richer chocolate flavor, add a handful of chocolate chips before freezing.
Strawberry Ice Cream
Mash approximately 1 cup of fresh strawberries.
Drain away excess liquid and gently fold the strawberries into the finished ice cream mixture.
Cookies and Cream
Crush approximately 12 chocolate sandwich cookies.
Fold most of the cookies into the mixture and sprinkle the remaining crumbs over the top.
Caramel Ice Cream
Swirl several tablespoons of caramel sauce through the mixture before freezing.
Do not completely mix the caramel in. Leaving ribbons of caramel throughout the ice cream creates a beautiful texture.
Peanut Butter Ice Cream
Warm a few tablespoons of smooth peanut butter just enough to make it easy to drizzle.
Swirl it through the ice cream before freezing.
History of Homemade Ice Cream
Ice cream has a long history that stretches back centuries. Early frozen desserts were very different from the ice cream we know today. Various cultures enjoyed mixtures of snow or ice combined with sweetened liquids, fruits, and other flavorings.
As methods for producing and preserving ice became more practical, frozen desserts became increasingly popular.
By the eighteenth and nineteenth centuries, ice cream had become a well-known luxury dessert in Europe and North America. Early recipes often required considerable effort because cooks had to manually churn the mixture while keeping it cold.
The development of mechanical ice-cream makers eventually made the process easier.
Modern no-churn recipes simplify the process even further by using whipped cream to provide the aeration normally produced by churning.
Formation and Texture
The formation of creamy ice cream depends on several important factors.
The fat in the heavy cream contributes richness and a smooth mouthfeel.
Whipping incorporates air into the cream, creating a lighter structure.
Sweetened condensed milk provides sweetness and concentrated milk solids, contributing to the rich consistency.
Freezing transforms the liquid mixture into a firm frozen dessert while the fat and incorporated air help prevent it from becoming completely hard and icy.
This is why the technique of gently folding the ingredients is so important.
Storage
Keep the ice cream tightly covered in the freezer.
For the best quality, enjoy it within approximately 1 to 2 weeks. It can remain frozen longer, but its texture may gradually become less smooth.
Always use a clean scoop or spoon when serving to avoid introducing unwanted moisture or food particles into the container.
Serving Ideas
This homemade ice cream can be served simply in a bowl or cone, but it also works beautifully as the centerpiece of a larger dessert.
Serve it with:
- Warm brownies
- Apple pie
- Chocolate cake
- Fresh berries
- Banana slices
- Caramel sauce
- Chocolate syrup
- Toasted nuts
- Crushed cookies
- Fresh fruit
For an elegant dessert, place one or two scoops in a chilled glass and add fresh fruit with a small drizzle of chocolate or caramel sauce.
Conclusion
This four-ingredient homemade ice cream proves that a delicious frozen dessert does not have to require complicated equipment or a long list of ingredients.
The combination of cold whipped cream, sweetened condensed milk, vanilla, and a touch of salt creates a rich and creamy base that can be enjoyed exactly as it is or transformed into countless different flavors.
The most important parts of the recipe are keeping the ingredients cold, whipping the cream properly, folding gently, and allowing enough time for the ice cream to freeze completely.
Once you master this basic recipe, you can use the same method to create chocolate, strawberry, cookies-and-cream, caramel, peanut butter, and many other homemade varieties.
For Ice Cream Lovers
For anyone who loves creamy homemade desserts, this recipe is a wonderful one to keep in your collection. It is simple enough for an ordinary weekday but delicious enough to serve when guests arrive.
The best part is that you can make the basic version once and then experiment with different flavors and textures each time.
A creamy scoop of homemade ice cream straight from your own freezer is one of those simple pleasures that makes a homemade dessert especially memorable.