
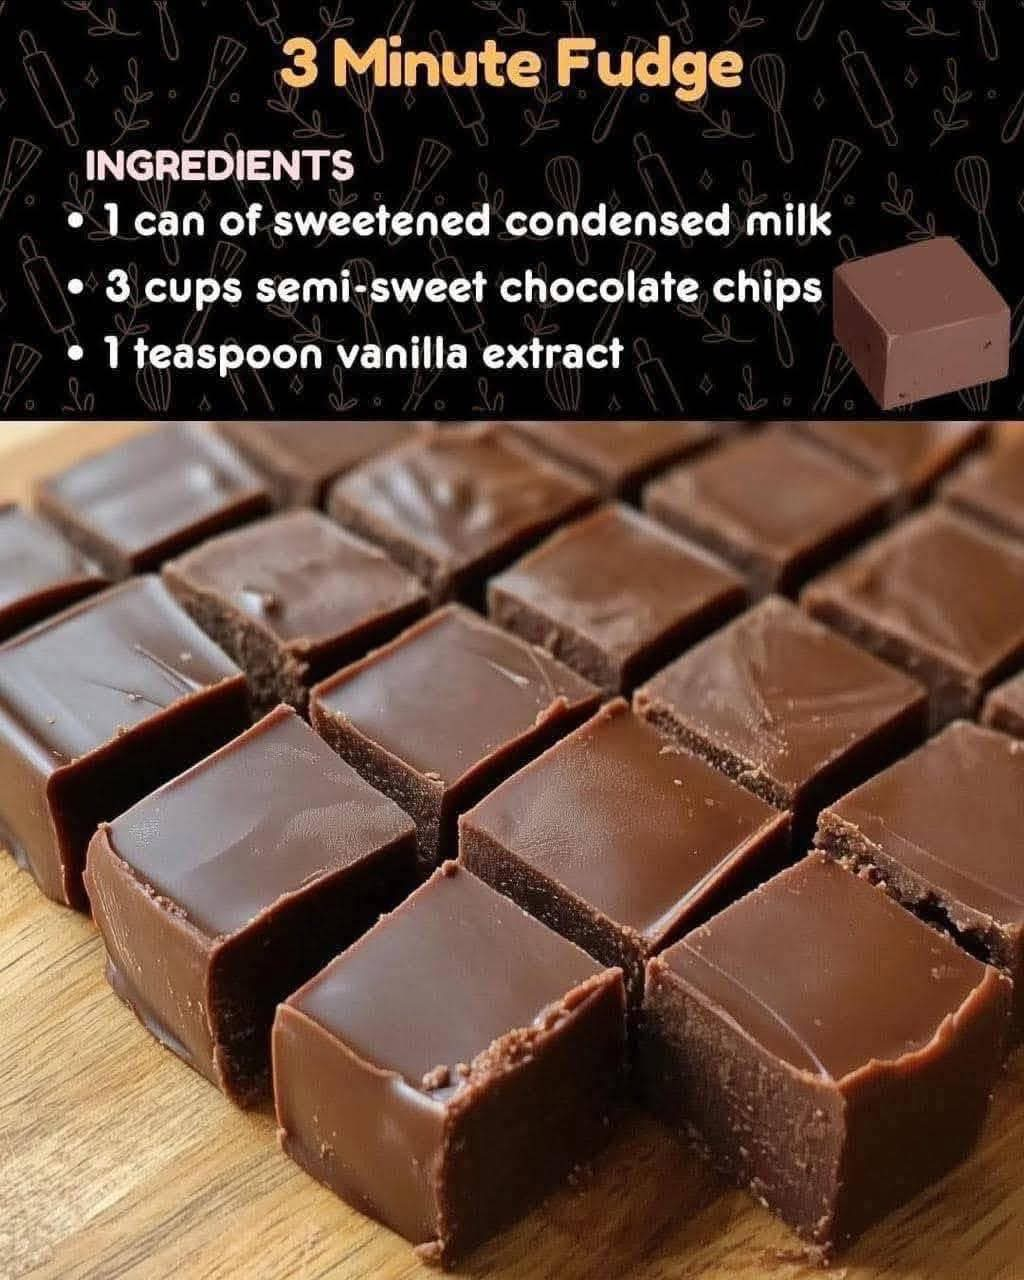
3-Minute Chocolate Fudge
Introduction
When you want a rich, creamy chocolate dessert without spending hours in the kitchen, this simple 3-Minute Chocolate Fudge is a wonderful recipe to keep on hand. It uses only three main ingredients and requires very little preparation. The result is smooth, chocolatey fudge with a soft, creamy texture and a satisfying bite.
This recipe is especially convenient during holidays, family gatherings, bake sales, parties, or whenever you need a quick homemade sweet. Because the ingredients are simple and the preparation is fast, it is also an excellent recipe for beginners.
Ingredients
Main Ingredients
- 1 can sweetened condensed milk, approximately 14 ounces
- 3 cups semi-sweet chocolate chips
- 1 teaspoon vanilla extract
Optional Additions
For different flavors and textures, you can also add:
- 1/2 cup chopped walnuts or pecans
- 1/2 teaspoon instant coffee or espresso powder
- 1/4 teaspoon salt
- 1/2 cup miniature marshmallows
- 1/2 cup peanut butter chips
- 1/2 cup white chocolate chips
- A small amount of finely grated orange zest
These additions are optional. The basic three-ingredient recipe produces delicious fudge on its own.
Preparation
Before beginning, prepare an 8-inch square baking pan. Line it with parchment paper, leaving some paper hanging over two sides. This will make it much easier to lift the finished fudge from the pan.
Measure all of your ingredients before starting because the chocolate mixture comes together quickly.
Instructions
Step 1: Prepare the Pan
Line an 8-inch square baking pan with parchment paper. Lightly grease the parchment if desired.
Make sure the paper extends slightly over the edges of the pan. These overhanging edges will serve as handles when you remove the fudge.
Step 2: Melt the Chocolate
Place the semi-sweet chocolate chips and sweetened condensed milk in a microwave-safe bowl.
Heat the mixture in short intervals, stirring thoroughly after each interval. Continue until the chocolate is almost completely melted and the mixture is smooth.
Do not overheat the chocolate. Gentle heating is important because chocolate can become thick, grainy, or scorched when overheated.
Step 3: Add the Vanilla
Once the chocolate and condensed milk have combined into a smooth mixture, stir in the vanilla extract.
Mix thoroughly until the vanilla is evenly distributed throughout the fudge.
If you are using nuts, salt, coffee, or another optional ingredient, this is the time to fold it into the mixture.
Step 4: Form the Fudge
Immediately pour the warm chocolate mixture into the prepared pan.
Use a spatula to spread it evenly from corner to corner. Smooth the surface as much as possible.
Work fairly quickly because the mixture begins to thicken as it cools.
Step 5: Chill
Place the pan in the refrigerator and allow the fudge to cool and firm completely.
This usually takes approximately 1 to 2 hours, depending on the thickness of the fudge and the temperature of your refrigerator.
For a firmer texture, you can leave it refrigerated for several hours.
Step 6: Cut and Serve
Once completely firm, lift the fudge from the pan using the parchment-paper handles.
Place it on a cutting board and cut it into small squares with a sharp knife.
For cleaner cuts, allow the fudge to sit at room temperature for several minutes before slicing. You can also wipe the knife clean between cuts.
Method
The main method behind this recipe is a simple melt-and-set technique.
Chocolate chips are gently melted together with sweetened condensed milk. The condensed milk provides sweetness and richness while also helping create the characteristic soft and creamy fudge texture.
Vanilla extract is added after melting to provide additional depth of flavor. Once the mixture is spread into a pan and cooled, the chocolate firms and becomes sliceable.
The key to successful fudge is controlling the heat. The chocolate should be melted gently rather than aggressively heated. Stirring frequently helps distribute the heat evenly and prevents the chocolate from burning.
Formation and Texture
The finished fudge should be firm enough to hold its shape while remaining smooth and creamy when eaten.
When properly prepared, the surface will become smooth and slightly glossy, while the inside will have a dense, rich chocolate texture.
If the fudge seems too soft, additional chilling time will usually help. If it becomes very hard in the refrigerator, allow it to sit at room temperature for several minutes before serving.
History of Fudge
Fudge is a classic confection that became popular in the United States during the late nineteenth century. Early fudge recipes were generally made by cooking sugar, butter, milk, and chocolate or other flavorings to a specific temperature before allowing the mixture to cool and crystallize.
Traditional fudge requires careful temperature control and considerable stirring. Modern condensed-milk fudge recipes simplify the process by using sweetened condensed milk and chocolate chips.
This shortcut method has become especially popular because it produces a rich homemade confection without requiring a candy thermometer or complicated sugar-cooking techniques.
Tips for Perfect Fudge
Use good-quality chocolate chips for the best flavor.
Do not overheat the chocolate. Short heating intervals with frequent stirring are safer than one long heating period.
Use room-temperature vanilla if possible so it blends easily into the warm chocolate mixture.
Line the pan with parchment paper so the finished fudge can be removed easily.
Allow the fudge to become completely firm before cutting.
Use a sharp knife for clean, attractive squares.
For an extra-rich flavor, replace part of the semi-sweet chocolate chips with dark chocolate chips.
For a festive variation, add chopped nuts, dried fruit, coconut, or crushed cookies.
Serving Suggestions
This fudge is delicious served on its own, but it can also be used as part of a dessert platter.
Arrange small squares alongside cookies, brownies, chocolate truffles, or other homemade sweets.
It also makes a thoughtful homemade gift. Place individual pieces in small candy cups and arrange them in a decorative container or gift box.
For an elegant dessert, serve a small square of fudge alongside fresh berries and a cup of coffee or tea.
Storage
Store the fudge in an airtight container.
At room temperature, it can generally be kept for several days if the environment is cool and dry.
For longer storage, refrigerate it in a tightly sealed container. Separate layers with parchment paper so the pieces do not stick together.
Before serving refrigerated fudge, allow it to sit at room temperature for several minutes. This allows the texture to soften slightly and makes the chocolate flavor more noticeable.
Recipe Variations
Chocolate Walnut Fudge
Fold 1/2 cup of chopped walnuts into the chocolate mixture before transferring it to the pan.
Chocolate Peanut Butter Fudge
Add 1/2 cup peanut butter chips to the melted chocolate mixture and stir until incorporated.
Chocolate Coconut Fudge
Add 1/2 cup shredded coconut for a rich chocolate-coconut combination.
Dark Chocolate Fudge
Replace some or all of the semi-sweet chocolate chips with dark chocolate chips for a deeper, less sweet chocolate flavor.
Chocolate Orange Fudge
Add a small amount of finely grated orange zest to the finished chocolate mixture for a bright citrus note.
For Chocolate Lovers
Chocolate lovers will appreciate how much flavor can come from such a short ingredient list. The semi-sweet chocolate provides the rich cocoa foundation, while the sweetened condensed milk creates a creamy, smooth texture.
The vanilla adds warmth and balance without overpowering the chocolate.
For an even more intense chocolate experience, use high-quality dark chocolate chips or add a small amount of espresso powder. Coffee does not necessarily make the fudge taste like coffee; instead, it can enhance the natural depth of the chocolate.
Another Simple Method
If you prefer to prepare the fudge on the stovetop, place the chocolate chips and sweetened condensed milk in a saucepan over very low heat.
Stir continuously until the chocolate has melted and the mixture is smooth.
Remove the saucepan from the heat and immediately stir in the vanilla extract.
Pour the mixture into the prepared pan, smooth the surface, and refrigerate until firm.
The important point with the stovetop method is to keep the heat low and stir constantly. High heat is unnecessary and can damage the chocolate.
Common Mistakes to Avoid
Do not use high heat to melt the chocolate.
Do not leave the chocolate unattended while it is melting.
Do not add large amounts of cold liquid to the melted chocolate because this can affect the texture.
Do not cut the fudge before it has properly set.
Do not store the fudge uncovered because it can lose moisture and absorb odors from the refrigerator.
Conclusion
This 3-Minute Chocolate Fudge is a wonderful example of how a few simple ingredients can create a rich and satisfying homemade dessert. The preparation is quick, the method is straightforward, and the finished fudge is versatile enough for everyday treats, celebrations, holidays, gifts, and dessert tables.
Its creamy texture, deep chocolate flavor, and simple preparation make it a recipe worth saving. Once you have mastered the basic version, you can easily create your own variations with nuts, peanut butter, coconut, dark chocolate, or other favorite additions.
For chocolate lovers, this is the kind of recipe that deserves a permanent place in the kitchen recipe collection.
Recipe at a Glance
Prep time: Approximately 3 minutes
Chilling time: 1 to 2 hours
Difficulty: Easy
Main ingredients: Sweetened condensed milk, semi-sweet chocolate chips, vanilla extract
Texture: Rich, smooth, creamy, and firm
Best served: Chilled slightly or at cool room temperature
Yield: Approximately 25 to 36 small squares, depending on how the fudge is cut