
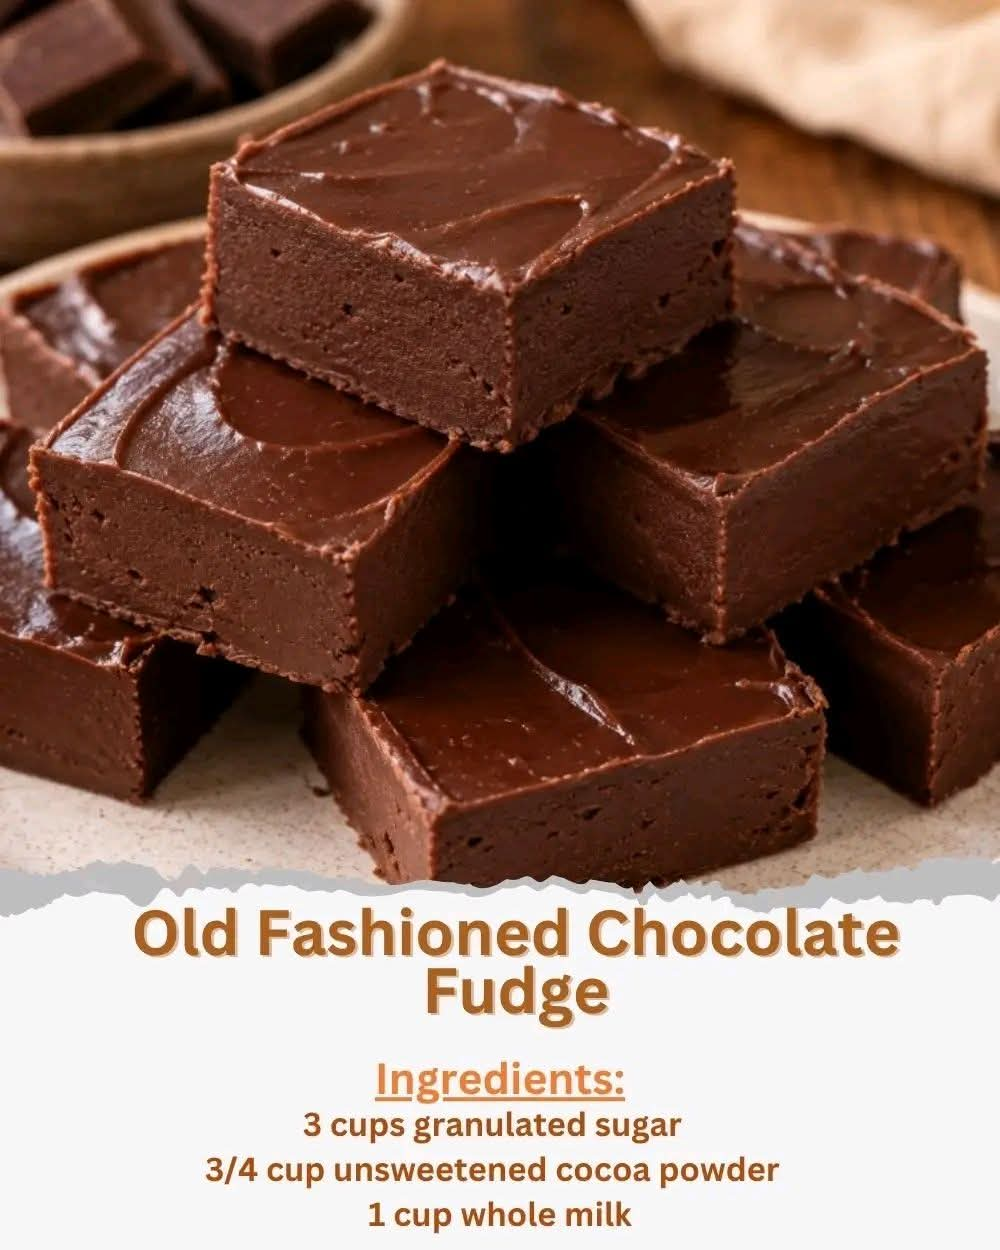
Old-Fashioned Chocolate Fudge
Introduction
Old-Fashioned Chocolate Fudge is a timeless homemade confection known for its deep chocolate flavor, creamy texture, and rich, buttery finish. Made with simple pantry ingredients, this classic fudge relies on careful cooking and cooling rather than complicated equipment or modern shortcuts.
This recipe produces a traditional-style fudge that is dense, smooth, and satisfyingly chocolatey. It is wonderful for holiday cookie trays, family gatherings, homemade gifts, bake sales, or simply enjoying a small piece with a cup of coffee or tea.
Ingredients
- 3 cups granulated sugar
- 3/4 cup unsweetened cocoa powder
- 1 cup whole milk
- 1/2 cup unsalted butter
- 1 teaspoon vanilla extract
- 1/4 teaspoon salt
Optional Additions
For extra flavor or texture, you can add:
- 1 cup chopped walnuts or pecans
- 1/2 cup mini marshmallows
- 1/2 cup chocolate chips
- 1/4 teaspoon espresso powder for a stronger chocolate flavor
Equipment
- Medium or large heavy-bottomed saucepan
- Wooden spoon or heat-resistant spatula
- Candy thermometer, preferably
- 8-inch square baking pan
- Parchment paper or aluminum foil
- Measuring cups and spoons
- Mixing bowl, if needed
Preparation
Begin by preparing the baking pan. Line an 8-inch square pan with parchment paper, leaving some paper hanging over the sides. This makes it much easier to remove the finished fudge.
If you are using nuts, chop them into small, even pieces and set them aside.
Measure all of the ingredients before beginning. Traditional fudge requires attention during the cooking process, so having everything ready makes the preparation much easier.
Method
Step 1: Combine the Dry Ingredients
Place the granulated sugar, unsweetened cocoa powder, and salt in a heavy-bottomed saucepan.
Whisk or stir the ingredients together until the cocoa is evenly distributed throughout the sugar. Breaking up any cocoa lumps at this stage will help create a smoother finished fudge.
Step 2: Add the Milk
Slowly pour the whole milk into the cocoa and sugar mixture while stirring.
Continue stirring until the mixture becomes evenly moistened and there are no large dry pockets of cocoa or sugar.
Add the butter and place the saucepan over medium heat.
Step 3: Heat the Mixture
Stir gently as the butter melts and the mixture begins to warm.
Once the sugar mixture starts to dissolve and the liquid becomes smooth, continue heating until it reaches a gentle boil.
Avoid scraping the sides of the saucepan once the mixture begins boiling. Sugar crystals left on the sides can sometimes encourage crystallization, which may make the fudge grainy.
Step 4: Cook to the Correct Temperature
Once the mixture reaches a steady boil, continue cooking until it reaches approximately 234 to 238°F (112 to 114°C) on a candy thermometer.
This stage is very important. The temperature determines the final texture of the fudge.
If the mixture is undercooked, the fudge may remain too soft. If it is overcooked, the finished fudge can become dry, hard, or crumbly.
If you do not have a candy thermometer, you can test a small amount of the mixture in a cup of very cold water. It should form a soft, pliable ball when gathered between your fingers.
Step 5: Remove From the Heat
Once the correct temperature is reached, immediately remove the saucepan from the heat.
Allow the mixture to cool undisturbed for several minutes.
Add the vanilla extract once the mixture has stopped boiling.
Do not begin vigorous stirring immediately. Allowing the mixture to cool first helps the sugar structure develop properly.
Step 6: Beat the Fudge
After the mixture has cooled somewhat, begin beating it vigorously with a wooden spoon or sturdy spatula.
Continue beating until the mixture thickens, loses some of its glossy appearance, and begins to look creamy and slightly matte.
This step is one of the defining characteristics of traditional fudge. The controlled formation of tiny sugar crystals is what gives old-fashioned fudge its characteristic smooth but slightly firm texture.
If you are adding chopped nuts, fold them in toward the end of the beating process.
Step 7: Form the Fudge
Immediately transfer the thickened fudge into the prepared baking pan.
Spread it evenly with a spatula, gently pressing it into the corners.
Work relatively quickly because the fudge will continue to firm as it cools.
Smooth the surface as much as possible.
Step 8: Cool Completely
Allow the fudge to cool at room temperature for several hours, or until it is completely firm.
For the best texture, avoid cutting it while it is still warm.
Once completely set, lift the fudge from the pan using the parchment-paper overhang.
Place it on a cutting board and cut it into small squares with a sharp knife.
For cleaner cuts, wipe the knife between slices.
The Formation of Traditional Fudge
The formation of fudge is a fascinating part of this recipe. Although the ingredients are simple, the texture depends on controlling sugar crystallization.
When sugar is dissolved in the milk and heated, the mixture becomes a concentrated sugar syrup. As the syrup reaches the proper temperature, much of the water evaporates and the sugar concentration increases.
The mixture is then allowed to cool before being beaten. During beating, tiny sugar crystals begin to form. The goal is to create many very small crystals rather than a few large ones.
Small crystals give fudge its smooth, creamy, tender texture. Large crystals can produce a coarse or grainy result.
This is why both temperature and beating are important in traditional fudge-making.
A Brief History of Old-Fashioned Fudge
Fudge became popular in the United States during the late nineteenth century and became especially associated with homemade sweets, college communities, family kitchens, and holiday candy-making.
Early fudge recipes were generally made from sugar, milk or cream, butter, and chocolate or cocoa. Before modern shortcuts became common, cooks had to rely on careful temperature control and traditional tests such as dropping hot syrup into cold water.
Homemade fudge became a popular treat because it could be prepared with relatively inexpensive ingredients while still producing something rich and special.
Over generations, families developed their own versions, adding nuts, marshmallows, chocolate pieces, peanut butter, or other flavorings. Despite these variations, the basic technique of cooking a sugar mixture to the correct stage and then encouraging controlled crystallization remains at the heart of traditional fudge.
Tips for Perfect Old-Fashioned Chocolate Fudge
Use a Heavy-Bottomed Pan
A heavy saucepan distributes heat more evenly and reduces the chance of scorching the chocolate mixture.
Measure Carefully
Fudge is more sensitive to ingredient ratios than many ordinary desserts. Measuring accurately helps produce a consistent texture.
Watch the Temperature
A candy thermometer is extremely useful. Aim for approximately 234 to 238°F (112 to 114°C).
Avoid Excessive Stirring During Boiling
Once the mixture is boiling, unnecessary stirring can encourage sugar crystals to form prematurely.
Do Not Rush the Cooling Stage
Allow the mixture to cool before beating. This helps produce the small crystals responsible for the classic fudge texture.
Beat Thoroughly
The beating stage is essential. The mixture should become noticeably thicker and less glossy before being transferred to the pan.
Add Nuts at the Right Time
If using walnuts or pecans, stir them in after the fudge has begun thickening but before it becomes too firm to spread.
Serving Suggestions
Cut the fudge into small squares because its flavor is rich and concentrated.
Serve it:
- With coffee or tea
- On a holiday dessert tray
- Alongside cookies and brownies
- As a homemade edible gift
- At family celebrations
- At bake sales
- As a simple after-dinner treat
For an elegant presentation, arrange the pieces on a serving plate and lightly dust them with unsweetened cocoa powder.
Storage
Store the fudge in an airtight container at room temperature for several days.
For longer storage, refrigerate it in a tightly sealed container. Allow refrigerated fudge to sit at room temperature for a short time before serving so that its texture becomes softer and its chocolate flavor is more pronounced.
Place parchment or wax paper between layers to prevent the pieces from sticking together.
Fudge can also be frozen in an airtight, freezer-safe container. Wrap it well to protect it from moisture and freezer odors.
Troubleshooting
If the Fudge Is Too Soft
The mixture may not have been cooked to a sufficiently high temperature. Next time, use a candy thermometer and make sure the syrup reaches the proper temperature before removing it from the heat.
If the Fudge Is Grainy
The sugar may have crystallized too early or the mixture may have been stirred too much while boiling. Proper cooling before beating can also help prevent a coarse texture.
If the Fudge Is Too Hard
It may have been cooked beyond the recommended temperature. A few degrees can make a significant difference in traditional fudge.
If the Fudge Does Not Set
Give it additional time to cool completely. If it remains very soft after several hours, the mixture was likely undercooked.
Variations
Chocolate Walnut Fudge
Add approximately 1 cup of finely chopped walnuts during the final stage of beating.
Chocolate Pecan Fudge
Replace the walnuts with toasted chopped pecans for a richer, slightly buttery flavor.
Extra-Rich Chocolate Fudge
Add a small amount of espresso powder to intensify the chocolate flavor without making the fudge taste strongly of coffee.
Chocolate Marshmallow Fudge
Fold miniature marshmallows into the mixture shortly before transferring it to the pan.
Conclusion
Old-Fashioned Chocolate Fudge is a wonderful example of how a handful of simple ingredients can become an extraordinary homemade dessert. The combination of cocoa, sugar, milk, butter, and vanilla creates a deeply chocolatey confection with a rich, traditional character.
The secret is not complicated ingredients but careful technique: dissolve the sugar properly, cook the mixture to the correct temperature, allow it to cool, and beat it until the texture changes from glossy and fluid to thick and creamy.
Once you master the process, this classic fudge becomes a dependable recipe for holidays, celebrations, gifts, and everyday treats.
For Chocolate Fudge Lovers
For those who love traditional chocolate desserts, this fudge is especially satisfying because every bite delivers a concentrated cocoa flavor with a buttery sweetness and a firm yet tender texture.
It is the kind of recipe that feels nostalgic and homemade, making it perfect for sharing with family and friends. Whether enjoyed plain or prepared with walnuts, pecans, marshmallows, or another favorite addition, old-fashioned chocolate fudge remains a classic that never goes out of style.