
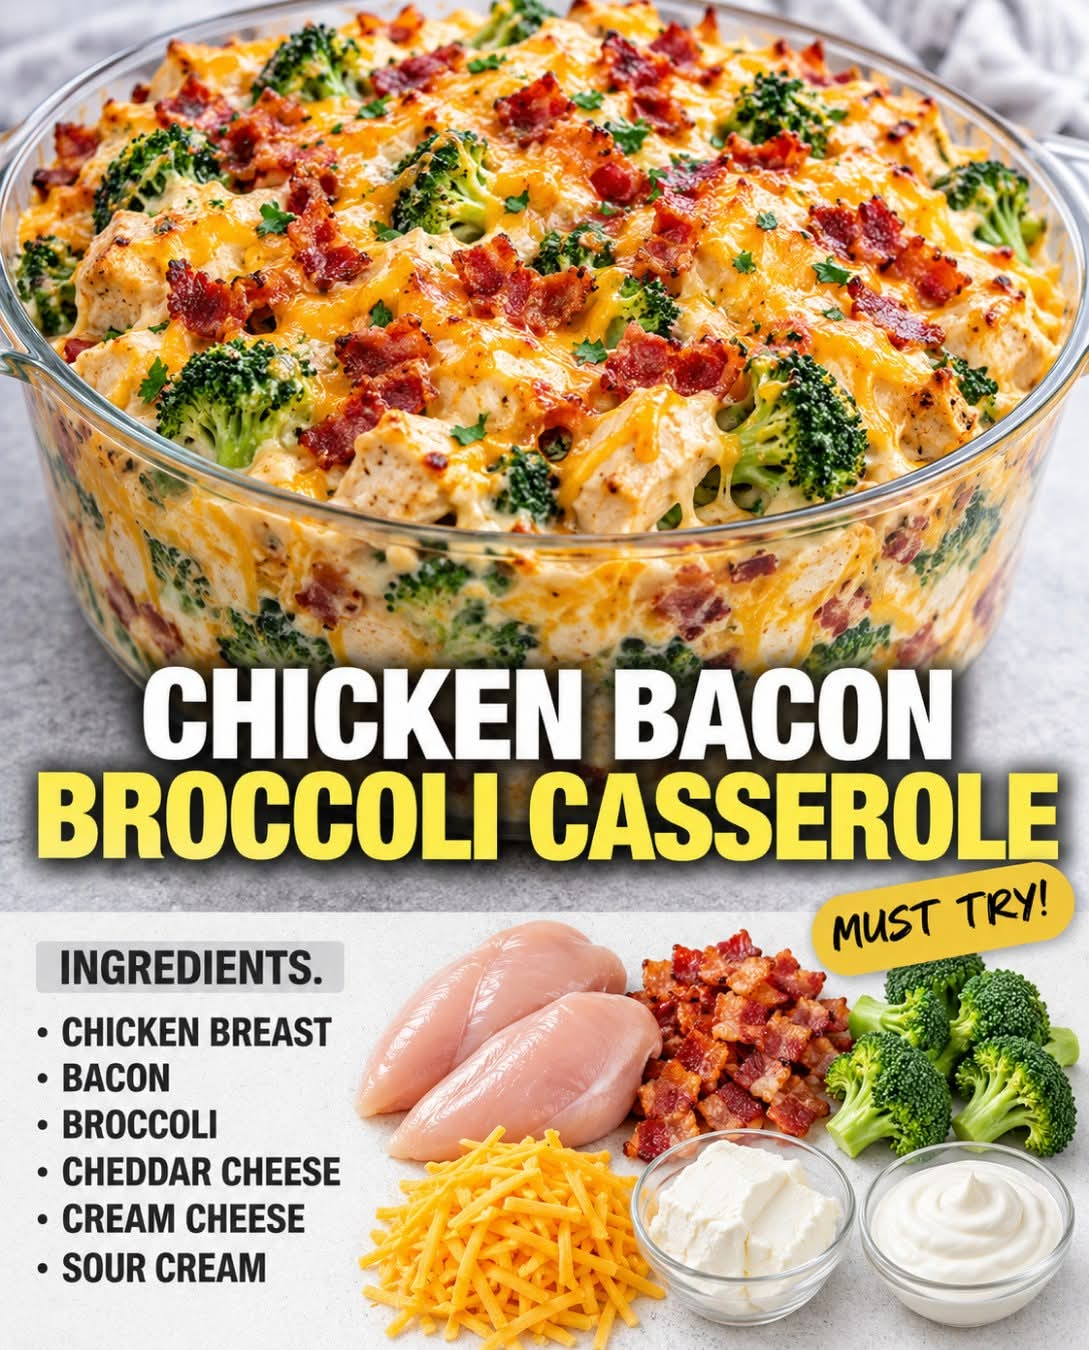
Chicken Bacon Broccoli Casserole
Introduction
Chicken Bacon Broccoli Casserole is a comforting, creamy, and satisfying family dinner that brings together tender chicken, crisp-tender broccoli, smoky bacon, and plenty of melted cheese in one hearty baked dish. It is easy enough for a weeknight meal but delicious enough to serve when you have guests.
The combination of savory chicken and bacon with fresh broccoli and a rich, creamy cheese sauce creates layers of flavor and texture. Everything is baked together until bubbling and golden on top, making this casserole warm, filling, and wonderfully comforting.
Ingredients
For the Casserole
- 3 cups cooked chicken, shredded or cut into bite-sized pieces
- 4 cups fresh broccoli florets
- 6 to 8 slices bacon
- 2 cups shredded cheddar cheese
- 1 cup shredded mozzarella cheese
- 1 small onion, finely diced
- 2 cloves garlic, minced
- 1 can (10.5 ounces) cream of chicken soup
- 1 cup sour cream
- 1/2 cup milk
- 4 ounces cream cheese, softened
- 1 teaspoon Dijon mustard
- 1 teaspoon dried parsley
- 1/2 teaspoon garlic powder
- 1/2 teaspoon onion powder
- 1/2 teaspoon paprika
- Salt, to taste
- Black pepper, to taste
Optional Topping
- 1/2 cup shredded cheddar cheese
- 1/3 cup breadcrumbs or crushed crackers
- 1 tablespoon melted butter
- 2 tablespoons grated Parmesan cheese
Instructions
1. Prepare the Chicken
If using raw chicken, cook it first until it reaches an internal temperature of 165°F (74°C). Allow it to cool slightly before shredding or cutting it into small pieces.
You can use leftover roasted chicken, baked chicken, poached chicken, or rotisserie chicken. Using already-cooked chicken makes this recipe especially quick.
2. Cook the Bacon
Place the bacon in a skillet over medium heat and cook until crisp.
Transfer the bacon to a paper towel-lined plate to drain. Once cool enough to handle, crumble it into small pieces.
Leave about 1 tablespoon of bacon fat in the skillet for extra flavor.
3. Prepare the Broccoli
Bring a pot of water to a boil. Add the broccoli florets and cook for approximately 2 to 3 minutes.
Drain immediately and rinse with cold water to stop the cooking process.
The broccoli should remain bright green and slightly firm because it will continue cooking in the oven.
4. Sauté the Aromatics
Add the diced onion to the skillet containing the reserved bacon fat.
Cook for approximately 3 to 4 minutes, or until the onion becomes soft and translucent.
Add the minced garlic and cook for another 30 seconds.
Remove the skillet from the heat.
5. Make the Creamy Sauce
In a large mixing bowl, combine the cream of chicken soup, sour cream, milk, softened cream cheese, and Dijon mustard.
Add the garlic powder, onion powder, paprika, dried parsley, salt, and black pepper.
Stir thoroughly until the mixture becomes smooth and creamy.
Add the sautéed onion and garlic and mix again.
6. Combine the Ingredients
Add the cooked chicken, broccoli, crumbled bacon, 2 cups of cheddar cheese, and 1 cup of mozzarella cheese to the creamy mixture.
Gently fold everything together until the chicken and broccoli are evenly coated with the sauce.
Taste the mixture and adjust the seasoning if necessary.
7. Assemble the Casserole
Preheat the oven to 375°F (190°C).
Lightly grease a 9 x 13-inch baking dish.
Pour the chicken, bacon, broccoli, and cheese mixture into the prepared dish.
Spread it evenly with a spatula.
8. Add the Topping
Sprinkle the remaining cheddar cheese over the top.
For a crunchy topping, combine the breadcrumbs or crushed crackers with melted butter and Parmesan cheese.
Sprinkle this mixture evenly over the casserole.
9. Bake
Place the casserole in the preheated oven.
Bake uncovered for approximately 25 to 30 minutes, or until the cheese is melted, the edges are bubbling, and the center is heated through.
For a more golden top, place the casserole under the broiler for 1 to 2 minutes at the end, watching carefully so it does not burn.
10. Rest and Serve
Remove the casserole from the oven and allow it to rest for approximately 5 to 10 minutes before serving.
This short resting period allows the creamy sauce to settle and makes the casserole easier to serve.
Cooking Method
The main cooking method is baking.
The chicken is cooked before assembly, the bacon is fried until crisp, and the broccoli is briefly blanched. The ingredients are then combined with a creamy cheese sauce and baked until hot, bubbling, and golden.
This combination of cooking methods helps preserve the broccoli’s texture while allowing the chicken to absorb the flavors of the creamy sauce, bacon, garlic, onion, and cheese.
History and Background
Chicken casseroles have become a familiar part of home cooking in many countries, particularly in North America. The casserole style of cooking became popular because it offered an economical and convenient way to combine meat, vegetables, starches, sauces, and cheese in one baking dish.
Broccoli and cheese have long been a popular pairing, while chicken and bacon provide additional savory flavors. Combining these ingredients into a casserole creates the kind of practical comfort food that can be prepared ahead of time and served to an entire family.
There is no single traditional historical recipe for Chicken Bacon Broccoli Casserole. Instead, it represents the evolution of home-style casserole cooking, where cooks combine familiar ingredients according to taste and availability.
Formation of the Dish
The casserole is built in several flavorful layers.
First, the chicken provides the main protein and a tender texture. The broccoli adds freshness, color, and a slightly firm bite. Bacon contributes smoky, salty richness, while cheddar and mozzarella provide creaminess and a beautifully melted topping.
The sauce brings everything together. Cream cheese and sour cream create richness, while cream of chicken soup gives the casserole its thick, creamy consistency. Garlic, onion, paprika, and mustard add additional depth.
When baked, the cheese melts into the sauce while the edges become bubbling and flavorful.
Tips for the Best Casserole
Use Cooked Chicken
Rotisserie chicken is an excellent shortcut. Remove the skin and bones, then shred the meat into bite-sized pieces.
Do Not Overcook the Broccoli
Broccoli should be slightly crisp before going into the casserole. Overcooking it during preparation can result in soft broccoli after baking.
Use Freshly Shredded Cheese
Freshly shredded cheese generally melts more smoothly than many pre-shredded varieties.
Make It Creamier
For an especially rich casserole, replace some of the milk with additional heavy cream.
Make It Crunchier
Add crushed buttery crackers, panko breadcrumbs, or crispy fried onions to the top before baking.
Let It Rest
Allowing the casserole to rest for a few minutes after baking helps the sauce thicken slightly and makes serving easier.
Variations
Chicken Bacon Broccoli Rice Casserole
Add approximately 2 cups of cooked white or brown rice to the mixture before baking. This turns the casserole into a complete, extra-filling meal.
Chicken Bacon Broccoli Pasta Casserole
Add 3 cups of cooked pasta such as penne, rotini, or shells. Increase the sauce slightly if needed.
Spicy Version
Add crushed red pepper flakes, cayenne pepper, or diced jalapeños for some heat.
Ranch Version
Add 1 to 2 tablespoons of ranch seasoning to the creamy sauce for a ranch-style flavor.
Extra Cheesy Version
Add Monterey Jack, Colby, or Parmesan along with the cheddar and mozzarella.
Low-Carbohydrate Version
Leave out rice, pasta, and breadcrumbs. The chicken, bacon, broccoli, cheese, and creamy sauce can be baked together without them.
Make-Ahead Method
This casserole can be assembled ahead of time.
Prepare the chicken, bacon, broccoli, and sauce, then combine everything in the baking dish. Cover tightly and refrigerate for up to 24 hours.
When ready to bake, remove the casserole from the refrigerator and allow it to sit at room temperature briefly while the oven preheats.
Because the casserole starts cold, it may require additional baking time. Make sure the center is thoroughly hot before serving.
Storage
Allow leftovers to cool before transferring them to an airtight container.
Refrigerate for up to 3 to 4 days.
Reheat individual portions in the microwave or reheat larger portions in a covered baking dish at approximately 350°F (175°C) until hot.
Freezing
For best results, freeze the casserole before baking if you are intentionally preparing it as a freezer meal. Wrap it tightly and freeze.
Thaw it safely in the refrigerator before baking.
If freezing leftovers, keep in mind that creamy sauces can sometimes change texture slightly after thawing and reheating.
What to Serve With It
Chicken Bacon Broccoli Casserole is filling enough to serve by itself, but it also pairs beautifully with:
- Green salad
- Garlic bread
- Dinner rolls
- Roasted vegetables
- Steamed green beans
- Cauliflower
- Simple tomato salad
- Fresh fruit
Conclusion
Chicken Bacon Broccoli Casserole is the kind of comforting homemade meal that is easy to prepare, generously filling, and packed with familiar flavors. Tender chicken, smoky bacon, nutritious broccoli, creamy sauce, and melted cheese come together in one delicious baking dish.
It is especially useful when you want a satisfying dinner without preparing several separate dishes. Whether you make it for a busy weeknight, a family gathering, or as a make-ahead meal, this casserole is versatile and easy to customize.
For Chicken Bacon Broccoli Casserole Lovers
If you love creamy comfort food, cheesy baked dishes, bacon, and tender chicken, this casserole is an excellent recipe to keep in your collection. It can be made richer, lighter, spicier, crunchier, or heartier simply by changing a few ingredients.
The best part is that the recipe is forgiving. You can use leftover chicken, different cheeses, frozen broccoli, cooked rice, pasta, or your favorite crunchy topping. That flexibility makes it a practical recipe for using ingredients already available in your kitchen.
Final Method at a Glance
- Cook and shred the chicken.
- Fry the bacon until crisp and crumble it.
- Blanch the broccoli for 2 to 3 minutes.
- Sauté the onion and garlic.
- Mix the creamy sauce ingredients.
- Fold in chicken, broccoli, bacon, and cheese.
- Transfer everything to a greased baking dish.
- Add extra cheese and optional crunchy topping.
- Bake at 375°F (190°C) for 25 to 30 minutes.
- Rest for 5 to 10 minutes.
- Serve warm and enjoy.
Dolly Parton’s Giant Chocolate Chip Cookies
Introduction
There is something wonderfully nostalgic about a giant chocolate chip cookie: crisp, golden edges, a soft and tender center, generous pockets of melted chocolate, and just enough buttery richness to make every bite feel special. This recipe takes the classic chocolate chip cookie and makes it extra large, creating bakery-style cookies that are perfect for sharing, gifting, bake sales, celebrations, or simply enjoying with a cold glass of milk.
Inspired by the warm, generous spirit associated with Dolly Parton’s Southern hospitality, these cookies are made with simple pantry ingredients but deliver an impressive result. The combination of granulated sugar and brown sugar gives them both crispness and moisture, while chocolate chips provide plenty of rich chocolate flavor. Pecans or walnuts can be added for a pleasant nutty crunch.
Ingredients
For the Cookie Dough
- 1 cup (227 g) unsalted butter, softened
- 1 cup (200 g) granulated sugar
- 1 cup (220 g) packed light or dark brown sugar
- 2 large eggs, preferably at room temperature
- 2 teaspoons alcohol-free vanilla extract
- 3 cups (375 g) all-purpose flour
- 1 teaspoon baking soda
- 1/2 teaspoon baking powder
- 1 teaspoon salt
- 2 cups (340 g) semisweet chocolate chips
- 1 cup (115 g) chopped pecans or walnuts, optional
For Preparing the Baking Sheets
- Parchment paper or silicone baking mats
- A little butter or nonstick baking spray, if necessary
Equipment
- Large mixing bowl
- Medium bowl
- Electric hand mixer or stand mixer
- Measuring cups and spoons
- Kitchen scale, if available
- Rubber spatula
- Large cookie scoop
- Two baking sheets
- Wire cooling rack
History of the Chocolate Chip Cookie
The chocolate chip cookie is one of the most recognizable American cookies. Its origins are generally associated with Ruth Wakefield, who developed the famous cookie at the Toll House Inn in Massachusetts during the 1930s.
The original concept was simple: combine a buttery cookie dough with pieces of chocolate to create a cookie with contrasting textures and flavors. Chocolate chip cookies quickly became popular, eventually appearing in home kitchens, bakeries, restaurants, cookbooks, and holiday traditions across the United States and beyond.
The giant version takes the familiar cookie and increases its size, creating a dessert with a particularly soft and substantial center. Large cookies also allow the chocolate to remain melted and gooey inside while the outside develops a beautiful golden crust.
Method
Step 1: Prepare the Oven
Preheat your oven to 350°F (175°C).
Line two large baking sheets with parchment paper or silicone baking mats. This will help prevent the cookies from sticking and make cleanup easier.
Position the oven racks so there is enough space for the cookies to bake evenly.
Step 2: Cream the Butter and Sugars
Place the softened butter in a large mixing bowl.
Add the granulated sugar and packed brown sugar.
Beat the mixture with an electric mixer for approximately 2 to 3 minutes, or until it becomes lighter, creamy, and fluffy.
This step is important because properly creamed butter and sugar help create the characteristic texture of the cookies.
Do not use melted butter for this recipe. Softened butter should be cool to the touch but easy to press with your finger.
Step 3: Add the Eggs and Vanilla
Add the eggs one at a time, beating well after each addition.
Add the alcohol-free vanilla extract and mix until incorporated.
Scrape down the sides of the bowl with a rubber spatula to make sure everything is evenly combined.
The mixture may look slightly creamy and fluffy at this stage.
Step 4: Combine the Dry Ingredients
In a separate bowl, whisk together:
- All-purpose flour
- Baking soda
- Baking powder
- Salt
Whisking the ingredients together distributes the leavening agents and salt evenly throughout the flour.
Step 5: Combine Wet and Dry Mixtures
Gradually add the dry ingredients to the butter mixture.
Mix on low speed just until the flour disappears.
Do not overmix the dough. Once the ingredients are combined, stop mixing.
Overmixing can develop too much gluten, which may result in tougher cookies.
Step 6: Add the Chocolate and Nuts
Fold in the semisweet chocolate chips using a rubber spatula.
If you are using pecans or walnuts, fold them in at the same time.
Mix gently until the chocolate and nuts are distributed throughout the dough.
At this point, the dough should be thick and substantial.
Forming the Giant Cookies
For truly giant cookies, use approximately 1/4 cup of dough per cookie.
Scoop the dough onto the prepared baking sheets, leaving approximately 3 to 4 inches (7.5 to 10 cm) between portions.
The cookies will spread during baking, so avoid placing them too close together.
For especially attractive cookies, press a few additional chocolate chips onto the tops of the dough balls before baking.
Do not flatten the dough too much. Keeping the portions relatively thick helps create a soft, substantial center.
Chilling the Dough
For the best texture, refrigerate the formed dough balls for approximately 30 minutes before baking.
This step is optional but highly recommended.
Chilling allows the butter to firm up, which helps prevent the cookies from spreading too quickly in the oven. It can also produce thicker cookies with beautifully defined edges.
If you refrigerate the dough overnight, place it in a covered container and allow it to sit at room temperature for several minutes before scooping if it becomes very firm.
Baking Method
Place one baking sheet in the preheated oven.
Bake the giant cookies for approximately 12 to 16 minutes, depending on their size and your oven.
Look for:
- Golden-brown edges
- Lightly browned tops
- Centers that still look slightly soft
Do not wait for the centers to become completely firm in the oven. The cookies will continue cooking from residual heat after they are removed.
For a softer center, remove them when the edges are golden but the middle still appears slightly underdone.
For a firmer cookie, bake for another minute or two.
Because giant cookies vary considerably in size, begin checking them around the 12-minute mark.
The Cooling Method
Remove the baking sheet from the oven and allow the cookies to rest on the pan for approximately 8 to 10 minutes.
This is an important part of the process.
Freshly baked giant cookies are extremely soft. Moving them immediately can cause them to break.
After they have firmed slightly, carefully transfer them to a wire rack.
Allow them to cool completely if you want the chocolate and cookie structure to set, or enjoy one while it is still warm for a softer, gooier experience.
Formation and Texture
The combination of ingredients creates several different characteristics in the finished cookie.
Butter
Butter contributes richness, tenderness, and flavor. It also helps the cookies spread during baking.
Granulated Sugar
Granulated sugar encourages browning and contributes to crisp edges.
Brown Sugar
Brown sugar contains molasses, which contributes moisture, deeper flavor, and a softer texture.
Eggs
Eggs provide structure and help bind the ingredients together.
Flour
Flour gives the cookies their framework. Measuring flour accurately is important because too much flour can make the cookies dry or dense.
Baking Soda and Baking Powder
These leavening ingredients help the cookies rise and spread while contributing to their final texture.
Chocolate Chips
Semisweet chocolate chips provide rich chocolate flavor throughout the cookie.
Pecans or Walnuts
Nuts are optional, but they add texture and a delicious roasted, nutty flavor.
Tips for Perfect Giant Cookies
Use Properly Softened Butter
Butter that is too cold will not cream properly with the sugar.
Butter that is completely melted can cause the cookies to spread excessively.
The ideal butter should be soft enough to mix easily but should still hold its shape.
Measure Flour Carefully
For the most consistent results, weigh the flour.
If using measuring cups, spoon the flour into the cup and level it rather than packing it down.
Do Not Overmix
Once the flour has been incorporated, mix only until combined.
This helps keep the cookies tender.
Chill When Necessary
If your dough seems very soft or your kitchen is warm, chilling the dough is particularly helpful.
Bake One Test Cookie
If you are unsure how much your cookies will spread, bake one cookie first.
If it spreads too much, chill the remaining dough before continuing.
If it remains too thick, gently flatten the remaining dough portions before baking.
Add Extra Chocolate
For a bakery-style appearance, place a few chocolate chips on top of each cookie immediately before baking.
This gives the finished cookies a generous, chocolate-filled appearance.
Storage
Once completely cooled, store the cookies in an airtight container at room temperature.
They are best enjoyed within several days.
To keep them soft, place a small piece of bread in the container. The bread can help maintain moisture in the cookies without significantly changing their flavor.
For longer storage, place the cooled cookies in a freezer-safe container or bag and freeze them for up to approximately 3 months.
Allow them to thaw at room temperature.
For a freshly baked texture, warm a thawed cookie briefly before serving.
Serving Ideas
These giant chocolate chip cookies are wonderful served:
- With cold milk
- With coffee
- With tea
- With hot chocolate
- With vanilla ice cream
- With caramel sauce
- Slightly warmed from the oven
- As part of a dessert platter
- Wrapped individually as homemade gifts
For an indulgent dessert, place a warm cookie in a bowl and top it with a scoop of vanilla ice cream. The contrast between the warm chocolate cookie and cold ice cream makes an especially satisfying combination.
Conclusion
These giant chocolate chip cookies transform a familiar homemade favorite into a generous bakery-style treat. The buttery dough, brown sugar richness, golden edges, soft centers, melted semisweet chocolate, and optional toasted nuts come together beautifully.
The key to excellent results is simple: use softened butter, measure the flour carefully, avoid overmixing, give the dough time to chill when needed, and remove the cookies from the oven while their centers are still slightly soft.
Whether prepared for a family gathering, a bake sale, a special celebration, or a quiet afternoon at home, these oversized chocolate chip cookies are designed to be generous, comforting, and memorable.
For Chocolate Chip Cookie Lovers
For people who love an especially soft cookie, slightly underbake the centers and allow the cookies to finish setting on the baking sheet.
For those who prefer crispier edges, bake them a little longer until the edges become more deeply golden.
For nut lovers, pecans provide a rich Southern-style character, while walnuts offer a slightly earthier crunch.
For serious chocolate lovers, use a mixture of semisweet chocolate chips and chopped chocolate. The chips provide recognizable chocolate pockets while chopped chocolate creates irregular pools of melted chocolate throughout the cookie.
For the ultimate giant cookie experience, serve one warm with a scoop of vanilla ice cream.
Dolly’s Cinnamon Donut Loaf
Introduction
Dolly’s Cinnamon Donut Loaf is a wonderfully comforting baked treat that combines the soft, tender texture of a homemade loaf cake with the warm cinnamon-sugar flavor of a classic cake donut. It is simple enough for a weekday breakfast but special enough to serve with coffee or tea when family and friends gather.
The loaf has a delicate crumb, a fragrant cinnamon aroma, and a sweet cinnamon topping that gives every slice the familiar taste of a freshly baked donut. Rather than frying individual donuts, this recipe transforms those beloved flavors into an easy loaf that can be baked in one pan.
Ingredients
For the Loaf
- 2 cups all-purpose flour
- 1 1/2 teaspoons baking powder
- 1/2 teaspoon salt
- 1/2 teaspoon ground cinnamon
- 1/2 cup unsalted butter, softened
- 3/4 cup granulated sugar
- 2 large eggs, room temperature
- 1 teaspoon vanilla extract
- 3/4 cup whole milk
- 1/4 cup sour cream or plain full-fat yogurt
For the Cinnamon Topping
- 1/4 cup granulated sugar
- 1 teaspoon ground cinnamon
- 2 tablespoons melted butter
Equipment
- 9-by-5-inch loaf pan
- Mixing bowls
- Whisk
- Electric mixer or wooden spoon
- Rubber spatula
- Cooling rack
- Pastry brush
Preparation
Begin by preheating the oven to 350°F (175°C). Grease a 9-by-5-inch loaf pan thoroughly and, if desired, line it with parchment paper, leaving some parchment hanging over the sides to make the finished loaf easier to remove.
Allow the butter and eggs to come to room temperature before beginning. Room-temperature ingredients blend more evenly and help create a softer, more uniform crumb.
Method for the Batter
In a medium bowl, whisk together the flour, baking powder, salt, and 1/2 teaspoon of cinnamon. Mixing the dry ingredients first distributes the baking powder and cinnamon throughout the flour.
In a separate large bowl, beat the softened butter and granulated sugar together until light and creamy. This usually takes about 2 to 3 minutes with an electric mixer.
Add the eggs one at a time, mixing well after each addition. Stir in the vanilla extract.
In another small bowl, combine the milk and sour cream or yogurt.
Add approximately one-third of the flour mixture to the butter mixture and mix gently. Add half of the milk mixture, followed by another third of the flour. Add the remaining milk and finish with the remaining flour.
Mix only until the ingredients are combined. Do not overmix the batter, because excessive mixing can develop too much gluten and make the loaf less tender.
Forming the Loaf
Transfer the batter to the prepared loaf pan. Use a spatula to spread the batter evenly and smooth the surface.
Tap the pan gently against the counter once or twice to remove any large air pockets.
Place the loaf in the preheated oven and bake for approximately 45 to 55 minutes, or until a toothpick inserted into the center comes out clean or with only a few moist crumbs attached.
If the top begins to brown too quickly, loosely cover the loaf with aluminum foil during the final portion of baking.
Preparing the Cinnamon Topping
While the loaf is baking, combine the granulated sugar and 1 teaspoon ground cinnamon in a small bowl.
When the loaf comes out of the oven, allow it to cool in the pan for approximately 10 minutes.
Brush the warm surface with the melted butter. Sprinkle the cinnamon-sugar mixture generously over the top, allowing it to adhere to the buttery surface.
For an especially flavorful finish, gently press the cinnamon sugar onto the top so it forms a delicate sweet coating.
Cooling and Formation
Carefully lift the loaf from the pan and transfer it to a cooling rack.
Allow it to cool for another 20 to 30 minutes before slicing. The loaf will continue to set as it cools, and cutting it while extremely hot can cause the center to crumble.
For neat slices, use a sharp serrated knife and cut the loaf into approximately 10 to 12 pieces.
What Makes It Taste Like a Cinnamon Donut
The secret to the donut-like character is the combination of several simple elements.
The butter provides richness and helps create a tender crumb. Sugar supplies sweetness and encourages a lightly golden crust. Cinnamon brings the characteristic warm spice, while vanilla adds depth.
The sour cream or yogurt helps keep the loaf moist without making it heavy. Finally, the melted butter and cinnamon-sugar topping recreate the familiar finish of a classic cinnamon cake donut.
History and Inspiration
Cinnamon donuts belong to a long tradition of simple American baked and fried treats made with pantry staples such as flour, sugar, eggs, butter, milk, and warming spices. Donuts became particularly popular in American home kitchens and bakeries because they could be adapted into countless flavors and shapes.
The idea behind a cinnamon donut loaf is wonderfully practical: instead of preparing and frying individual donuts, the same comforting flavors can be baked together in a loaf pan.
Recipes associated with Dolly Parton often evoke the style of warm, generous Southern home cooking, where uncomplicated ingredients are transformed into food meant to be shared. This loaf fits naturally into that tradition, although the exact recipe and its historical connection to Dolly should not be treated as a verified traditional family recipe without a specific original source.
Serving Suggestions
Serve the loaf slightly warm or at room temperature.
It is delicious alongside:
- Freshly brewed coffee
- Hot tea
- A glass of cold milk
- Fresh berries
- Sliced bananas
- Whipped cream
- Vanilla ice cream
For an extra-special dessert, warm an individual slice for a few seconds and serve it with a scoop of vanilla ice cream.
Variations
Extra Cinnamon
For a stronger cinnamon flavor, increase the cinnamon in the batter to 3/4 teaspoon.
Cinnamon Swirl
Pour half of the batter into the pan. Sprinkle a mixture of cinnamon and sugar over it, then add the remaining batter. Use a butter knife to gently swirl the layers together before baking.
Glazed Cinnamon Loaf
Instead of using only cinnamon sugar, prepare a simple glaze with powdered sugar, vanilla, and a small amount of milk. Drizzle it over the cooled loaf.
Nutty Version
Add approximately 1/2 cup finely chopped pecans or walnuts to the batter for a pleasant crunch.
Apple Cinnamon Version
Fold 1 small peeled and finely diced apple into the batter. Apples pair beautifully with the cinnamon and give the loaf an even more autumnal character.
Tips for the Best Results
- Measure the flour carefully. Too much flour can make the loaf dense and dry.
- Use room-temperature ingredients. This helps the batter come together smoothly.
- Do not overmix. Stop mixing as soon as the flour disappears.
- Do not overbake. Begin checking the loaf around 45 minutes.
- Let it cool before slicing. This helps preserve the tender structure.
- Apply the topping while warm. The melted butter allows the cinnamon sugar to stick beautifully.
- Use fresh cinnamon. Cinnamon loses some of its fragrance over time, so fresh ground cinnamon gives the loaf a much warmer aroma.
Storage
Keep the completely cooled loaf in an airtight container at room temperature for up to 3 days.
For longer storage, wrap individual slices tightly and refrigerate for up to 5 days. Bring the slices to room temperature before serving, or warm them gently for a few seconds.
The loaf can also be frozen. Wrap it tightly in plastic wrap and place it in a freezer-safe bag or container. Freeze for up to 2 months. Thaw overnight in the refrigerator or at room temperature before serving.
Conclusion
Dolly’s Cinnamon Donut Loaf is a simple, tender, cinnamon-filled bake that brings together the best qualities of a loaf cake and a classic cinnamon donut. The buttery crumb, fragrant cinnamon, and sweet topping make it especially satisfying when served warm with coffee or tea.
It is also an excellent recipe for sharing. A single loaf produces generous slices without the work of shaping and frying individual donuts, making it an easy choice for breakfast tables, afternoon gatherings, bake sales, holidays, or a quiet homemade treat.
For Cinnamon Lovers
If you are a true cinnamon lover, do not be afraid to add an additional sprinkle of cinnamon sugar between the layers of batter. You can also finish the cooled loaf with a thin vanilla glaze and another light dusting of cinnamon.
The result is a soft, fragrant loaf with a buttery cinnamon aroma and a sweet finish that makes it difficult to stop at just one slice.
Dolly Parton–Inspired Pecan Chicken Salad
Introduction
There is something wonderfully comforting about a classic chicken salad. It is creamy, satisfying, versatile, and easy to prepare, yet a few thoughtful additions can turn a simple recipe into something truly special.
This Dolly Parton–inspired pecan chicken salad brings together tender chicken, crunchy toasted pecans, crisp celery, sweet grapes, and a creamy dressing with just the right balance of savory and slightly sweet flavors. It is the kind of dish that feels equally at home at a holiday gathering, a family luncheon, a church potluck, or a relaxed weekend meal.
Pecans add a distinctly Southern character to the recipe. Their buttery flavor and delicate crunch complement the tender chicken beautifully, while grapes provide little bursts of sweetness throughout every bite. A touch of Dijon mustard and lemon juice keeps the dressing from becoming too heavy.
Whether served on croissants, between slices of fresh bread, over lettuce, or simply enjoyed by the spoonful, this chicken salad makes a beautiful addition to any table.
Ingredients
For the Chicken Salad
- 3 cups cooked chicken, shredded or diced
- 1 cup pecans, roughly chopped
- 1 cup seedless red or green grapes, halved
- 2 celery stalks, finely diced
- 2 green onions, thinly sliced
- 2 tablespoons finely chopped fresh parsley
- 1/4 cup finely diced red onion, optional
- 1/2 teaspoon salt
- 1/4 teaspoon freshly ground black pepper
For the Creamy Dressing
- 3/4 cup mayonnaise
- 1/4 cup sour cream or plain Greek yogurt
- 1 tablespoon Dijon mustard
- 1 tablespoon freshly squeezed lemon juice
- 1 tablespoon honey
- 1/2 teaspoon garlic powder
- 1/4 teaspoon salt
- 1/4 teaspoon black pepper
Optional Additions
For additional flavor and texture, you can add:
- 1/4 cup dried cranberries
- 1/4 cup finely chopped apples
- 1 tablespoon sweet pickle relish
- 1/2 teaspoon celery seed
- A small pinch of cayenne pepper
- A little fresh dill
- Extra toasted pecans for garnish
Choosing the Chicken
The chicken is the foundation of this salad, so good-quality cooked chicken makes a noticeable difference.
You can use roasted chicken, poached chicken, baked chicken, or leftover rotisserie chicken. Boneless, skinless chicken breasts create a lighter, cleaner texture, while a combination of breast and thigh meat produces a richer and more flavorful salad.
If cooking chicken specifically for this recipe, season it lightly with salt and pepper before baking or poaching. Allow it to cool completely before cutting or shredding it.
Cold chicken is easier to cut neatly and also prevents the mayonnaise dressing from becoming warm and greasy.
Preparing the Pecans
The pecans are one of the most important ingredients in this recipe because they provide the characteristic Southern crunch.
Place the chopped pecans in a dry skillet over medium-low heat. Toast them for approximately 3 to 5 minutes, stirring frequently.
Watch them carefully because pecans can burn quickly.
Once they become fragrant and lightly toasted, transfer them immediately to a plate and allow them to cool.
Toasting is optional, but it brings out the natural buttery flavor of the pecans and gives the finished salad considerably more depth.
Preparing the Chicken
If using whole cooked chicken breasts, place them on a cutting board and cut them into bite-sized pieces.
For a more traditional chicken salad texture, shred the chicken using two forks.
Do not shred the chicken too finely. Small pieces provide a pleasant texture and allow the dressing, pecans, grapes, and celery to remain distinct.
Place the prepared chicken into a large mixing bowl.
Preparing the Fresh Ingredients
Wash the grapes thoroughly and dry them before cutting them in half.
Dice the celery into small, even pieces so that it provides crunch without overpowering the chicken.
Thinly slice the green onions and finely chop the parsley.
If using red onion, dice it very finely. Strong pieces of onion can dominate the salad, so smaller pieces work best.
Add the grapes, celery, green onions, parsley, and optional red onion to the chicken.
Making the Dressing
In a separate bowl, combine the mayonnaise, sour cream or Greek yogurt, Dijon mustard, lemon juice, honey, garlic powder, salt, and black pepper.
Whisk everything together until smooth and creamy.
Taste the dressing before adding it to the chicken.
If you prefer a sweeter chicken salad, add another small amount of honey.
For a brighter flavor, add a little more lemon juice.
For a richer and more traditional Southern-style dressing, increase the mayonnaise slightly.
The goal is a creamy dressing with a balance of richness, sweetness, acidity, and gentle mustard flavor.
Combining the Salad
Pour approximately two-thirds of the dressing over the chicken mixture.
Using a large spoon or rubber spatula, gently fold everything together.
Add additional dressing as needed.
Avoid adding all the dressing immediately. The amount needed can vary depending on the size and moisture of the chicken.
Once the salad reaches your preferred consistency, gently fold in the toasted pecans.
If you are using dried cranberries or chopped apples, add them at this stage as well.
Taste the finished salad and adjust the seasoning with additional salt, pepper, lemon juice, or honey if necessary.
The Chilling Method
Cover the bowl tightly and refrigerate the chicken salad for at least 30 minutes before serving.
For the best flavor, allow it to rest for approximately 1 to 2 hours.
This resting period allows the chicken to absorb the flavors of the dressing while the pecans, grapes, celery, and herbs blend together.
If making the salad a day ahead, reserve a small amount of the pecans and add them just before serving. This keeps some of the pecans especially crisp.
History and Southern Inspiration
Chicken salad has a long history in American home cooking. Early versions were often simple combinations of cooked chicken, mayonnaise, celery, and seasonings.
Over time, families developed their own versions, adding ingredients such as grapes, apples, nuts, dried fruit, herbs, mustard, and different creamy dressings.
The combination of chicken and pecans is particularly associated with Southern-inspired cooking. Pecans are native to North America and have become an important ingredient in Southern cuisine, appearing in everything from pies and cakes to savory dishes and salads.
Adding grapes and pecans to chicken salad creates the contrast that makes the dish so appealing: tender and crunchy, savory and sweet, creamy and fresh.
The Dolly Parton connection gives this recipe a warm country-style personality, but this is best understood as a Dolly Parton–inspired recipe rather than a verified historical recipe from Dolly herself.
Formation and Presentation
For a beautiful holiday presentation, arrange a bed of crisp lettuce leaves on a large serving platter.
Spoon the chicken salad into the center and sprinkle additional toasted pecans and chopped parsley over the top.
A few halved grapes can be arranged around the edges for color.
For individual servings, use a small scoop of chicken salad on a bed of lettuce and garnish with a pecan half and a little parsley.
For a more elegant gathering, serve the chicken salad inside croissants or small brioche rolls.
For a casual family meal, simply place the bowl of chicken salad on the table with fresh bread and let everyone make their own sandwiches.
Ways to Serve It
This pecan chicken salad is extremely versatile.
Croissant Sandwiches
Split fresh croissants and fill them generously with chilled chicken salad.
The buttery croissant pairs beautifully with the creamy filling and crunchy pecans.
Classic Sandwiches
Serve between two slices of white, wheat, sourdough, or multigrain bread.
Add lettuce and thinly sliced tomato for extra freshness.
Lettuce Cups
For a lighter presentation, spoon the chicken salad into crisp lettuce leaves.
Butter lettuce, romaine, or iceberg lettuce all work well.
Crackers
Place the chicken salad in a serving bowl and surround it with crackers for an easy appetizer.
Holiday Platter
Arrange the chicken salad alongside grapes, apple slices, crackers, toasted pecans, and small pieces of bread.
This makes an attractive buffet-style presentation.
Stuffed Tomatoes
Hollow out ripe tomatoes and fill them with chilled chicken salad for a colorful luncheon dish.
Tips for the Best Chicken Salad
Use fully cooled chicken. Warm chicken can make the dressing loose and oily.
Toast the pecans. This small step adds a remarkable amount of flavor.
Do not overdress the salad. Begin with less dressing and add more until you reach the desired consistency.
Cut the ingredients into similar-sized pieces. This makes every bite more balanced.
Use fresh lemon juice whenever possible. It provides a cleaner flavor than bottled lemon juice.
Chill before serving. The flavors improve considerably after resting.
Add extra pecans immediately before serving if you want maximum crunch.
Make-Ahead Method
This chicken salad is an excellent make-ahead dish.
Prepare the chicken, dressing, vegetables, and grapes several hours before serving. Combine everything and refrigerate in an airtight container.
For the best texture, keep a small portion of the toasted pecans separate and fold them into the salad immediately before serving.
The salad should remain refrigerated and should not be left sitting at room temperature for extended periods.
Holiday Variation
For a festive holiday version, add dried cranberries and finely diced crisp apple.
The cranberries contribute a pleasant tart sweetness, while the apple provides additional crunch.
You can also add a small amount of fresh rosemary or parsley for a more seasonal flavor.
Serve the finished salad on a platter surrounded by green lettuce, red grapes, apple slices, and toasted pecans.
The result is colorful enough for a holiday buffet while remaining simple enough for a family meal.
Why People Love This Recipe
There are several reasons this style of chicken salad has remained popular.
The chicken makes it hearty and satisfying.
The mayonnaise-based dressing provides richness.
The grapes add sweetness and moisture.
The celery provides freshness and crunch.
The pecans add a buttery, toasted texture.
The lemon juice and Dijon mustard prevent the dressing from becoming overly rich.
Most importantly, the recipe is adaptable. Every family can adjust it to suit its own taste.
Some people prefer more grapes. Others want extra pecans. Some like their chicken salad very creamy, while others prefer a chunkier mixture with less dressing.
That flexibility is part of the charm of homemade chicken salad.
Conclusion
Dolly Parton–inspired pecan chicken salad is the kind of recipe that feels made for sharing.
It combines tender chicken, crunchy pecans, crisp celery, juicy grapes, fresh herbs, and a creamy dressing into one comforting dish. It is simple enough for an ordinary lunch but special enough for a holiday table.
Serve it on buttery croissants for a beautiful luncheon, spoon it over lettuce for a lighter meal, or place a generous bowl in the center of the table and let everyone help themselves.
For the best results, remember the three secrets: use flavorful chicken, toast the pecans, and give the finished salad time to chill before serving.
The result is a creamy, crunchy, sweet-and-savory chicken salad that brings classic Southern-inspired comfort to the table and is sure to have family and guests coming back for another helping.
Final Serving Suggestion
For a truly inviting presentation, serve the chilled chicken salad on a large platter lined with fresh lettuce. Scatter toasted pecans and halved grapes around the edges, add a little chopped parsley over the top, and place warm croissants or fresh bread alongside it.
It is a simple presentation, but it makes the dish feel generous, homemade, and ready for a special gathering.