
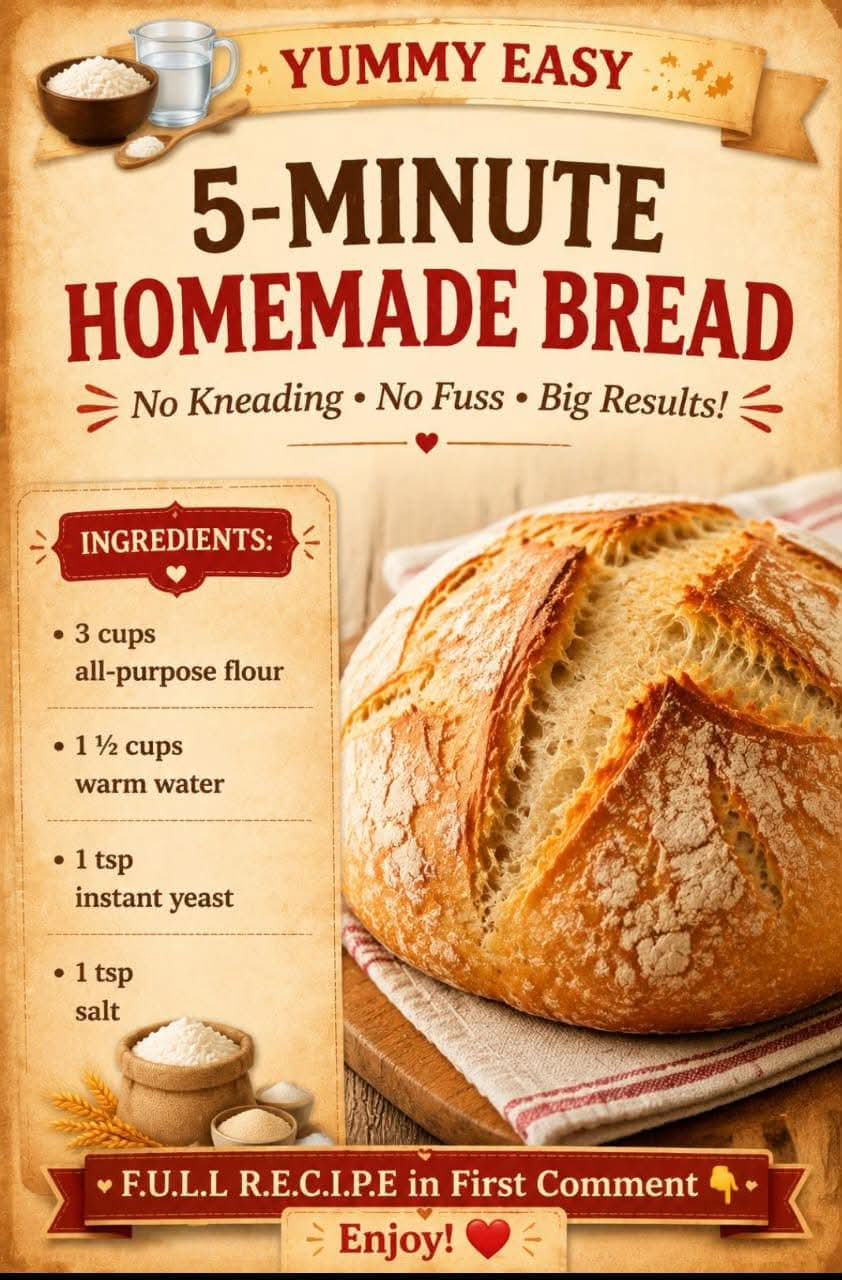
5-Minute Homemade Bread
Introduction
There is something wonderfully comforting about a loaf of freshly baked bread. The aroma fills the kitchen, the crust becomes golden and crisp, and the inside stays soft, warm, and tender. This 5-Minute Homemade Bread is designed for those moments when you want homemade bread without spending hours preparing an elaborate dough.
The recipe uses only four basic ingredients: all-purpose flour, warm water, instant yeast, and salt. The dough comes together quickly with very little effort. While the preparation itself takes only a few minutes, the yeast still needs time to work and the bread needs time to bake. The result is a simple rustic loaf with a lightly crisp exterior and a soft, chewy center.
This is an excellent recipe for beginners because there is no complicated technique required. You simply combine the ingredients, allow the dough to rise, shape it, and bake.
Ingredients
For the Bread
- 3 cups all-purpose flour
- 1 1/2 cups warm water
- 1 teaspoon instant yeast
- 1 teaspoon salt
Optional Additions
For a slightly different loaf, you can add:
- 1 tablespoon olive oil for a softer crumb
- 1 teaspoon honey or sugar to encourage browning
- 1/2 teaspoon garlic powder for garlic bread
- 1 teaspoon dried Italian herbs for an herbed loaf
- 1 tablespoon sesame seeds or poppy seeds for the topping
The basic four-ingredient version is all you need for a delicious everyday loaf.
Instructions
Step 1: Prepare the Water
Pour the warm water into a large mixing bowl. The water should feel comfortably warm rather than hot. Very hot water can damage the yeast, while water that is too cool may slow the rising process.
Add the instant yeast and stir briefly.
Step 2: Add the Flour and Salt
Add the all-purpose flour and salt to the bowl. Using a wooden spoon, sturdy spatula, or your hands, mix everything together until the flour is incorporated.
The dough should look soft and somewhat sticky. Do not worry if it does not look perfectly smooth at this stage.
Step 3: Form the Dough
Once the ingredients are combined, gather the dough into a rough ball.
If the dough seems extremely wet, add a tablespoon of flour at a time until it becomes manageable. Avoid adding too much flour because a slightly sticky dough can produce a lighter and softer loaf.
If the dough seems unusually dry, add a tablespoon of warm water at a time.
Step 4: Let the Dough Rise
Cover the bowl loosely with plastic wrap, a clean kitchen towel, or a plate.
Place the bowl somewhere warm and allow the dough to rise until it has noticeably expanded. Depending on the temperature of your kitchen, this may take approximately 45 to 90 minutes.
The dough does not necessarily have to double perfectly in size. Look for a puffy appearance and visible air bubbles.
Step 5: Shape the Bread
Lightly flour your work surface.
Turn the risen dough onto the surface and gently shape it into a round or oval loaf. Try not to press all the air out of the dough.
Tuck the edges underneath to create a smoother surface.
Place the shaped loaf onto a parchment-lined baking sheet or into a lightly greased baking dish.
Step 6: Rest the Shaped Dough
Allow the shaped loaf to rest for approximately 15 to 20 minutes while the oven preheats.
This short rest gives the dough a chance to relax and can help create a lighter texture.
Step 7: Preheat the Oven
Preheat the oven to 425°F (220°C).
For a crispier crust, place an empty oven-safe pan on a lower rack while the oven heats. When the bread goes into the oven, carefully add a small amount of hot water to that pan to create steam.
Be very careful when working with hot steam.
Step 8: Score the Loaf
Using a sharp knife or bread lame, make one or two shallow cuts across the top of the loaf.
Scoring gives the expanding bread a controlled place to open during baking and also gives the finished loaf a beautiful rustic appearance.
Step 9: Bake
Place the bread in the preheated oven.
Bake for approximately 25 to 30 minutes, or until the loaf is golden brown and sounds hollow when tapped underneath.
Because ovens vary, begin checking the bread toward the end of the baking time.
Step 10: Cool Before Slicing
Remove the loaf from the oven and place it on a wire rack.
Allow it to cool for at least 15 to 20 minutes before slicing. Although it may be tempting to cut into it immediately, allowing the bread to cool helps the interior finish setting.
Slice with a serrated bread knife and serve warm.
Method
The method behind this bread is wonderfully simple.
First, the flour, water, yeast, and salt are combined to create a basic yeast dough. The warm water activates the yeast, while the flour provides the structure needed for the loaf.
During the resting period, the yeast consumes available sugars in the flour and produces carbon dioxide. Those tiny pockets of gas become trapped within the developing dough, causing it to expand and become airy.
After rising, the dough is gently shaped and baked at a high temperature. The heat causes the loaf to expand rapidly during the early part of baking. Meanwhile, the outside develops a golden crust while the interior transforms into a soft, chewy crumb.
Steam can be used during baking to help keep the surface flexible during the initial oven rise and encourage a crisp, attractive crust.
History of Homemade Bread
Bread is one of the oldest prepared foods in human history. Long before modern ovens, packaged yeast, and electric mixers existed, people were combining grains with water and cooking the mixture over heat.
The discovery and development of naturally fermented bread eventually allowed people to produce loaves that were lighter and more flavorful than simple flatbreads.
Over centuries, bread-making traditions developed throughout Europe, the Middle East, North Africa, and many other parts of the world. Different cultures developed their own grains, fermentation methods, shapes, crusts, and baking techniques.
Modern instant yeast has made homemade bread much easier because it can be mixed directly into the flour without requiring the same preparation as some traditional yeast methods.
This simple loaf follows the same basic principle that has made bread such an important food for generations: flour, water, yeast, salt, time, and heat.
Formation and Texture
The formation of the bread begins when the flour absorbs the warm water. Gluten-forming proteins in the flour begin interacting with water, creating the framework that allows the dough to stretch and hold the gases produced by yeast.
As the dough rests, fermentation creates bubbles throughout the dough. These bubbles are responsible for much of the bread’s airy texture.
When the loaf enters the hot oven, the gases expand and the yeast becomes increasingly active for a short period before the heat stops its activity. This creates the characteristic oven rise.
The exterior dries and browns, creating a flavorful crust, while the interior remains moist and tender.
For a more open crumb, handle the dough gently and avoid adding excessive flour. For a denser sandwich-style loaf, the dough can be shaped more firmly.
Tips for Successful Homemade Bread
Use the Right Water Temperature
The water should be warm, not boiling hot. Excessive heat can interfere with yeast activity.
Do Not Add Too Much Flour
Sticky dough is not necessarily bad dough. Adding too much flour can produce a heavy loaf.
Give the Dough Enough Time
The exact rising time depends on the temperature of your kitchen. A warm room generally speeds fermentation, while a cool room slows it down.
Avoid Overworking the Dough
This quick bread does not require extensive kneading. Gentle mixing and shaping are enough.
Preheat the Oven Properly
A fully preheated oven helps the loaf rise properly and develop a good crust.
Let the Bread Cool
Cooling gives the crumb time to stabilize and makes slicing easier.
Serving Ideas
Fresh homemade bread can be served in countless ways.
Serve thick slices with butter for a simple breakfast. Toast slices and top them with eggs, avocado, cheese, or tomatoes. Use the bread for sandwiches, grilled cheese, French toast, or garlic toast.
It is also excellent alongside soups, stews, pasta, roasted vegetables, and hearty dinners.
For a rustic appetizer, slice the bread, brush it lightly with olive oil, toast it, and serve with seasoned tomatoes or a favorite spread.
Variations
Garlic Herb Bread
Add 1 teaspoon garlic powder and 1 teaspoon dried Italian herbs to the dough.
Seeded Bread
Sprinkle sesame seeds, sunflower seeds, pumpkin seeds, or poppy seeds over the top before baking.
Olive Oil Bread
Add 1 tablespoon olive oil to the dough for a slightly softer and richer texture.
Rustic Dinner Loaf
Shape the dough into a round boule and score a cross or several decorative lines across the top before baking.
Cheese Bread
Add a small amount of shredded cheese and dried herbs to the dough for a savory variation.
How to Store the Bread
Once completely cooled, store the bread at room temperature in a bread bag, paper bag, or loosely covered container.
For the best texture, enjoy it within one to two days.
If you want to keep it longer, slice the cooled loaf and freeze the slices in an airtight freezer-safe bag. Individual slices can then be removed as needed and warmed or toasted.
Common Questions
Can I use active dry yeast?
Yes. Active dry yeast can generally be used, although it may be preferable to dissolve it in the warm water first and give it a few minutes before mixing in the remaining ingredients.
Can I make the dough ahead of time?
Yes. The dough can be prepared ahead and refrigerated for a slower fermentation. Bring it out when you are ready to shape and bake it, allowing additional time if needed.
Why is my bread dense?
Dense bread can result from insufficient rising, inactive yeast, excessively cool conditions, or adding too much flour.
Why is my dough sticky?
A sticky dough can be completely normal, especially with a relatively high water-to-flour ratio. Lightly flour your hands and work surface rather than adding large quantities of flour.
How do I know when the bread is done?
The loaf should have a deep golden-brown exterior and should sound hollow when tapped on the bottom. If you have an instant-read thermometer, the center of a yeast bread is generally around 190–200°F (88–93°C) when fully baked.
Conclusion
This 5-Minute Homemade Bread is a wonderful example of how a few everyday ingredients can become something special. The preparation is quick, the ingredients are inexpensive, and the technique is simple enough for beginners.
The most important thing to remember is that the five-minute description refers to the hands-on preparation, not the total baking and rising time. The yeast still needs time to ferment, and the bread needs time in the oven to develop its crust and texture.
Once you become comfortable with this basic recipe, you can experiment with herbs, seeds, cheese, garlic, or olive oil to create your own favorite version.
For Bread Lovers
Bread lovers will appreciate this recipe because it delivers the simple pleasure of homemade bread without requiring complicated equipment or advanced baking skills.
There is something especially satisfying about cutting into a loaf that you mixed with your own hands. The crisp crust, soft center, and warm aroma make even an ordinary meal feel more homemade.
Whether served with breakfast, placed beside a bowl of soup, turned into a sandwich, or simply eaten warm with butter, this easy loaf is the kind of recipe worth keeping close.
It is simple, practical, comforting, and versatile enough to become an everyday favorite.