
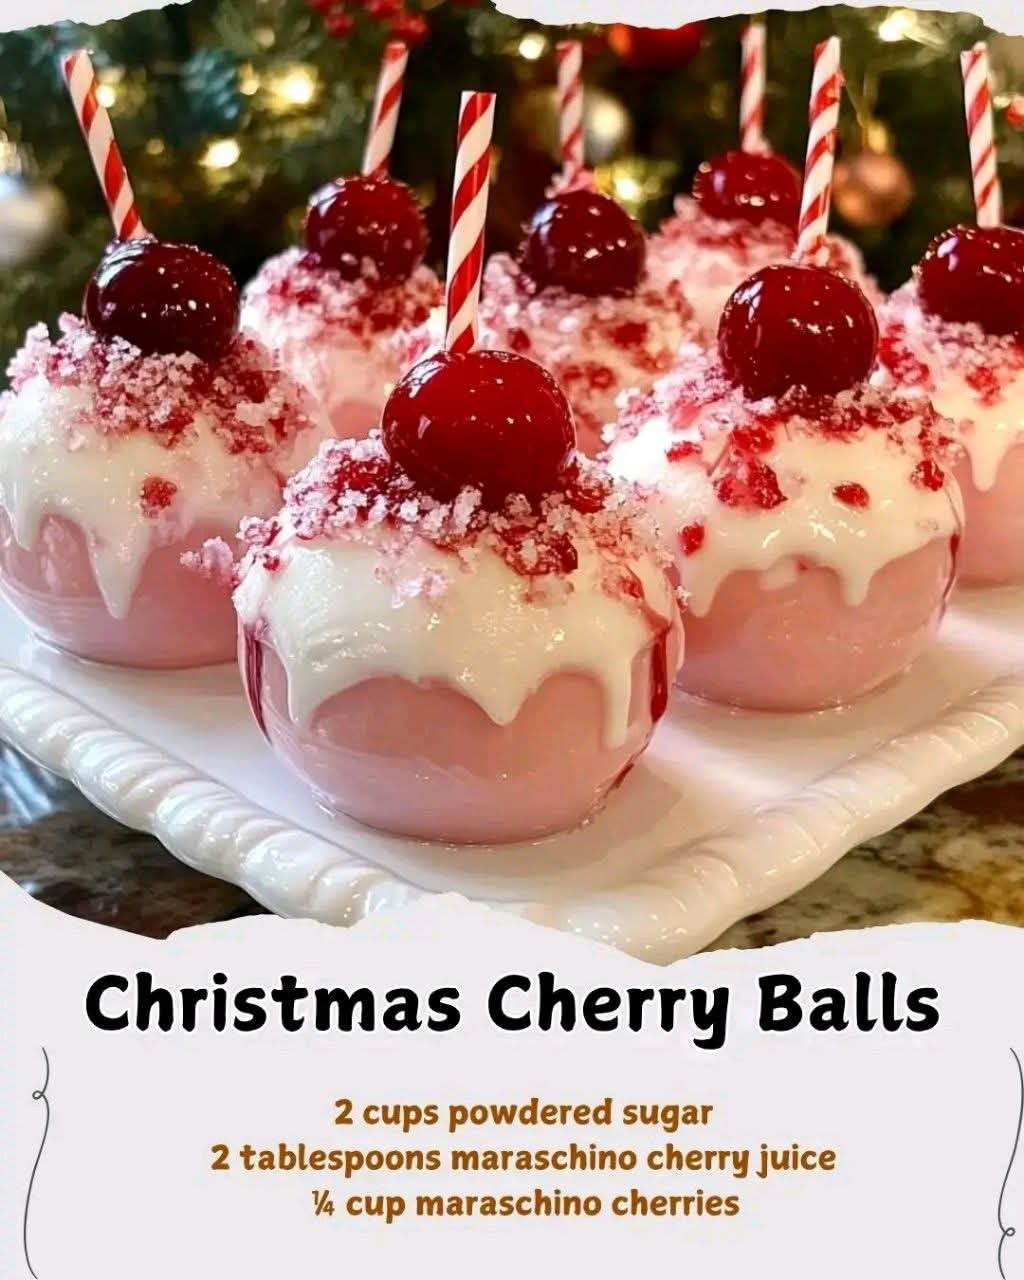
Christmas Cherry Balls
Introduction
Christmas Cherry Balls are a classic no-bake holiday confection that brings together buttery richness, sweet coconut, cherries, and confectioners’ sugar in one simple bite-sized treat. They are especially popular during the Christmas season because they require no complicated baking techniques, can be prepared ahead of time, and look beautiful arranged on a holiday dessert tray.
These little treats are also perfect for making in large quantities. Using a small cookie scoop, approximately one tablespoon in size, makes it easy to create evenly sized balls so that every piece looks uniform. Whether you are preparing one batch for your family or several batches for a Christmas gathering, these cherry balls are simple enough to make again and again.
Their soft, rich texture and sweet coconut flavor make them especially appealing to people who enjoy traditional holiday candies and old-fashioned Christmas desserts.
Ingredients
Main Ingredients
- ½ cup softened unsalted butter
- 1½ cups icing sugar, also called confectioners’ sugar
- 1 cup medium shredded coconut or sweetened flaked coconut
Additional Ingredients for a Complete Cherry Version
To turn the mixture into traditional Christmas Cherry Balls, you can also add:
- 1 cup finely chopped maraschino cherries, well drained
- 1 teaspoon vanilla extract
- ¼ teaspoon almond extract, optional
- 1 to 2 tablespoons reserved cherry juice, only if needed to adjust the texture
Optional Coating
For decorating and finishing the cherry balls, you may use:
- Additional shredded coconut
- Finely chopped pecans or walnuts
- Powdered sugar
- Melted white chocolate
- Whole or halved maraschino cherries for decoration
Instructions
Step 1: Prepare the Cherries
Begin by draining the maraschino cherries thoroughly. This step is important because excess liquid can make the mixture too soft.
Place the cherries on several layers of paper towel and gently pat them dry. Chop them finely and set them aside.
If you are using cherries that are particularly juicy, allow them to sit on the paper towel for several minutes before adding them to the mixture.
Step 2: Cream the Butter
Place the softened butter in a large mixing bowl.
Beat the butter until smooth and creamy. It should be soft enough to blend easily but should not be melted.
Add the vanilla extract and almond extract if using. The almond extract is optional, but it complements the cherry flavor beautifully.
Step 3: Add the Confectioners’ Sugar
Gradually add the icing sugar to the softened butter.
Mix slowly at first so the powdered sugar does not scatter from the bowl. Continue mixing until the butter and sugar form a thick, smooth mixture.
The mixture should resemble a soft frosting at this stage.
Step 4: Add the Coconut
Add the shredded coconut and mix until it is evenly distributed throughout the butter and sugar mixture.
The coconut gives the cherry balls their characteristic texture and helps make the mixture firm enough to shape.
Step 5: Add the Cherries
Fold the finely chopped cherries into the mixture.
Mix gently until the cherries are distributed evenly. Avoid overmixing, especially if you want to maintain small pieces of cherry throughout each bite.
If the mixture seems too dry to hold together, add a very small amount of reserved cherry juice, about one teaspoon at a time.
If the mixture becomes too soft, add a little additional coconut or confectioners’ sugar.
Step 6: Chill the Mixture
Cover the bowl and refrigerate the mixture for approximately 30 to 60 minutes.
Chilling is an important part of the process because it allows the butter to firm up and makes the mixture much easier to portion and shape.
Step 7: Portion the Cherry Balls
Use a small cookie scoop, approximately one tablespoon in size, to portion the mixture.
Scoop out one portion at a time and place it onto a parchment-lined baking sheet or tray.
Using a cookie scoop helps keep the cherry balls similar in size, which is particularly helpful when preparing several batches for a Christmas party.
Step 8: Shape the Balls
Roll each portion gently between your palms until it forms a smooth ball.
Do not press too firmly. The goal is to create a compact ball without making the mixture dense.
If the mixture begins sticking to your hands, return it to the refrigerator for a few minutes before continuing.
Step 9: Add the Coating
Roll each cherry ball in additional shredded coconut if desired.
You can also use finely chopped nuts or a light dusting of confectioners’ sugar.
For a more decorative Christmas presentation, drizzle the finished balls with melted white chocolate and allow the chocolate to set completely.
Step 10: Chill Before Serving
Once all the cherry balls have been shaped and decorated, place the tray in the refrigerator for at least 30 minutes.
This final chilling period allows the candies to become firm and gives the flavors time to blend.
Method
The basic method for Christmas Cherry Balls is simple: soften the butter, combine it with confectioners’ sugar, incorporate the coconut and cherries, chill the mixture, portion it evenly, shape it into balls, and finish with your preferred coating.
The key to a successful texture is controlling the moisture. Maraschino cherries contain a considerable amount of liquid, so they should be drained and patted dry before being added. If the mixture is too wet, the balls may be difficult to shape. If it is too dry, a tiny amount of cherry juice can help bring everything together.
Using softened rather than melted butter is also important. Soft butter creates a creamy base while still providing enough structure for the mixture to firm up during refrigeration.
Formation and Texture
The formation of these cherry balls is one of the easiest parts of the recipe.
After chilling, the mixture should be soft enough to scoop but firm enough to hold its shape. A one-tablespoon cookie scoop is ideal for producing small, attractive portions.
Roll each scoop gently between your hands. The warmth of your hands will slightly soften the mixture and allow it to form into a smooth ball.
If you are making four batches or preparing a large quantity for a holiday gathering, work with part of the mixture at a time and keep the remaining mixture refrigerated.
The finished cherry balls should be tender and rich, with a soft coconut texture and small pieces of cherry throughout.
History and Holiday Tradition
No-bake holiday confections have long been popular because they allow families to prepare festive sweets without relying entirely on the oven.
Recipes made from butter, powdered sugar, coconut, cherries, nuts, and other pantry ingredients became especially useful for Christmas cookie trays and candy exchanges. These recipes could be prepared ahead of time and stored in the refrigerator, making them convenient for busy holiday kitchens.
Cherry and coconut combinations became particularly recognizable in Christmas sweets because their flavors work naturally together. Maraschino cherries also became a familiar ingredient in American holiday baking and confectionery, often used to add sweetness, color, and a distinctive cherry flavor to cakes, cookies, candies, and dessert bars.
Christmas Cherry Balls fit beautifully into that tradition. They are small, easy to share, simple to prepare in large quantities, and attractive enough to become part of a festive dessert table.
Tips for Perfect Christmas Cherry Balls
Use Softened Butter
Allow the butter to soften naturally at room temperature. Avoid melting it because melted butter can make the mixture unnecessarily soft.
Drain the Cherries Well
This is one of the most important steps. Excess cherry juice can change the consistency of the mixture.
Chill Before Shaping
If the mixture feels sticky or difficult to handle, refrigerate it longer rather than immediately adding large amounts of powdered sugar.
Keep the Balls Uniform
A one-tablespoon cookie scoop makes the process faster and gives you evenly sized treats.
Do Not Overwork the Mixture
Mix only until the ingredients are combined. Gentle mixing produces a pleasant texture.
Refrigerate Before Serving
The finished cherry balls become firmer and easier to handle after chilling.
Make-Ahead Instructions
Christmas Cherry Balls are ideal for preparing ahead of time.
Once formed, place them in an airtight container with parchment paper between layers. Refrigerate them until you are ready to serve.
For holiday entertaining, they can be prepared a day or two in advance, which allows you to spend less time in the kitchen on the day of your gathering.
If freezing, arrange the finished balls in a single layer until firm, then transfer them to a freezer-safe container. Separate layers with parchment paper.
Allow frozen cherry balls to thaw in the refrigerator before serving.
Serving Suggestions
Christmas Cherry Balls look beautiful when arranged on a holiday dessert platter alongside cookies, fudge, truffles, and other homemade candies.
For an elegant presentation, place them in small paper candy cups.
You can also create several varieties from the same basic mixture by coating some in coconut, some in chopped nuts, and others in powdered sugar.
For a more festive dessert table, arrange the different coatings together so that guests can choose their favorite version.
Variations
Coconut Cherry Balls
Use extra coconut both inside the mixture and as the outer coating for an especially coconut-forward treat.
Cherry Almond Balls
Add a small amount of almond extract to emphasize the natural pairing of cherry and almond flavors.
Chocolate-Dipped Cherry Balls
After chilling, dip the finished balls partially into melted chocolate and allow them to set on parchment paper.
White Chocolate Cherry Balls
Drizzle or dip the cherry balls with melted white chocolate for a lighter Christmas presentation.
Cherry Pecan Balls
Add finely chopped pecans to the mixture for a pleasant nutty texture.
Storage
Store Christmas Cherry Balls in a tightly covered container in the refrigerator.
Place parchment or wax paper between layers to prevent them from sticking together.
Because the recipe contains butter and cherries, refrigeration is recommended for maintaining the best texture and freshness.
Before serving, allow them to sit at room temperature for several minutes. This gives the butter-based mixture a softer, more pleasant texture.
Conclusion
Christmas Cherry Balls are the kind of simple holiday treat that proves a festive dessert does not need to be complicated.
With softened butter, sweet confectioners’ sugar, coconut, and cherries, you can create small, beautiful treats that are perfect for Christmas cookie trays, family gatherings, dessert exchanges, or homemade gifts.
The one-tablespoon cookie scoop makes preparing multiple batches especially easy, giving every cherry ball a consistent size and attractive appearance. Once chilled and coated, they become a delicious little holiday confection with a creamy, coconut-rich texture and sweet cherry flavor.
Whether you make one batch for your family or several batches for a large Christmas celebration, these cherry balls are an easy addition to a traditional holiday dessert collection.
For Cherry Ball Lovers
If you love old-fashioned Christmas candies, coconut desserts, maraschino cherries, and simple no-bake treats, these Christmas Cherry Balls are an excellent recipe to keep in your holiday collection.
They are especially enjoyable for people who appreciate desserts that can be prepared ahead of time without spending hours in front of the oven.
The combination of creamy butter, sweet confectioners’ sugar, chewy coconut, and bright cherry flavor creates a nostalgic holiday taste that fits perfectly beside traditional Christmas cookies and homemade candies.
For a Christmas dessert tray, make several batches, coat them in different toppings, and arrange them in decorative paper cups. They are small enough for guests to enjoy alongside other sweets and convenient enough to prepare well before the celebration begins.
Final Method Summary
- Soften the butter.
- Beat the butter until creamy.
- Gradually incorporate the confectioners’ sugar.
- Add vanilla and optional almond extract.
- Mix in the shredded coconut.
- Drain, dry, and finely chop the cherries.
- Fold the cherries into the mixture.
- Refrigerate until firm enough to scoop.
- Portion with a one-tablespoon cookie scoop.
- Roll each portion into a smooth ball.
- Coat with coconut, nuts, powdered sugar, or another desired topping.
- Chill again before serving.
- Store leftovers in an airtight container in the refrigerator.
These Christmas Cherry Balls are simple, make-ahead holiday treats that are especially convenient when preparing multiple batches for family, friends, parties, and Christmas dessert tables.