
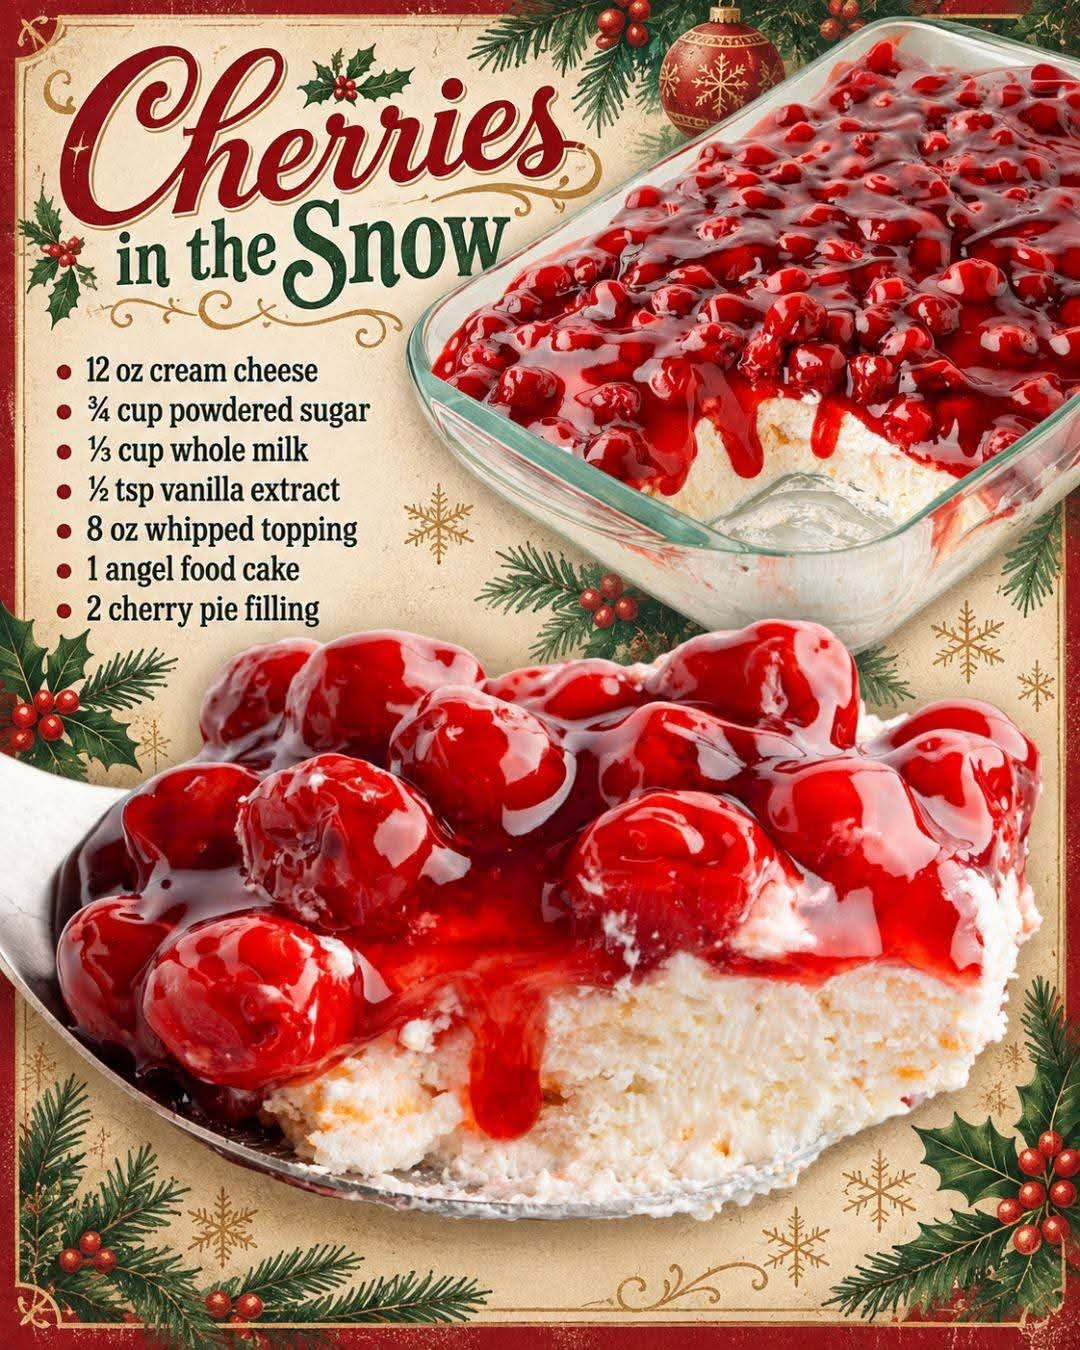
Cherries in the Snow: A Classic No-Bake Cherry Dessert


Introduction
Cherries in the Snow is a beautiful, creamy, and refreshing dessert that brings sweetness and elegance to any holiday table. Made with soft angel food cake, a smooth cream cheese filling, fluffy whipped topping, and generous layers of glossy cherry pie filling, this dessert is as delightful to look at as it is to eat.
This easy recipe is perfect for Christmas celebrations, Thanksgiving dinners, family gatherings, potlucks, birthdays, and Sunday suppers. It combines simple ingredients into a dessert that tastes like it took hours to prepare, even though the process is wonderfully straightforward.
The name “Cherries in the Snow” comes from the lovely contrast between the white, fluffy cream layer and the bright red cherries on top. Every spoonful offers a combination of airy cake, rich creaminess, and sweet cherry flavor.
Best of all, this dessert is prepared ahead of time and chilled in the refrigerator, making it an excellent choice when you want to spend less time in the kitchen and more time enjoying the people around you.
Ingredients
This recipe makes approximately 12–16 servings, depending on the size of each portion.

For the creamy filling
- 12 oz cream cheese, softened
- ¾ cup powdered sugar
- ⅓ cup whole milk
- ½ teaspoon vanilla extract
- 8 oz whipped topping, thawed

For the cake and cherry topping
- 1 angel food cake, approximately 10–12 oz
- 2 cans cherry pie filling, 21 oz each
Optional ingredients
- ½ teaspoon almond extract for a deeper cherry flavor
- Fresh cherries for decoration
- A little lemon zest for a subtle citrus note
- White chocolate shavings for a festive finishing touch
These additions are optional. The original combination of cream cheese, angel food cake, whipped topping, and cherry filling is already delicious.
Instructions
Step 1: Prepare the angel food cake
Begin by cutting the angel food cake into bite-sized cubes, approximately 1 inch in size.
Place the cubes in a large bowl and gently separate any pieces that stick together. The cake should remain light and airy, so avoid pressing or crushing it.
If you are using a homemade angel food cake, allow it to cool completely before cutting. A store-bought cake works wonderfully and saves preparation time.
Set the cake aside while you prepare the creamy filling.
Step 2: Soften the cream cheese
Remove the cream cheese from the refrigerator and allow it to soften at room temperature for about 30–45 minutes.
Place it in a large mixing bowl and beat with an electric mixer until smooth and creamy. Scrape down the sides of the bowl as needed.
This step is important because softened cream cheese blends much more easily than cold cream cheese. It also helps prevent lumps from forming in the finished dessert.
Step 3: Add the powdered sugar
Gradually add the powdered sugar to the softened cream cheese.
Beat on medium speed until the mixture becomes smooth, thick, and slightly fluffy.
Powdered sugar is ideal for this recipe because it dissolves easily and helps create a silky filling without a grainy texture.
Step 4: Mix in the milk and vanilla
Pour in the whole milk a little at a time, beating continuously until the mixture becomes creamy and spreadable.
Add the vanilla extract and mix until fully incorporated.
The filling should be smooth enough to fold into the whipped topping but thick enough to hold its shape. Avoid adding extra milk unless necessary, as an overly thin filling can make the cake soggy.
Step 5: Fold in the whipped topping
Add the thawed whipped topping to the cream cheese mixture.
Using a rubber spatula, gently fold the whipped topping into the mixture with broad, sweeping movements.
Continue folding until the filling is evenly combined and light in texture. Avoid vigorous stirring because it can deflate the whipped topping and make the cream layer less fluffy.
You should now have a smooth, sweet, cloud-like cream filling.
Step 6: Combine the cake and cream
Place the angel food cake cubes in a large mixing bowl or directly into your serving dish.
Add the cream mixture and gently fold until the cake pieces are coated.
Alternatively, you can arrange the cake cubes in a 9-by-13-inch dish and spread the cream mixture evenly over them. This method creates more distinct layers and makes the dessert particularly attractive when served.
Make sure the cream reaches the spaces between the cake pieces so every serving has a balanced combination of cake and filling.
Step 7: Add the cherry pie filling
Open both cans of cherry pie filling and stir gently to distribute the cherries throughout the thick sauce.
Spoon the cherry filling over the cream layer, spreading it carefully with a spatula.
Cover the entire surface with cherries, allowing the bright red topping to contrast beautifully with the white cream beneath it.
For an especially attractive presentation, reserve a few cherries to place around the edges or in the center just before serving.
Step 8: Cover and refrigerate
Cover the dish tightly with plastic wrap or a lid.
Refrigerate for at least 4 hours, although 6–8 hours or overnight is even better.
During chilling, the angel food cake absorbs some of the moisture from the creamy filling and cherry topping. The flavors blend together, and the dessert becomes easier to scoop and serve.
Keep the dessert refrigerated until you are ready to enjoy it.
Methods of Preparation
There are several ways to prepare Cherries in the Snow, depending on how you want it to look and how you plan to serve it.
Method 1: Traditional layered dessert
Arrange the angel food cake in the bottom of a rectangular dish, spread the cream cheese mixture over it, and finish with cherry pie filling. This method is ideal for family dinners and potlucks.

Method 2: Individual dessert cups
Layer the cake, cream, and cherries in clear glasses or small dessert cups. This presentation is elegant for holiday parties and makes portioning easy.
Method 3: Festive cherry trifle
Alternate cake cubes, cream filling, and cherries in a clear trifle bowl. Repeat the layers until the ingredients are used, finishing with cherries on top.
All three methods use the same ingredients. Choose the presentation that best suits your occasion.
The History of Cherries in the Snow
Cherries in the Snow belongs to the tradition of easy American cream desserts that became popular in home kitchens during the twentieth century.
Recipes combining cake, whipped toppings, cream cheese, and canned fruit became especially appealing as convenience foods grew more common. Home cooks could create attractive desserts without preparing every component from scratch.
Angel food cake was a natural choice because of its light texture. Cream cheese added richness and a gentle tang, while whipped topping created a soft, airy consistency. Canned cherry pie filling provided a convenient, colorful finish without requiring fresh cherries to be pitted and cooked.
The exact origin of Cherries in the Snow is difficult to establish, and many similar versions have circulated through family recipe collections, community cookbooks, and holiday menus.
Its lasting popularity comes from its simplicity, familiar flavors, beautiful appearance, and ability to feed a crowd without complicated baking techniques.
Formation and Texture: What Makes This Dessert Special?
The magic of Cherries in the Snow comes from the way its ingredients work together.
The angel food cake provides a delicate, sponge-like base. Its airy structure absorbs a little moisture from the cream and cherries while maintaining a soft texture.
The cream cheese gives the filling body and a slight tang that balances the sweetness of the other ingredients.
The powdered sugar sweetens the filling and helps it blend smoothly.
The milk loosens the cream cheese mixture, making it easier to combine with the whipped topping.
The vanilla extract adds warmth and enhances the creamy flavor.
The whipped topping creates a light, fluffy texture that prevents the cream cheese filling from feeling too heavy.
The cherry pie filling contributes juicy fruit, sweetness, a glossy finish, and the vivid red color that gives the dessert its name.
When chilled together, these ingredients create a dessert that is creamy, soft, fruity, and refreshing. The contrast between the white filling and red cherries also makes it an eye-catching centerpiece for a holiday dessert table.
Tips for Perfect Cherries in the Snow
- Use softened cream cheese. This is the best way to avoid lumps in your filling.
- Thaw the whipped topping completely. Partially frozen topping is difficult to fold evenly into the cream cheese.
- Fold gently. Keeping the mixture airy produces a lighter dessert.
- Do not oversaturate the cake. Follow the stated ingredient quantities and avoid adding unnecessary milk.
- Chill long enough. Four hours is the minimum recommended time for the dessert to set and develop its flavor.
- Use a clear dish if possible. The red and white layers look especially beautiful through glass.
- Keep it cold. Because this dessert contains cream cheese and whipped topping, return leftovers to the refrigerator promptly.
Variations to Try
Cherry Almond Cherries in the Snow
Add ¼–½ teaspoon almond extract to the cream filling. Almond and cherry are a classic combination, and the extract gives the dessert a slightly more sophisticated flavor.
Chocolate Cherry Version
Sprinkle a small amount of chocolate shavings between the layers or over the finished dessert. The chocolate complements the cherry filling and adds a richer dessert flavor.
Fresh Cherry Version
When cherries are in season, garnish the top with fresh pitted cherries. You can also prepare a homemade cherry sauce, provided it is cooled completely before layering.
Strawberry or Blueberry Version
Replace the cherry pie filling with strawberry or blueberry pie filling for a different fruit flavor. You can even make two varieties for a holiday gathering.
Extra-Creamy Version
For a richer result, prepare the cream cheese filling carefully and allow the dessert to chill overnight. The longer resting time gives the layers a cohesive, spoonable texture without requiring additional ingredients.
Make-Ahead, Storage, and Serving
Make ahead: Prepare the dessert the evening before your gathering and refrigerate it overnight. This is especially convenient for busy holiday mornings.
Storage: Store covered in the refrigerator and enjoy within about 3 days for the best texture and quality.
Freezing: Freezing is not recommended because the cream filling and whipped topping may change texture after thawing, and the angel food cake can become watery.
Serving: Scoop into dessert bowls with a large spoon. For individual portions, use clear glasses so the red cherry topping and white cream remain visible.
Serving temperature: Serve chilled, straight from the refrigerator. Do not leave the dessert at room temperature for more than 2 hours, or 1 hour in temperatures above 90°F (32°C).
Frequently Asked Questions
Can I make Cherries in the Snow the day before?
Yes. In fact, preparing it the day before is an excellent idea. The chilling time allows the flavors to blend and the cake to soften slightly.
Can I use homemade angel food cake?
Absolutely. Homemade angel food cake works beautifully. Let it cool completely before cutting it into cubes.
Can I use homemade whipped cream instead of whipped topping?
Yes, although the texture and stability may differ. Use approximately 2 cups of whipped cream prepared from heavy whipping cream, sweetened to taste, and keep the dessert well chilled.
Why is my dessert watery?
This can happen if the cream cheese mixture is too thin, the whipped topping is not fully thawed, or the dessert is stored for too long. Measure the milk carefully and avoid adding extra liquid.
Can I use only one can of cherry pie filling?
Yes. One 21-ounce can will give you a lighter cherry layer. Using both cans creates the generous, fruit-covered topping intended for this recipe.
Does this recipe require baking?
No. If you use a ready-made angel food cake, the dessert requires only mixing, layering, and refrigeration.
Conclusion
Cherries in the Snow is a wonderful reminder that a memorable dessert does not need to be complicated. With soft angel food cake, fluffy cream cheese filling, and sweet cherry topping, this recipe transforms a handful of familiar ingredients into something beautiful enough for a holiday celebration.
It is easy to prepare ahead, simple to serve, and ideal for sharing with family, friends, neighbors, and guests. Whether you present it in a large glass dish, a festive trifle bowl, or individual dessert cups, the striking red-and-white colors make it feel special.
The best part is that you can spend less time baking and more time enjoying the occasion. Prepare it the night before, let it chill, and bring it to the table when everyone is ready for something sweet.
For Cherry Dessert Lovers
If you love creamy desserts, fruity toppings, and nostalgic family recipes, Cherries in the Snow deserves a place in your recipe collection. It combines the lightness of cake with the richness of cream cheese and the irresistible sweetness of cherries.
Serve it at Christmas, Thanksgiving, Easter, summer potlucks, or an ordinary weekend family dinner. Every spoonful delivers a delicious mix of soft cake, smooth cream, and juicy cherries.
This is the kind of easy dessert that can become a family tradition, requested year after year because it is familiar, beautiful, and wonderfully satisfying.
Recipe at a glance
- Preparation time: 20 minutes
- Chilling time: 4–8 hours
- Total time: Approximately 4 hours 20 minutes or longer
- Servings: 12–16
- Difficulty: Easy
- Method: No-bake assembly and refrigeration
- Best occasion: Holidays, potlucks, and family gatherings