
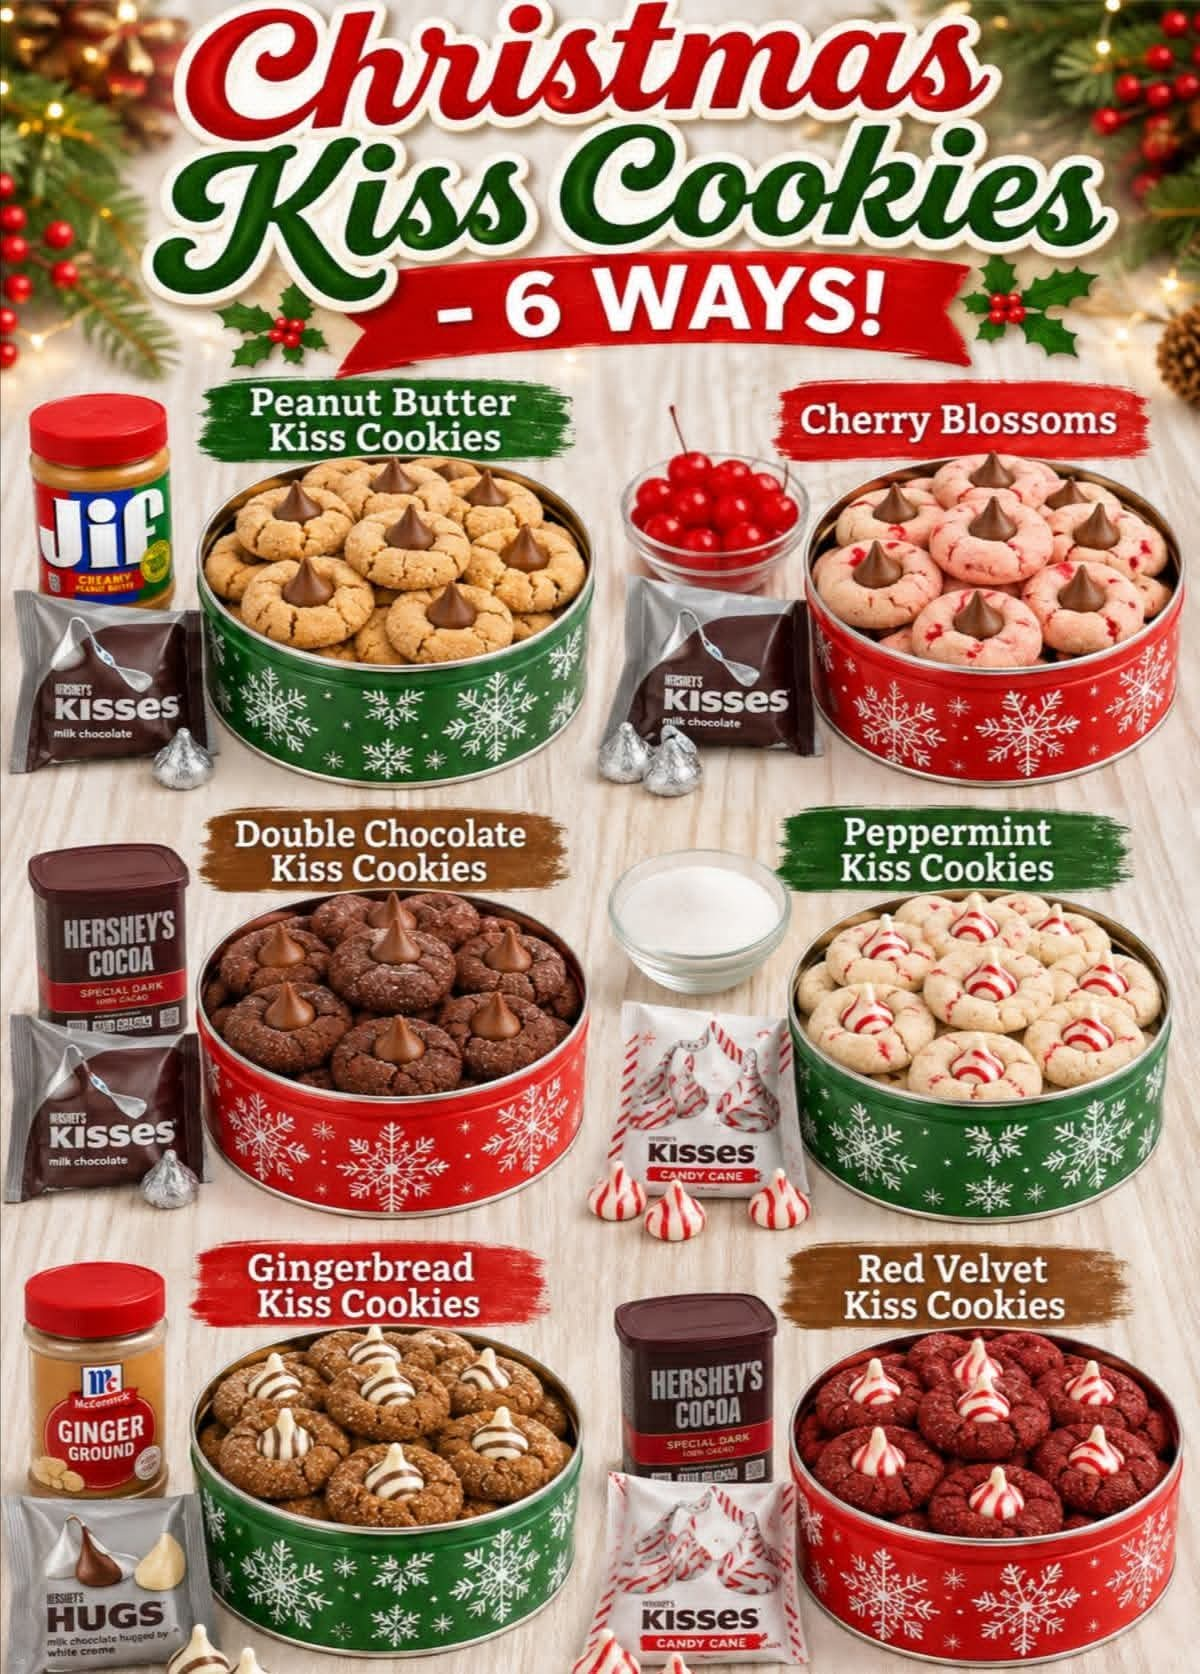
Christmas Kiss Cookies – 6 Delicious Ways
Introduction
Christmas baking is all about creating cookies that look beautiful, taste nostalgic, and bring everyone together around the kitchen table. Christmas Kiss Cookies are especially popular because they combine a soft, tender cookie with a chocolate kiss placed in the center while the cookies are still warm.
This collection gives you six festive versions to make throughout the holiday season: Peanut Butter Kiss Cookies, Cherry Blossoms, Double Chocolate Kiss Cookies, Peppermint Kiss Cookies, Gingerbread Kiss Cookies, and Red Velvet Kiss Cookies.
Each recipe has its own personality. Some are rich and chocolatey, some are warmly spiced, some have bright cherry flavor, and others bring a refreshing peppermint twist. They are excellent for Christmas cookie trays, holiday parties, cookie exchanges, edible gifts, and family baking days.
1. Peanut Butter Kiss Cookies
Introduction
Peanut Butter Kiss Cookies are one of the most recognizable versions of the classic Christmas Kiss Cookie. The cookie is soft and slightly chewy, with a rich peanut butter flavor that pairs beautifully with a smooth chocolate kiss in the center.
Ingredients
- 1/2 cup unsalted butter, softened
- 1/2 cup creamy peanut butter
- 1/2 cup granulated sugar
- 1/2 cup packed brown sugar
- 1 large egg
- 1 teaspoon vanilla extract
- 1 3/4 cups all-purpose flour
- 1 teaspoon baking soda
- 1/2 teaspoon salt
- 2 to 3 tablespoons granulated sugar, for rolling
- 36 chocolate kisses, unwrapped
Instructions
- Preheat the oven to 375°F (190°C).
- Line baking sheets with parchment paper.
- Beat the softened butter, peanut butter, granulated sugar, and brown sugar until creamy and fluffy.
- Add the egg and vanilla extract and beat until completely incorporated.
- In another bowl, whisk together the flour, baking soda, and salt.
- Gradually add the dry ingredients to the peanut butter mixture.
- Mix just until a soft dough forms.
- Scoop the dough into small portions and roll each portion into a ball.
- Roll each dough ball in granulated sugar.
- Place the balls on the prepared baking sheets, leaving space between them.
- Bake for approximately 8 to 10 minutes, until the edges are lightly golden.
- Immediately after removing the cookies from the oven, gently press one chocolate kiss into the center of each cookie.
- Allow the cookies to cool on the baking sheet for several minutes before transferring them to a cooling rack.
Method
The key to these cookies is not overbaking them. The centers should remain soft when the cookies come out of the oven. The chocolate kiss is pressed into the warm cookie so it settles slightly into the center without completely melting into the dough.
Formation
Form the dough into evenly sized balls so that all the cookies bake at the same rate. A small cookie scoop is useful for producing uniform cookies. The sugar coating gives the outside a delicate sparkle and a slightly crisp texture.
2. Cherry Blossoms
Introduction
Cherry Blossoms are a festive variation that combines buttery cookie dough, sweet cherry flavor, and a chocolate kiss. The bright red cherries make these cookies particularly attractive on Christmas dessert trays.
Ingredients
- 1/2 cup unsalted butter, softened
- 3/4 cup granulated sugar
- 1 large egg
- 1 teaspoon vanilla extract
- 1/2 teaspoon almond extract
- 1 1/2 cups all-purpose flour
- 1/2 teaspoon baking powder
- 1/4 teaspoon salt
- 1/2 cup finely chopped maraschino cherries, well drained
- 2 to 3 tablespoons cherry juice
- 36 chocolate kisses, unwrapped
- Extra granulated sugar, optional, for rolling
Instructions
- Preheat the oven to 350°F (175°C).
- Line baking sheets with parchment paper.
- Cream the butter and sugar until light and fluffy.
- Add the egg, vanilla, and almond extract.
- Mix until smooth.
- Whisk together the flour, baking powder, and salt.
- Gradually add the dry ingredients to the butter mixture.
- Fold in the chopped cherries.
- Add the cherry juice gradually until the dough has a soft, manageable consistency.
- Scoop the dough into small portions and roll into balls.
- Place the balls on the prepared baking sheets.
- Bake for approximately 10 to 12 minutes.
- Remove the cookies from the oven while they are still soft in the center.
- Immediately press a chocolate kiss into the middle of each cookie.
- Cool completely before storing.
Method
Drain the cherries very well before chopping them. Excess liquid can make the cookie dough too wet. The almond extract enhances the cherry flavor and gives the cookies a classic bakery-style aroma.
Formation
The chopped cherries should be distributed evenly throughout the dough. Press the chocolate kiss firmly enough to create a small center indentation but avoid crushing the cookie.
3. Double Chocolate Kiss Cookies
Introduction
For chocolate lovers, Double Chocolate Kiss Cookies are an especially indulgent Christmas treat. A rich chocolate cookie is combined with a chocolate kiss in the center, creating a soft, fudgy cookie with an extra chocolate finish.
Ingredients
- 1/2 cup unsalted butter, softened
- 3/4 cup granulated sugar
- 1/2 cup brown sugar
- 1 large egg
- 1 teaspoon vanilla extract
- 1 1/2 cups all-purpose flour
- 1/3 cup unsweetened cocoa powder
- 1 teaspoon baking soda
- 1/4 teaspoon salt
- 2 tablespoons milk
- 1 cup chocolate chips, optional
- 36 chocolate kisses, unwrapped
Instructions
- Preheat the oven to 350°F (175°C).
- Prepare baking sheets with parchment paper.
- Cream together the butter, granulated sugar, and brown sugar.
- Add the egg and vanilla.
- Beat until smooth.
- In a separate bowl, whisk together the flour, cocoa powder, baking soda, and salt.
- Slowly add the dry ingredients to the wet mixture.
- Add the milk and mix until a soft chocolate dough forms.
- Fold in the chocolate chips if using.
- Scoop the dough into small balls.
- Arrange them on the baking sheets.
- Bake for approximately 9 to 11 minutes.
- Remove from the oven.
- Immediately place a chocolate kiss in the center of each warm cookie.
- Allow the cookies to cool before serving.
Method
Using unsweetened cocoa powder gives the cookie a deep chocolate flavor without making the dough overly sweet. Do not bake until the cookies look completely firm; they will continue setting as they cool.
Formation
For an attractive holiday appearance, keep the cookies relatively small and uniform. The chocolate kiss should sit directly in the center, creating the signature appearance of this cookie family.
4. Peppermint Kiss Cookies
Introduction
Peppermint Kiss Cookies bring a cool, refreshing flavor to the Christmas cookie platter. A soft vanilla or chocolate cookie is paired with peppermint flavor and finished with a peppermint-flavored chocolate kiss.
Ingredients
- 1/2 cup unsalted butter, softened
- 3/4 cup granulated sugar
- 1 large egg
- 1 teaspoon vanilla extract
- 1/2 teaspoon peppermint extract
- 1 3/4 cups all-purpose flour
- 1 teaspoon baking powder
- 1/4 teaspoon salt
- 2 tablespoons milk
- Red or green sanding sugar, optional
- 36 peppermint-flavored chocolate kisses
Instructions
- Preheat the oven to 350°F (175°C).
- Line baking sheets with parchment paper.
- Beat the butter and sugar until creamy.
- Add the egg, vanilla, and peppermint extract.
- Mix well.
- Combine the flour, baking powder, and salt in another bowl.
- Gradually add the dry mixture to the butter mixture.
- Add the milk and mix until a soft dough forms.
- Shape the dough into small balls.
- Roll the balls in sanding sugar if desired.
- Place them on the baking sheets.
- Bake for approximately 9 to 11 minutes.
- Remove from the oven.
- Immediately press a peppermint chocolate kiss into the center.
- Allow the cookies to cool completely.
Method
Peppermint extract is powerful, so a small amount is usually enough. The peppermint chocolate kiss provides additional flavor after baking. If you use peppermint candies or peppermint-flavored chocolate, adjust the extract according to taste.
Formation
The colorful sugar coating makes these cookies particularly festive. Keep the coating light so that the sugar does not overpower the peppermint and chocolate flavors.
5. Gingerbread Kiss Cookies
Introduction
Gingerbread Kiss Cookies combine the warm spices traditionally associated with Christmas baking with the familiar chocolate kiss center. They are soft, fragrant, and perfect for anyone who loves cinnamon, ginger, and molasses.
Ingredients
- 1/2 cup unsalted butter, softened
- 1/2 cup packed brown sugar
- 1/4 cup molasses
- 1 large egg
- 1 teaspoon vanilla extract
- 1 3/4 cups all-purpose flour
- 1 teaspoon ground ginger
- 1 teaspoon ground cinnamon
- 1/4 teaspoon ground cloves
- 1/4 teaspoon nutmeg
- 1 teaspoon baking soda
- 1/4 teaspoon salt
- 1/4 cup granulated sugar, for rolling
- 36 chocolate kisses
Instructions
- Preheat the oven to 350°F (175°C).
- Line baking sheets with parchment paper.
- Cream the butter and brown sugar until smooth.
- Add the molasses, egg, and vanilla.
- Mix thoroughly.
- In another bowl, combine the flour, ginger, cinnamon, cloves, nutmeg, baking soda, and salt.
- Gradually mix the dry ingredients into the wet ingredients.
- Chill the dough for approximately 20 to 30 minutes if it feels too soft.
- Roll the dough into small balls.
- Coat each ball in granulated sugar.
- Place the balls on the baking sheets.
- Bake for approximately 9 to 11 minutes.
- Remove from the oven.
- Immediately press a chocolate kiss into the center of every cookie.
- Let cool completely.
Method
Chilling the dough helps control spreading and makes the cookies easier to shape. Molasses gives the cookies their characteristic gingerbread depth and helps keep the centers tender.
Formation
The finished cookies should have slightly cracked, sugar-coated surfaces with a chocolate kiss sitting in the middle. They make an especially attractive addition to a mixed Christmas cookie box.
6. Red Velvet Kiss Cookies
Introduction
Red Velvet Kiss Cookies are soft, rich, and visually striking. Their deep red color makes them perfect for Christmas, while cocoa and vanilla create the familiar red velvet flavor. A chocolate kiss in the center completes the cookie.
Ingredients
- 1/2 cup unsalted butter, softened
- 3/4 cup granulated sugar
- 1/4 cup brown sugar
- 1 large egg
- 1 teaspoon vanilla extract
- 1 tablespoon red food coloring
- 1 1/2 cups all-purpose flour
- 1/4 cup unsweetened cocoa powder
- 1 teaspoon baking soda
- 1/4 teaspoon salt
- 1 tablespoon milk, if needed
- 36 chocolate kisses
Instructions
- Preheat the oven to 350°F (175°C).
- Line baking sheets with parchment paper.
- Beat the butter, granulated sugar, and brown sugar until fluffy.
- Add the egg and vanilla.
- Mix in the red food coloring.
- In a separate bowl, whisk together the flour, cocoa powder, baking soda, and salt.
- Gradually add the dry ingredients to the wet ingredients.
- Add a small amount of milk if the dough is too stiff.
- Mix just until combined.
- Shape the dough into small balls.
- Place the balls on the prepared baking sheets.
- Bake for approximately 9 to 11 minutes.
- Remove from the oven.
- Immediately place a chocolate kiss in the center.
- Cool on the baking sheet for several minutes.
- Transfer to a rack to cool completely.
Method
The cocoa powder should provide a subtle chocolate background rather than overpowering the red velvet flavor. Avoid overmixing once the flour has been incorporated because excessive mixing can make the cookies less tender.
Formation
The red cookie and chocolate center create a dramatic Christmas appearance. For an elegant finish, serve them alongside white, chocolate, and green holiday cookies.
The History of Kiss Cookies
Kiss-style cookies became popular in American home baking as chocolate candies became increasingly incorporated into cookies, bars, and holiday desserts. One of the best-known versions is the peanut butter cookie topped with a chocolate kiss.
The basic idea is simple: prepare a soft cookie dough, shape it into individual portions, bake until just set, and place a chocolate candy in the center while the cookie is still warm.
Over time, bakers developed many variations using different cookie flavors and different types of chocolate candies. Christmas became one of the most popular occasions for these cookies because the small chocolate center gives every cookie a decorative, finished appearance without requiring complicated frosting or decorating.
General Baking Method
For the best results with all six varieties, keep the following principles in mind.
Use Room-Temperature Butter
Softened butter blends more evenly with sugar and helps produce a consistent cookie texture.
Do Not Overmix
Once the flour is added, mix only until the ingredients are combined. Overmixing can create tougher cookies.
Keep Cookie Sizes Consistent
Uniform dough balls bake evenly and make your finished cookie tray look professional.
Do Not Overbake
Kiss Cookies are usually best when the centers remain soft. They will continue to firm up while cooling.
Add the Kiss Immediately
The chocolate kiss should be pressed into the cookie as soon as it comes out of the oven. The warmth helps the candy adhere to the cookie.
Allow the Chocolate to Set
After adding the chocolate, let the cookies cool completely before stacking them. If necessary, place them in the refrigerator for a short time to help the chocolate firm up.
Christmas Cookie Platter Formation
For a beautiful holiday platter, arrange the six varieties together.
Place Peanut Butter Kiss Cookies on one side, followed by Cherry Blossoms. Add Double Chocolate Kiss Cookies for a darker contrast, Peppermint Kiss Cookies for a bright holiday accent, Gingerbread Kiss Cookies for warm spice, and Red Velvet Kiss Cookies for a dramatic red centerpiece.
Different shapes, colors, and flavors make the platter look abundant without requiring complicated decorations.
Storage
Store completely cooled cookies in an airtight container.
Keep different varieties separated if you want to prevent flavors from transferring between cookies. Most of these cookies can remain fresh for several days when properly stored.
For longer storage, freeze the fully cooled cookies in airtight freezer-safe containers. Separate layers with parchment paper. Thaw them at room temperature before serving.
Make-Ahead Tips
The cookie dough for many of these recipes can be prepared ahead of time and refrigerated before baking. This makes Christmas baking easier because the dough can be prepared on one day and baked later.
You can also freeze portions of unbaked cookie dough. Shape the dough into balls, freeze them on a tray, and then transfer them to a freezer-safe container. When ready to bake, bake according to the recipe, adding a little extra baking time if necessary.
For the best appearance, add the chocolate kisses after baking rather than freezing the kisses with the dough.
Serving Ideas
These cookies are perfect for:
- Christmas cookie exchanges
- Holiday dessert tables
- Family gatherings
- School parties
- Office celebrations
- Christmas Eve dessert trays
- Homemade edible gifts
- Cookie tins
- Holiday bake sales
- Winter afternoon treats
They also pair wonderfully with coffee, hot chocolate, tea, warm milk, or a glass of cold milk.
Why Cookie Lovers Love These
Cookie lovers appreciate Kiss Cookies because they offer several textures and flavors in one small dessert. The cookie itself can be buttery, nutty, spicy, fruity, minty, or chocolatey, while the chocolate center adds richness.
They are also easy to customize. Once you understand the basic technique, you can experiment with different cookie doughs, flavored chocolate kisses, nuts, sprinkles, sanding sugar, extracts, and fillings.
The six varieties in this collection are especially useful during the holidays because you can prepare one large assortment and offer something for almost every taste.
Conclusion
Christmas Kiss Cookies are a wonderful example of how a simple baking technique can produce an impressive holiday dessert. The six versions in this collection offer a complete range of Christmas flavors, from classic peanut butter and rich chocolate to cherry, peppermint, gingerbread, and red velvet.
The most important secret is timing: bake the cookies until they are just set, then press the chocolate kiss into the center while the cookies are still warm. Once cooled, each cookie becomes a small festive treat with a soft cookie base and a rich chocolate finish.
Whether you make one variety or all six, these cookies are made for sharing. Pack them into holiday tins, arrange them on a Christmas platter, or serve them fresh from the cooling rack with your favorite warm drink.
Christmas baking is not only about the finished cookie. It is about the smell filling the kitchen, the family gathering around the counter, and the memories created while making something together.
Final Note for Cookie Lovers
If you love soft cookies, chocolate centers, classic Christmas flavors, and easy holiday baking, this six-way Kiss Cookie collection deserves a place in your Christmas recipe box. Make one batch for your family, several varieties for a cookie exchange, or all six for the ultimate Christmas cookie platter.