
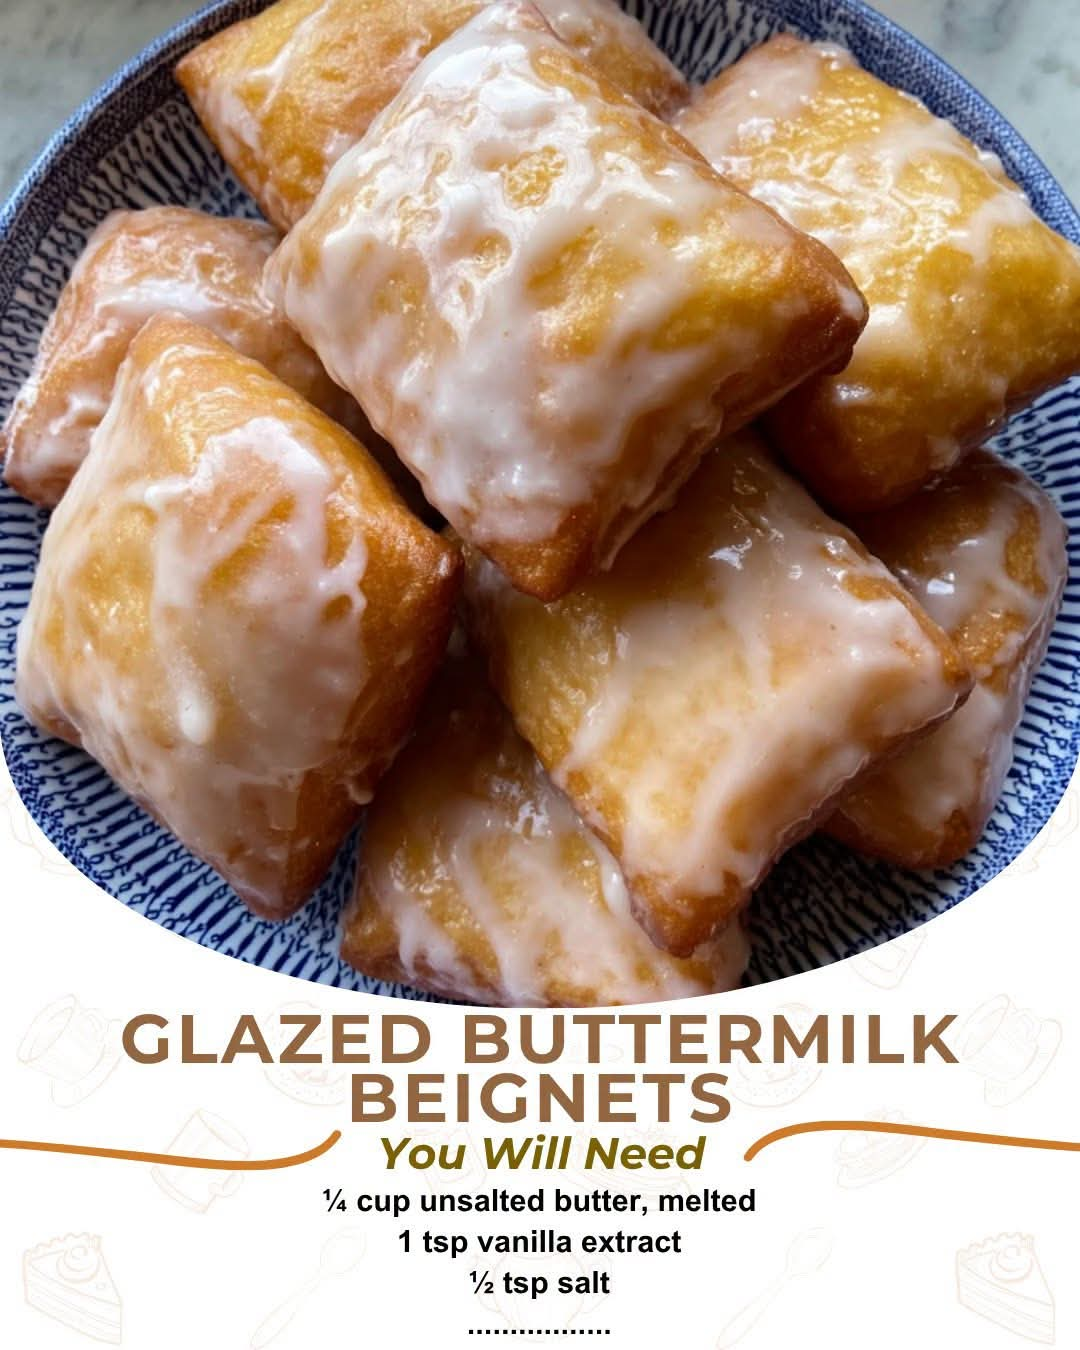
Glazed Buttermilk Beignets
Introduction
Glazed Buttermilk Beignets are a wonderfully light and fluffy homemade pastry with a golden, crisp exterior and a soft, pillowy center. Unlike a dense doughnut, a well-made beignet has an airy interior that becomes beautifully tender when fried.
This recipe combines the richness of buttermilk, butter, egg, and vanilla with yeast-leavened dough. After the dough rises, it is rolled, cut into individual pieces, fried until golden, and finished with a smooth vanilla glaze.
They are perfect for breakfast, brunch, afternoon coffee, weekend baking, or a special dessert. Served warm, these beignets are especially delicious because the glaze melts slightly over the freshly fried pastry.
Ingredients
For the Beignets
- 3½ cups (438 g) all-purpose flour
- 2¼ teaspoons (1 packet or 7 g) active dry yeast
- ¼ cup (60 ml) warm water, approximately 110°F (43°C)
- ¾ cup (180 ml) buttermilk, warmed slightly
- ¼ cup (50 g) granulated sugar
- 1 large egg, room temperature
- ¼ cup (57 g) unsalted butter, melted and slightly cooled
- 1 teaspoon vanilla extract
- ½ teaspoon salt
- Vegetable oil, for frying
For the Vanilla Glaze
- 2 cups (240 g) powdered sugar
- 3 tablespoons (45 ml) milk or buttermilk
- 1 tablespoon (14 g) unsalted butter, melted
- 1 teaspoon vanilla extract
- Pinch of salt
- 1–2 tablespoons additional milk, if needed for thinning
Optional Toppings
- Powdered sugar
- Finely grated lemon zest
- Chopped toasted pecans
- Cinnamon
- A light drizzle of additional vanilla glaze
Equipment
- Large mixing bowl
- Small bowl
- Wooden spoon or dough whisk
- Rolling pin
- Bench scraper or sharp knife
- Deep, heavy-bottomed pot or Dutch oven
- Candy or deep-fry thermometer
- Slotted spoon or spider strainer
- Wire rack
- Baking sheets
- Parchment paper
- Pastry brush or spoon for glazing
Instructions
Step 1: Activate the Yeast
Pour the warm water into a small bowl.
Sprinkle the active dry yeast over the water and add a small pinch of the sugar from the recipe.
Stir gently and allow the mixture to stand for approximately 5 to 10 minutes.
The yeast should become foamy or visibly active. If there is no sign of activity, the yeast may be old or the water may have been too hot or too cold.
Step 2: Combine the Wet Ingredients
In a large mixing bowl, combine the warmed buttermilk, remaining granulated sugar, egg, melted butter, and vanilla extract.
Whisk until the mixture is smooth.
Make sure the melted butter has cooled somewhat before adding the egg so that the egg does not become partially cooked.
Add the activated yeast mixture and stir gently.
Step 3: Add the Flour
Add approximately 3 cups of the flour and the salt to the wet mixture.
Stir until a soft, shaggy dough begins to form.
Gradually add the remaining flour, a little at a time.
You may not need every last gram of flour. The finished dough should be soft and slightly tacky but not excessively sticky.
Avoid adding too much flour because a stiff dough can produce heavier, less tender beignets.
Step 4: Knead the Dough
Turn the dough onto a lightly floured work surface.
Knead for approximately 6 to 8 minutes, until the dough becomes smoother, softer, and more elastic.
You can also knead it in a stand mixer fitted with a dough hook on low to medium-low speed.
The dough should feel soft and supple when finished.
Step 5: First Rise
Place the dough in a lightly greased bowl.
Turn the dough once so that the surface is lightly coated.
Cover the bowl with plastic wrap or a clean kitchen towel.
Place it somewhere warm and allow it to rise for approximately 1 to 1½ hours, or until it has noticeably increased in size.
The exact rising time depends on the temperature of your kitchen.
Step 6: Prepare the Dough for Cutting
Once the dough has risen, gently press it down to release some of the excess gas.
Transfer it to a lightly floured work surface.
Roll the dough into a rectangle approximately ¼ to ½ inch thick.
Try to maintain an even thickness so the beignets cook consistently.
Step 7: Cut the Beignets
Using a sharp knife, bench scraper, or pizza cutter, cut the dough into approximately 2½- to 3-inch squares or rectangles.
There is no need to make every piece perfectly identical.
Place the cut pieces on a lightly floured or parchment-lined baking sheet, leaving space between them.
Cover loosely and allow them to rest for approximately 20 to 30 minutes.
This short rest helps the dough relax and become lighter before frying.
Method: Frying the Beignets
Step 8: Heat the Oil
Pour vegetable oil into a deep, heavy-bottomed pot.
The oil should be deep enough to allow the beignets to float freely without touching the bottom.
Heat the oil to approximately 350°F to 360°F (175°C to 182°C).
Use a thermometer to monitor the temperature.
Do not overcrowd the pot, because adding too many pieces at once can dramatically lower the oil temperature.
Step 9: Fry
Carefully place several pieces of dough into the hot oil.
Fry for approximately 1½ to 2½ minutes per side, depending on their thickness.
Turn them gently with a slotted spoon or spider strainer.
The beignets should puff as they cook and become golden brown on both sides.
If they brown extremely quickly while remaining doughy inside, the oil is too hot. If they absorb a lot of oil and take a long time to brown, the oil is probably too cool.
Step 10: Drain
Remove the finished beignets from the oil using a slotted spoon.
Place them on a wire rack positioned over a baking sheet, or on a paper-towel-lined plate.
Allow excess oil to drain.
Continue frying the remaining dough, maintaining the oil temperature between batches.
Method: Preparing the Vanilla Glaze
Step 11: Make the Glaze
Place the powdered sugar in a medium bowl.
Add the milk or buttermilk, melted butter, vanilla extract, and a pinch of salt.
Whisk until smooth.
If the glaze is too thick, add additional milk about 1 teaspoon at a time.
If it becomes too thin, add a little more powdered sugar.
The ideal glaze should be thick enough to coat the beignets but fluid enough to spread easily.
Step 12: Glaze the Beignets
Allow the fried beignets to cool for several minutes, but do not let them become completely cold if you want the glaze to soften slightly over the warm pastry.
Dip the top of each beignet into the vanilla glaze.
Allow excess glaze to drip back into the bowl.
Place the glazed beignets on a wire rack and allow the glaze to set for several minutes.
For an extra-rich finish, you can dip them a second time after the first layer has partially set.
Formation and Texture
The characteristic texture of these beignets comes from the yeast-leavened dough.
During fermentation, the yeast produces carbon dioxide. This gas becomes trapped within the developing dough structure, creating tiny pockets of air.
When the dough enters the hot oil, the moisture inside rapidly turns into steam while the trapped gases expand. This causes the beignets to puff and develop their characteristic airy interior.
The buttermilk contributes tenderness and a subtle tangy flavor, while the butter and egg add richness.
The hot oil creates the golden exterior, while the interior remains soft and fluffy when the dough has been properly hydrated and fermented.
Important Tips for Light and Fluffy Beignets
Do Not Over-Flour the Dough
The dough should be soft and slightly tacky. Adding too much flour can make the finished beignets dense.
Watch the Yeast
Water that is too hot can damage the yeast. Warm water around 110°F (43°C) is appropriate for activating active dry yeast.
Give the Dough Enough Time to Rise
A properly risen dough produces lighter beignets. Do not rely only on the clock; look for a noticeable increase in volume.
Keep the Oil Temperature Consistent
Maintaining approximately 350°F to 360°F is important. The temperature will naturally fall when dough is added, so allow the oil to recover between batches.
Avoid Overcrowding
Fry only a few pieces at a time. This helps maintain the oil temperature and gives each beignet enough room to puff.
Glaze While Slightly Warm
A slightly warm beignet allows the glaze to spread beautifully over the surface without immediately running off.
History of Beignets
Beignets have a long culinary history and are particularly associated with New Orleans and Louisiana cuisine. The name comes from French culinary traditions, where similar fried dough preparations have been enjoyed for generations.
New Orleans-style beignets became especially famous as a café and breakfast treat, traditionally served hot and generously covered with powdered sugar.
The basic concept, however, is much broader than one particular recipe. Many cultures have developed their own forms of fried dough, using different ingredients, shapes, fermentation methods, and toppings.
This buttermilk version combines the traditional appeal of a yeast-raised fried pastry with the tenderness and slight tang that buttermilk provides. Instead of relying solely on powdered sugar, the beignets receive a rich vanilla glaze.
A Make-Ahead Method
The dough can be prepared the night before.
After kneading, place it in a lightly greased bowl, cover it tightly, and refrigerate overnight.
The slower fermentation can develop additional flavor while allowing you to prepare the dough ahead of time.
The following morning, remove the dough from the refrigerator and allow it to sit at room temperature until it becomes easier to roll.
Roll, cut, rest, fry, and glaze as directed.
Storage
These beignets are best served fresh.
If you have leftovers, allow them to cool completely and store them in an airtight container at room temperature for up to 1 to 2 days.
The glaze may soften during storage.
For the best texture, rewarm the beignets briefly before serving. Avoid overheating them, as this can make the pastry dry.
Serving Suggestions
Serve the glazed beignets warm with:
- Freshly brewed coffee
- Espresso
- Hot tea
- Hot chocolate
- Fresh berries
- Sliced bananas
- Whipped cream
- Fresh fruit preserves
- A little additional vanilla glaze
They make an especially inviting breakfast centerpiece when arranged on a large serving platter and finished with a light dusting of powdered sugar.
For Beignet Lovers
For people who love soft, bakery-style pastries, these beignets offer a wonderful combination of textures. The outside becomes lightly crisp and golden from frying, while the inside remains soft, airy, and buttery.
The vanilla glaze adds another layer of sweetness without completely covering the delicate flavor of the buttermilk dough.
For an especially indulgent version, serve the beignets warm and allow the glaze to become slightly glossy and soft. The contrast between the freshly fried pastry and the creamy vanilla coating makes every bite particularly satisfying.
Conclusion
Glazed Buttermilk Beignets are a beautiful homemade treat that transforms simple pantry ingredients into soft, golden, yeast-raised pastries.
The key to achieving the best result is patience: allow the yeast dough to rise properly, avoid adding excessive flour, roll the dough evenly, maintain the correct frying temperature, and glaze the beignets while they are still slightly warm.
The finished pastries should be golden and lightly crisp outside, airy and pillowy inside, and covered with a smooth vanilla glaze.
Whether served for breakfast, brunch, afternoon coffee, or a cozy weekend indulgence, these homemade beignets are the kind of treat that is best enjoyed fresh, warm, and shared with people who love a truly comforting pastry.