
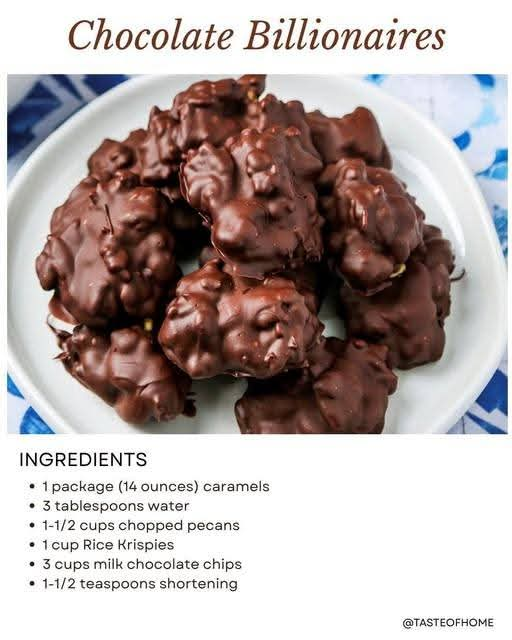
Homemade Chocolate Caramel Candies (A Classic Family Favorite)
Introduction
Some recipes are simply too good to leave behind, and these Homemade Chocolate Caramel Candies are one of them. Rich, buttery caramel coated in smooth chocolate creates an irresistible combination that has delighted families for generations. This treasured recipe was shared by a friend while living in Texas, and it became so beloved that it traveled to every new home. Whether you’re making them for holidays, gifts, family gatherings, or simply to satisfy a sweet tooth, these candies are guaranteed to impress.
Their perfect balance of creamy caramel and decadent chocolate makes every bite unforgettable. Once you make them from scratch, you’ll understand why everyone raves about these delicious homemade treats.
Ingredients
For the Caramel
- 1 cup unsalted butter
- 1 cup light corn syrup
- 1 can (14 ounces) sweetened condensed milk
- 2 cups granulated sugar
- 1 teaspoon vanilla extract
- ¼ teaspoon salt
For the Chocolate Coating
- 3 cups milk or semi-sweet chocolate chips
- 2 tablespoons coconut oil or vegetable shortening
Optional Toppings
- Flaky sea salt
- Crushed pecans
- Chopped almonds
- Colorful sprinkles
Equipment Needed
- Heavy-bottom saucepan
- Candy thermometer
- Wooden spoon or silicone spatula
- 8×8-inch baking pan
- Parchment paper
- Sharp knife
- Microwave-safe bowl
Instructions
Step 1: Prepare the Pan
Line an 8×8-inch baking dish with parchment paper, leaving extra paper hanging over the sides for easy removal.
Step 2: Make the Caramel
Combine butter, sugar, corn syrup, sweetened condensed milk, and salt in a heavy saucepan.
Cook over medium heat while stirring constantly.
Continue cooking until the mixture reaches 245°F (118°C) on a candy thermometer.
Remove from the heat and stir in the vanilla extract.
Step 3: Cool the Caramel
Pour the caramel into the prepared pan.
Allow it to cool completely at room temperature for 3–4 hours or refrigerate for about 1 hour.
Step 4: Cut into Pieces
Lift the caramel from the pan.
Using a lightly buttered knife, cut into bite-sized squares.
Step 5: Melt the Chocolate
Combine chocolate chips and coconut oil.
Melt in the microwave in 30-second intervals, stirring after each until smooth.
Step 6: Coat the Caramels
Dip each caramel square into the melted chocolate.
Use two forks to lift and drain excess chocolate.
Place onto parchment paper.
Add sea salt or nuts before the chocolate hardens if desired.
Step 7: Let Set
Allow candies to sit until the chocolate is completely firm.
Store in an airtight container.
Preparation Method
This recipe follows the traditional candy-making process. Slow cooking allows the caramel to develop its deep buttery flavor while achieving the perfect chewy consistency. Once cooled, each piece is dipped in silky melted chocolate for a beautiful homemade finish.
Tips for Perfect Candies
- Stir constantly to prevent scorching.
- Use a candy thermometer for the best texture.
- Don’t rush the cooling process.
- Chill briefly before cutting for neat squares.
- Temper the chocolate if you want a glossy finish.
- Store in a cool place to keep the chocolate firm.
A Brief History
Chocolate-covered caramels became popular in the United States during the late 1800s as candy makers began pairing rich homemade caramel with milk chocolate. Texas kitchens have long embraced homemade candy recipes, especially during Christmas and family celebrations. These treats have remained favorites because they’re simple to make, store well, and are perfect for sharing.
Serving Suggestions
These candies are wonderful:
- With coffee or hot chocolate
- On holiday dessert trays
- Wrapped as homemade gifts
- At bake sales
- For birthday parties
- As an afternoon sweet treat
Why Everyone Loves Them
Chocolate caramel candies are loved because they offer the perfect combination of flavors and textures. The chewy, buttery caramel contrasts beautifully with the smooth chocolate coating, creating a rich and satisfying bite. They’re nostalgic, elegant enough for gifts, and always disappear quickly at family gatherings and celebrations.
Storage
- Room Temperature: Up to 2 weeks in an airtight container.
- Refrigerator: Up to 1 month.
- Freezer: Up to 3 months. Thaw before serving.
Conclusion
These Homemade Chocolate Caramel Candies are a timeless recipe worth keeping for years to come. Rich caramel, smooth chocolate, and endless customization options make them a favorite for every occasion. Whether you’re making them as holiday gifts, sharing them with friends, or enjoying them as a homemade indulgence, they’re sure to become a treasured family tradition. One bite is all it takes to understand why everyone keeps asking for the recipe!