
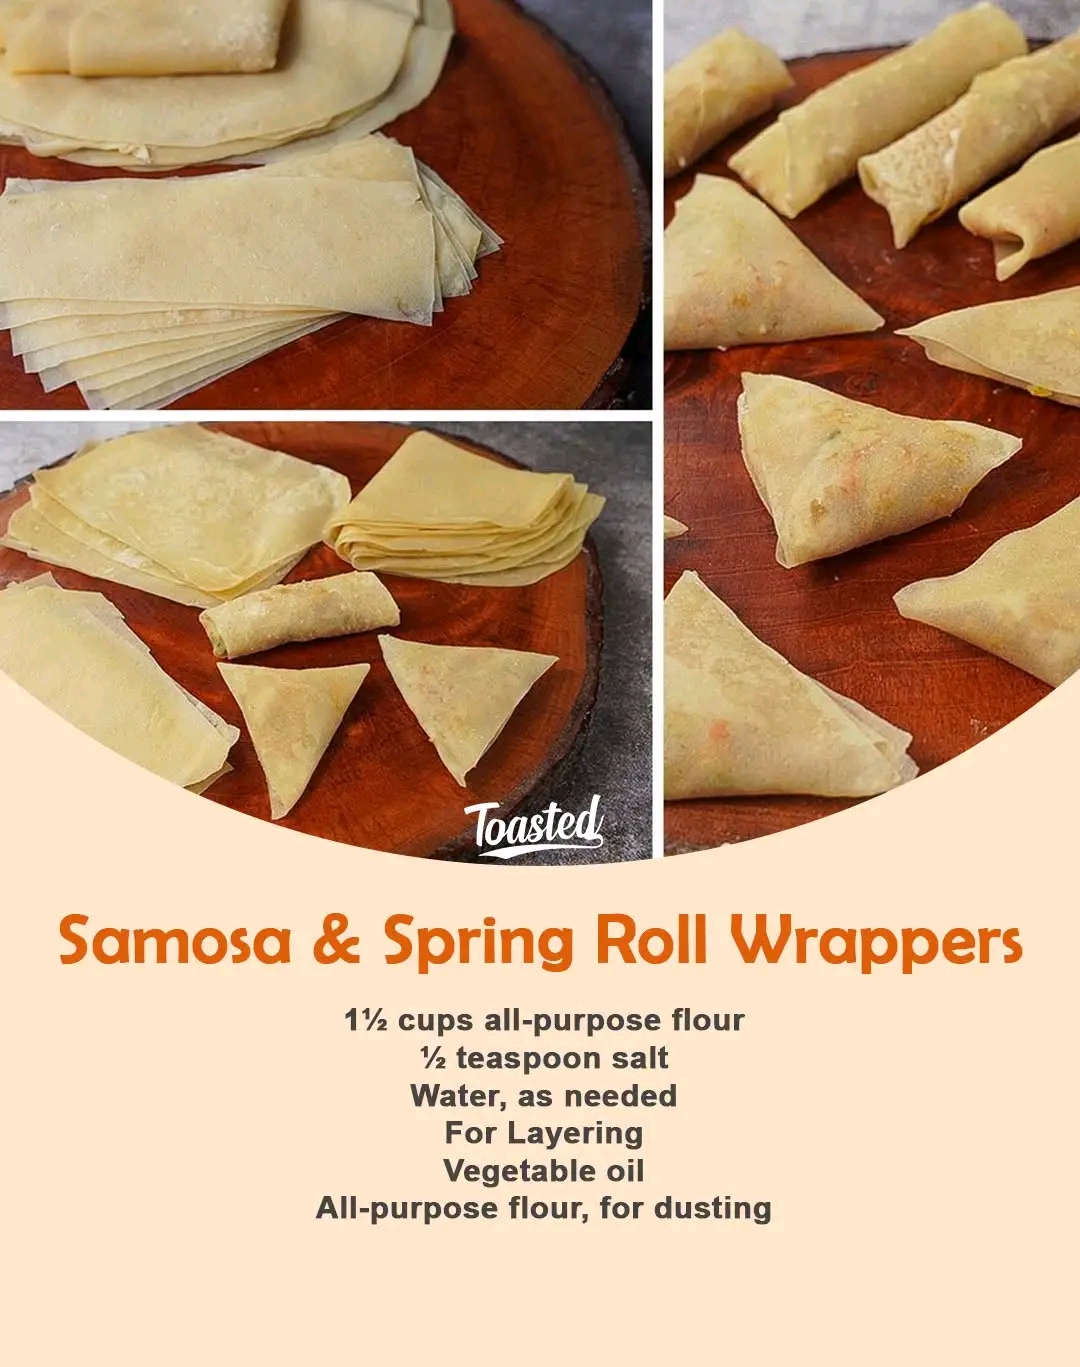
Homemade Samosa & Spring Roll Wrappers Recipe
Thin, Crispy, Homemade Sheets Perfect for Delicious Fillings
Introduction
Homemade samosa and spring roll wrappers are a simple kitchen treasure that can transform ordinary fillings into crispy, golden snacks. Making your own wrappers gives you control over the texture, freshness, and quality of every bite. These delicate sheets are soft enough to fold easily, yet strong enough to hold flavorful fillings without tearing.
Whether you are preparing spicy potato samosas, vegetable spring rolls, chicken rolls, or sweet dessert wraps, this homemade dough creates the perfect base. Once you learn this method, you may never want to rely on store-bought wrappers again!
History of Samosa & Spring Roll Wrappers
Samosas have a long history that stretches back many centuries. They are believed to have originated in the Middle East and Central Asia before traveling through trade routes into South Asia, where they became a beloved street food. Over time, different regions created their own versions with unique fillings, spices, and folding styles.
Spring rolls have their roots in Chinese cuisine and were traditionally prepared during the Spring Festival, celebrating the arrival of a new season. Their thin wrapper became popular worldwide because of its light texture and ability to hold many different fillings.
Today, both samosa and spring roll wrappers are enjoyed globally and have become favorites for parties, family gatherings, and everyday snacks.
Ingredients
For the Wrapper Dough
- 1½ cups (190 g) all-purpose flour
- ½ teaspoon salt
- Water, as needed to make a soft dough
For Layering
- Vegetable oil, as needed
- All-purpose flour, for dusting
Optional Fillings Ideas
Classic Samosa Filling:
- Mashed potatoes
- Green peas
- Onion
- Garlic
- Ginger
- Cumin
- Coriander
- Chili
- Salt and pepper
Spring Roll Filling:
- Shredded cabbage
- Carrots
- Bell peppers
- Mushrooms
- Chicken or shrimp (optional)
- Soy sauce and seasonings
Preparation Method
Step 1: Prepare the Dough
- Add flour and salt into a large mixing bowl.
- Slowly add water while mixing until a dough begins to form.
- Knead the dough for several minutes until smooth and soft.
- Cover the dough with a clean cloth or plastic wrap.
- Let it rest for 10 minutes. Resting helps the gluten relax, making the wrappers easier to roll.
Step 2: Divide and Roll
- Divide the dough into 16 equal portions.
- Roll each portion into a small, thin circle similar to a roti.
- Keep the rolled pieces covered so they do not dry out.
Step 3: Create the Layered Wrappers
- Take 3 rolled dough circles.
- Brush each one lightly with vegetable oil.
- Sprinkle a small amount of flour between each layer.
- Stack the oiled and floured circles together.
- Place one plain dough circle on top without oil or flour.
- Carefully roll the stack into a large, thin circle.
This layering technique creates very thin wrappers that separate easily after cooking.
Step 4: Cook the Wrapper Sheets
- Heat a dry nonstick pan or tawa over low heat.
- Place the stacked dough onto the pan.
- Cook for about 30 seconds until the surface looks slightly dry.
- Flip and cook for another 10 seconds.
- Do not allow the wrappers to brown because they should remain soft and flexible.
Step 5: Separate and Store
- While still warm, gently peel each wrapper apart.
- Trim the edges to create even sheets.
- Use immediately for samosas or spring rolls.
- If storing, place parchment or wax paper between each wrapper.
- Keep in an airtight container or freezer bag.
Freezer Storage: Up to 2 months.
Cooking Methods Using These Wrappers
Method 1: Crispy Samosas
- Prepare your favorite filling.
- Cut wrappers into suitable shapes.
- Fold into triangles.
- Seal edges with a flour-and-water paste.
- Deep fry or air fry until golden and crispy.
Method 2: Homemade Spring Rolls
- Add vegetable, chicken, or seafood filling.
- Roll tightly and seal the edges.
- Fry until crunchy and golden.
- Serve with sweet chili sauce or your favorite dip.
Tips for Perfect Wrappers
- Do not add too much water; the dough should be soft but not sticky.
- Resting the dough makes rolling much easier.
- Keep unused dough covered to prevent drying.
- Cook the wrappers only until dry, not browned.
- Separate the layers while they are warm for the best results.
- For extra crispiness, fry filled rolls at medium heat.
Formation of the Recipe
The secret of these wrappers is the layered dough technique. By brushing the dough circles with oil and flour before stacking and rolling, tiny layers are created. When heated, these layers separate into thin sheets that are flexible, smooth, and perfect for folding.
This traditional method creates wrappers that are fresher, more flavorful, and more reliable than many packaged versions.
Serving & Pairing Ideas
These homemade wrappers can be filled with:
❤️ Spiced potatoes and peas
❤️ Chicken and vegetables
❤️ Cheese and herbs
❤️ Minced meat with spices
❤️ Chocolate and bananas for dessert rolls
Serve them with:
- Mint chutney
- Garlic sauce
- Sweet chili sauce
- Yogurt dips
- Tomato salsa
Conclusion
Making homemade samosa and spring roll wrappers is easier than it looks and brings a special homemade touch to your favorite snacks. With simple ingredients like flour, salt, water, and a little patience, you can create fresh wrappers that are thin, strong, and perfectly crispy when cooked.
Once you master this recipe, you can prepare endless combinations of delicious snacks for family, friends, and celebrations.
Lovers of Homemade Cooking
For anyone who loves fresh flavors, traditional recipes, and the joy of making food from scratch, these wrappers are a must-try. They are budget-friendly, freezer-friendly, and perfect for sharing with the people you love.
A homemade wrapper is more than just dough — it is the beginning of a delicious memory. ❤️