
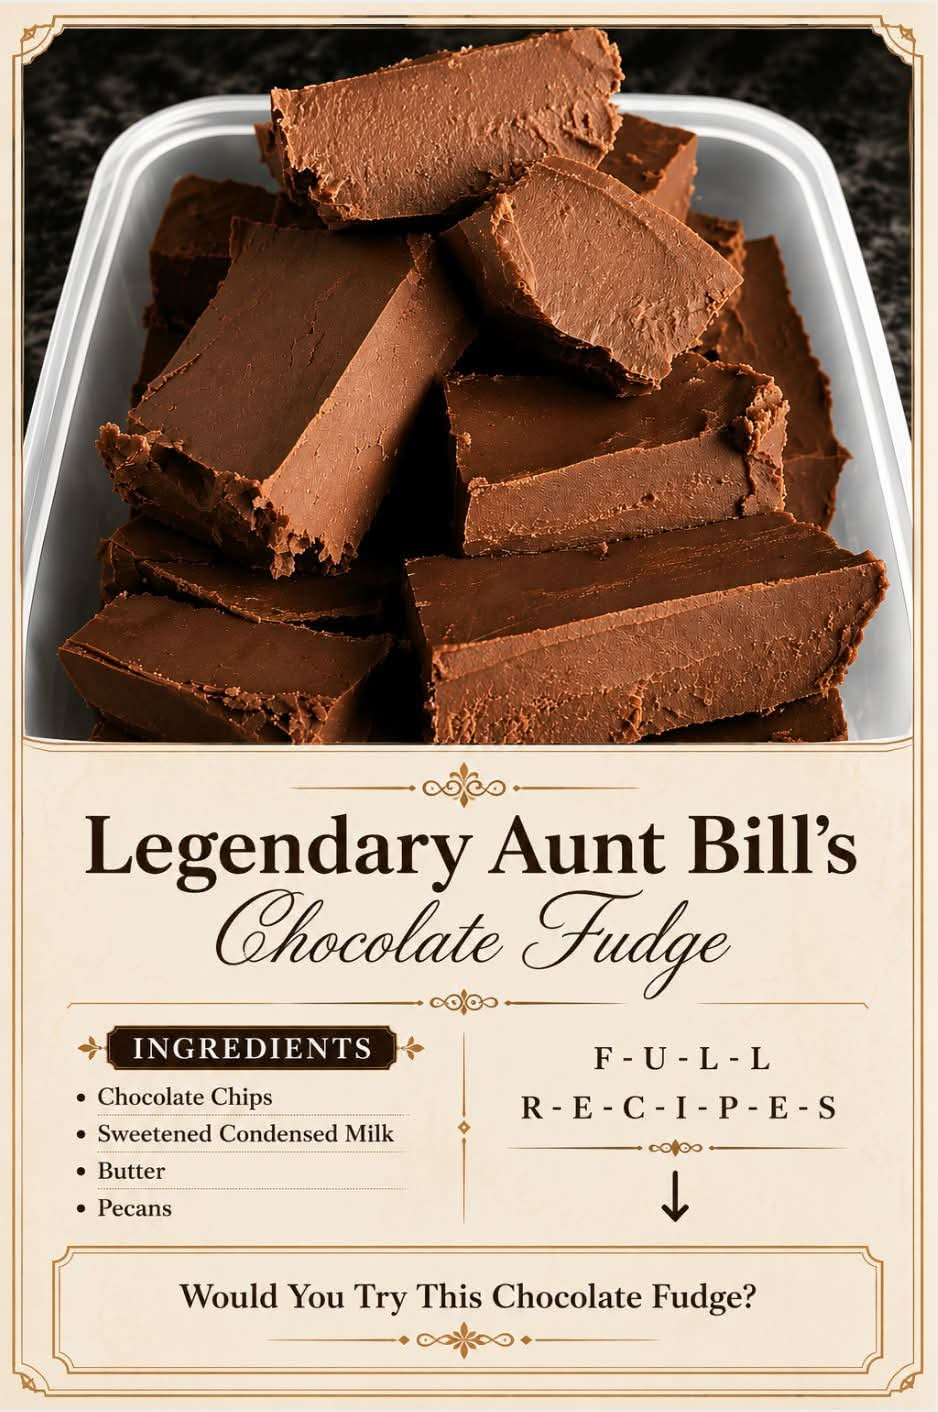
Legendary Aunt Bill’s Chocolate Fudge
Introduction
Legendary Aunt Bill’s Chocolate Fudge is the kind of old-fashioned candy that brings back memories of family kitchens, holiday gatherings, cookie exchanges, and big dessert tables. Rich, creamy, deeply chocolatey, and wonderfully satisfying, this fudge combines simple pantry ingredients to create a classic homemade treat with a smooth texture and a luxurious finish.
The recipe is especially appealing because it does not depend on complicated ingredients. Granulated sugar, evaporated milk, marshmallows, butter, salt, and semisweet chocolate come together to create a traditional fudge with plenty of chocolate flavor. Chopped walnuts can be added for a pleasant crunch, although the fudge is equally delicious without them.
This is a wonderful recipe to prepare for Christmas, Thanksgiving, birthdays, family reunions, bake sales, or simply whenever you want a homemade chocolate treat.
Ingredients
- 4½ cups granulated sugar
- 1 can (12 ounces) evaporated milk
- 18 large marshmallows, or approximately 3 cups mini marshmallows
- 2 tablespoons unsalted butter
- 1 pinch salt
- 12 ounces semisweet chocolate chips
- 1 cup chopped walnuts, optional
- Butter or parchment paper, for preparing the pan
Equipment
- Large heavy-bottomed saucepan
- Wooden spoon or heat-resistant spatula
- Candy thermometer, preferably
- 9 x 13-inch baking pan
- Parchment paper or aluminum foil
- Sharp knife for cutting
Preparation
Begin by preparing the baking pan. Line a 9 x 13-inch pan with parchment paper or aluminum foil, leaving some overhang on the sides. Lightly butter the lining so the finished fudge will release easily.
If using walnuts, chop them fairly finely. Smaller pieces distribute more evenly throughout the fudge and make the finished squares easier to cut.
Measure all of the ingredients before beginning. Fudge requires attention during cooking, so having everything ready makes the process much easier.
Instructions
Step 1: Prepare the Pan
Line a 9 x 13-inch baking pan with parchment paper or foil. Lightly grease the lining with butter.
Set the prepared pan aside.
Step 2: Combine the Sugar and Milk
Place the granulated sugar and evaporated milk in a large, heavy-bottomed saucepan.
Set the pan over medium heat and stir gently until the sugar begins dissolving into the milk.
Continue stirring frequently, making sure the mixture does not stick to the bottom of the pan.
Step 3: Add the Marshmallows and Butter
Add the marshmallows, butter, and pinch of salt.
Continue heating while stirring until the marshmallows and butter completely melt into the mixture.
The mixture should become smooth and creamy.
Step 4: Cook the Fudge Mixture
Once everything is melted and well combined, bring the mixture to a controlled boil.
If using a candy thermometer, cook the mixture to approximately 234–238°F (112–114°C), the soft-ball stage.
Stir regularly while the mixture cooks, scraping the bottom and sides of the saucepan to prevent scorching.
This is one of the most important stages of the recipe. Undercooking can leave the fudge too soft, while overcooking can make it dry or crumbly.
Step 5: Add the Chocolate
Remove the saucepan from the heat.
Immediately add the semisweet chocolate chips. Allow them to sit in the hot mixture for a minute or two, then stir until the chocolate has completely melted and the mixture is smooth.
Do not rush this stage. Continue stirring until there are no visible streaks or unmelted pieces of chocolate.
Step 6: Add the Walnuts
If using walnuts, fold the chopped walnuts into the warm chocolate mixture.
Stir just enough to distribute them evenly.
For a completely smooth fudge, simply leave the walnuts out.
Step 7: Pour Into the Pan
Immediately pour the fudge mixture into the prepared baking pan.
Use a spatula to spread it into an even layer.
Gently smooth the surface without overworking the fudge.
Step 8: Cool Completely
Allow the fudge to cool at room temperature until completely set.
This can take several hours depending on the temperature of the room and the thickness of the fudge.
For a firmer texture, the pan can be refrigerated after the fudge has cooled somewhat.
Step 9: Cut and Serve
Once completely firm, lift the fudge from the pan using the parchment or foil overhang.
Place it on a cutting board and remove the lining.
Using a sharp knife, cut the fudge into small squares.
For cleaner cuts, wipe the knife between slices.
Traditional Cooking Method
The traditional stovetop method is the heart of this recipe.
The sugar and evaporated milk are heated together before the marshmallows, butter, and salt are incorporated. The mixture must reach the proper temperature so that the sugar concentration is correct when the fudge cools.
After the cooking stage, chocolate chips are stirred into the hot mixture. The remaining heat melts the chocolate and produces the rich chocolate base that makes this fudge so appealing.
Finally, walnuts can be folded through the mixture before it is poured into the pan.
The fudge then cools and sets into firm, creamy squares.
The Importance of Temperature
Temperature plays a major role in successful fudge.
When the sugar mixture reaches the soft-ball stage, enough water has evaporated for the fudge to develop its characteristic texture once cooled.
A candy thermometer is helpful because it removes much of the guesswork. Aim for approximately 234–238°F (112–114°C).
If you do not have a candy thermometer, experienced candy makers sometimes test a small amount of the mixture in cold water. However, a thermometer provides more consistent results.
Avoid cooking the mixture significantly beyond the recommended temperature because excessive cooking can produce a dry or grainy texture.
Formation of the Fudge
The formation of fudge is essentially a controlled transformation of sugar, milk, fat, marshmallows, and chocolate.
During cooking, water evaporates from the evaporated milk and sugar mixture. As the mixture reaches the soft-ball stage, its concentration changes. Once removed from the heat, the chocolate melts into the hot base.
As the fudge cools, the sugar begins forming very small crystals. The goal is to create crystals small enough that the finished fudge feels smooth rather than gritty.
The butter contributes richness and a softer mouthfeel, while the marshmallows help create a creamy, smooth consistency. Semisweet chocolate provides the primary chocolate flavor, and walnuts add texture when included.
Tips for Perfect Chocolate Fudge
Use a Heavy-Bottomed Pan
A heavy saucepan distributes heat more evenly and reduces the risk of scorching the sugar mixture.
Prepare Everything Before Cooking
Fudge moves quickly once the cooking stage is finished. Have the chocolate, walnuts, prepared pan, and utensils ready before you begin.
Watch the Mixture Carefully
Do not leave the boiling sugar mixture unattended. Stir frequently and monitor the temperature closely.
Do Not Scrape Burned Mixture
If the bottom of the pan begins scorching, do not scrape the burned material into the fudge. Transfer the unburned mixture carefully to another saucepan if necessary.
Use Good-Quality Chocolate
Because chocolate is one of the main ingredients, a good semisweet chocolate chip can make a noticeable difference in the finished flavor.
Let It Set Completely
Cutting fudge before it has fully cooled can produce messy, uneven pieces. Give it enough time to firm up.
Make Smaller Pieces
Fudge is rich, so small squares are generally the perfect serving size.
Variations
Walnut Chocolate Fudge
The classic version includes one cup of chopped walnuts. Toasting the walnuts lightly before adding them can give them a deeper flavor.
Pecan Fudge
Replace the walnuts with chopped pecans for a buttery Southern-style variation.
Chocolate Marshmallow Fudge
For an especially soft marshmallow character, reserve a small portion of the mini marshmallows and fold them in near the end.
Extra-Rich Fudge
Use high-quality semisweet chocolate and unsalted butter for a particularly rich and balanced flavor.
Plain Chocolate Fudge
Simply omit the nuts. This creates a smooth chocolate fudge that is especially good for serving to guests with nut allergies, provided all other ingredients are verified to be free from cross-contact.
History and Tradition
Old-fashioned fudge became a popular homemade confection in the United States during the late nineteenth and early twentieth centuries. Its appeal came from the fact that families could make a rich candy using relatively familiar ingredients and a stovetop.
Traditional fudge recipes were often passed from one generation to another. Family members developed their own versions, adjusting the amount of sugar, chocolate, milk, butter, nuts, and other ingredients according to taste.
Recipes with names such as “Aunt Bill’s Fudge” became especially memorable because they were associated with particular family members and holiday traditions. The name suggested more than a dessert; it represented a recipe remembered through generations.
This style of fudge belongs to the great tradition of American homemade candy: simple ingredients transformed through careful cooking into something special enough to share at celebrations.
Serving Suggestions
Serve the fudge at room temperature for its richest flavor and creamiest texture.
Arrange the squares on a dessert platter alongside cookies, brownies, peanut butter treats, or other homemade candies.
For holidays, the pieces can be placed in small paper candy cups and arranged in a decorative tin. They also make a thoughtful homemade gift when packed in a food-safe container and kept properly sealed.
A small square is also wonderful alongside a cup of coffee, tea, or a glass of cold milk.
Storage
Store the completely cooled fudge in an airtight container.
Place parchment or wax paper between layers to prevent the pieces from sticking together.
At room temperature, properly stored fudge can generally keep for several days to a couple of weeks, depending on conditions and ingredients.
For longer storage, refrigerate it in a tightly sealed container. Allow refrigerated fudge to come closer to room temperature before serving for the best texture.
Fudge can also be frozen in an airtight, freezer-safe container. Separate the layers with parchment paper and thaw it gradually before serving.
Common Problems and Solutions
Fudge Is Too Soft
The sugar mixture may not have reached a sufficiently high temperature during cooking. Make sure the mixture reaches the proper soft-ball stage.
Fudge Is Too Hard
The mixture may have been cooked too long or to too high a temperature.
Fudge Is Grainy
Sugar crystals may have formed too quickly or the mixture may have been handled improperly during cooling. Careful temperature control helps produce a smoother result.
Fudge Is Difficult to Cut
Allow it to warm slightly if it has been refrigerated. Use a sharp knife and clean the blade between cuts.
Chocolate Did Not Melt Completely
The chocolate should be added immediately after removing the mixture from the heat. Let the chocolate sit briefly in the hot mixture before stirring thoroughly.
Why People Love Aunt Bill’s Chocolate Fudge
There is something special about homemade fudge that packaged candy simply cannot reproduce.
People love this kind of recipe because it is rich without being complicated. The chocolate flavor is deep and satisfying, the texture is creamy, and the walnuts provide a pleasant contrast when included.
It is also the type of recipe that naturally becomes connected with memories. A pan of fudge cooling on the kitchen counter can mean Christmas is approaching, relatives are coming to visit, or a special celebration is about to begin.
Many families have a favorite fudge recipe, and the best ones are often the recipes that people remember from childhood and continue making years later.
A Family-Favorite Method
For the most reliable result, prepare the pan first, measure everything, and cook the sugar and evaporated milk carefully.
Add the marshmallows, butter, and salt and continue cooking until smooth. Bring the mixture to the soft-ball stage, remove it from the heat, and immediately stir in the chocolate chips.
Once the chocolate is completely melted, fold in the walnuts and pour everything into the prepared pan.
Then comes the hardest part: waiting.
Allow the fudge to cool completely before cutting it into squares.
Conclusion
Legendary Aunt Bill’s Chocolate Fudge is a beautiful example of classic homemade candy. It takes straightforward ingredients and turns them into a rich, creamy chocolate dessert that is perfect for holidays, parties, gifts, and family gatherings.
The combination of granulated sugar, evaporated milk, marshmallows, butter, salt, and semisweet chocolate creates a wonderfully rich foundation. Walnuts add an optional layer of texture and nuttiness, making every bite even more satisfying.
The real beauty of this recipe is its timeless quality. It does not require fancy decorations or complicated techniques. It simply requires patience, careful temperature control, and a little attention while the fudge cooks.
Once the squares have cooled and been cut, you have a homemade treat that is ready to share. Whether served during the holidays or enjoyed with a quiet cup of coffee, this chocolate fudge is the kind of dessert that can easily become a family tradition of its own.