
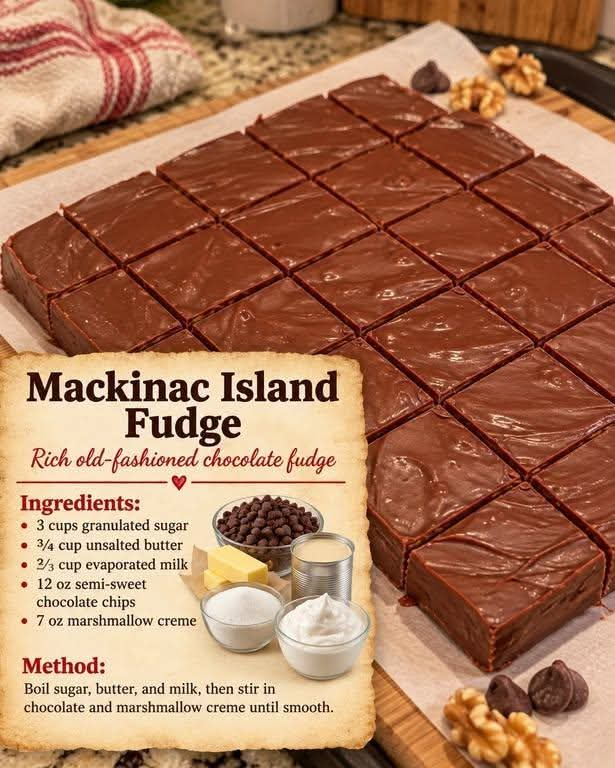
Mackinac Island Fudge
A Classic Old-Fashioned Chocolate Fudge Recipe
Introduction
There is something truly special about homemade fudge. Rich, creamy, chocolatey, and wonderfully sweet, it is the kind of old-fashioned treat that brings back memories of family vacations, charming candy shops, and homemade desserts shared with loved ones. Mackinac Island Fudge is famous for its smooth texture, deep chocolate flavor, and traditional candy-making heritage.
Inspired by the beloved fudge associated with Mackinac Island in Michigan, this recipe brings that nostalgic candy-shop experience into your own kitchen. Made with granulated sugar, butter, evaporated milk, semi-sweet chocolate chips, and marshmallow creme, it creates delicious squares that are perfect for holidays, parties, homemade gifts, or an afternoon chocolate treat.
The best part is that you do not need to travel to a candy shop to enjoy a taste of this classic tradition. With a little patience, careful stirring, and enough time for the fudge to set, you can prepare a batch of rich chocolate squares that everyone will want to try.
Ingredients
Preparation time: 15 minutes
Cooking time: 10–15 minutes
Cooling and setting time: 2–4 hours
Total time: Approximately 3–5 hours
Yield: About 25–36 small squares, depending on how you cut them
Ingredients for the Fudge
- 3 cups granulated sugar
- 3/4 cup unsalted butter
- 2/3 cup evaporated milk
- 12 ounces semi-sweet chocolate chips
- 7 ounces marshmallow creme
Optional Additions
- 1 teaspoon vanilla extract for extra flavor
- 1/2 cup chopped walnuts or pecans for a nutty variation
- A small pinch of salt to balance the sweetness
The optional additions are not necessary for the basic recipe. The five main ingredients are enough to make a delicious chocolate fudge.
Instructions
Step 1: Prepare the Pan
Begin by lining an 8-inch or 9-inch square baking pan with parchment paper. Leave a little extra paper hanging over the sides so you can lift the fudge out easily once it has set.
Lightly butter the parchment paper if desired. Set the prepared pan aside while you make the chocolate mixture.
Measure all your ingredients before starting because the sugar mixture needs your attention during cooking.
Step 2: Combine the Sugar, Butter, and Milk
Place the granulated sugar, unsalted butter, and evaporated milk in a large, heavy-bottomed saucepan.
Set the saucepan over medium heat and stir continuously as the butter melts and the sugar begins to dissolve.
Continue stirring until the mixture becomes smooth and the sugar is mostly dissolved. Scrape the sides of the pan carefully to help prevent sugar crystals from forming.
Step 3: Bring the Mixture to a Boil
Once the butter has melted and the mixture is smooth, bring it to a full rolling boil while stirring.
After the mixture reaches a full boil, cook it for approximately 4–5 minutes, stirring constantly to prevent scorching.
For the most reliable result, use a candy thermometer and cook the mixture to approximately 234°F (112°C), the soft-ball stage. Cooking time can vary depending on your saucepan, stove, and altitude.
Keep the heat controlled. The mixture should boil steadily without burning on the bottom of the pan.
Important: Hot sugar syrup can cause serious burns. Avoid tasting it while hot, and keep children away from the saucepan during cooking.
Step 4: Add the Chocolate Chips
Remove the saucepan from the heat once the sugar mixture reaches the appropriate temperature.
Immediately add the semi-sweet chocolate chips. Stir until they melt completely and blend into the hot mixture.
The chocolate should create a smooth, glossy mixture with a rich, deep brown color.
If a few chocolate chips remain unmelted, continue stirring gently until the mixture becomes uniform.
Step 5: Stir in the Marshmallow Creme
Add the marshmallow creme to the melted chocolate mixture.
Stir thoroughly until the marshmallow creme is completely incorporated and the mixture becomes thick, creamy, and smooth.
If you are using vanilla extract or a small pinch of salt, stir it in at this stage.
For a variation with nuts, fold in the chopped walnuts or pecans after the chocolate and marshmallow creme are combined.
Step 6: Transfer the Mixture to the Pan
Working promptly, pour the warm fudge mixture into the prepared baking pan.
Use a silicone spatula to spread the mixture evenly into the corners. Smooth the surface gently without pressing too hard.
The mixture will begin to thicken as it cools, so it is best to complete this step while the fudge is still easy to spread.
Step 7: Allow the Fudge to Set
Leave the fudge at room temperature until it has cooled and become firm, usually about 2–4 hours.
If you need to speed up the process, allow the pan to cool briefly at room temperature before placing it in the refrigerator.
Avoid covering the fudge while it is still hot, as trapped condensation can affect the surface.
Step 8: Cut into Squares
Once the fudge has set completely, lift it from the pan using the parchment paper.
Place it on a cutting board and use a sharp knife to cut it into small squares.
For neat cuts, warm the knife under hot water, wipe it dry, and slice through the fudge. Repeat as needed.
Arrange the finished squares on a serving plate or place them in a lined gift box.
Cooking Methods and Important Tips
Traditional Stovetop Method
The stovetop method is the recommended approach for this recipe because it allows you to control the temperature of the sugar mixture.
Use a heavy-bottomed saucepan, stir consistently, and monitor the temperature carefully. Accurate cooking helps the fudge set properly and develop the right texture.
How to Achieve a Smooth Texture
The key to smooth fudge is controlling the sugar mixture and mixing the chocolate thoroughly.
- Measure the ingredients accurately.
- Avoid overheating the sugar mixture.
- Use a candy thermometer when possible.
- Stir the chocolate until fully melted.
- Mix the marshmallow creme evenly into the chocolate.
- Allow the fudge to cool completely before cutting.
How to Avoid Grainy Fudge
Sugar crystals can sometimes make homemade fudge grainy. Make sure the sugar dissolves properly as the butter and milk heat up. Avoid scraping crystallized sugar from the sides of the pan back into the mixture.
Once the mixture reaches a full boil, follow the cooking temperature carefully and avoid unnecessary changes in heat.
How to Fix Fudge That Is Too Soft
If the fudge remains soft after several hours, it may not have reached the correct temperature during cooking.
Place it in the refrigerator to see whether chilling helps it firm up. If it remains too soft, it can still be enjoyed as a thick chocolate confection or used as a topping for ice cream.
The History of Mackinac Island Fudge
Mackinac Island, located in Lake Huron between Michigan’s Upper and Lower Peninsulas, is well known for its historic character, scenic waterfront, horse-drawn carriages, and traditional fudge shops.
Fudge became an important part of the island’s identity during the late nineteenth century, when candy-making businesses helped establish a distinctive tourist tradition. Visitors came to watch confectioners prepare large batches of fudge, work the warm candy, and package it for travelers to take home.
Over time, Mackinac Island became closely associated with handcrafted fudge. Families visiting the island often made stopping at a fudge shop part of their vacation experience.
Traditional island fudge is known for its rich flavor and carefully prepared texture. Although recipes and techniques vary from shop to shop, the combination of sugar, dairy, chocolate, and skilled candy-making remains central to the tradition.
This homemade version is inspired by that classic chocolate fudge experience. The addition of marshmallow creme helps create a smooth, creamy confection that is practical to prepare in a home kitchen.
Formation and Texture of the Fudge
The formation of fudge depends on the way sugar, fat, milk, and chocolate behave during heating and cooling.
When the sugar, butter, and evaporated milk are heated together, the sugar dissolves and forms a hot syrup. Cooking the syrup to the correct temperature determines how the fudge will set once it cools.
The chocolate chips provide cocoa flavor and cocoa butter, contributing richness and structure. The butter adds a smooth mouthfeel, while the evaporated milk contributes dairy flavor and moisture.
Marshmallow creme contains sugar and ingredients that help stabilize the mixture and create a softer, creamier texture.
As the fudge cools, the mixture becomes firm enough to cut into squares. The final texture should be rich and dense, yet tender enough to bite through without being excessively hard.
Cooking temperature is especially important. If the mixture is undercooked, the fudge may remain too soft. If it is overcooked, it may become dry or crumbly.
Delicious Ways to Serve Mackinac Island Fudge
This chocolate fudge is delicious on its own, but there are several ways to serve it.
With coffee: Serve a small square alongside a cup of freshly brewed coffee for a simple afternoon treat.
As a dessert platter: Arrange the fudge with cookies, brownies, and fresh strawberries for a dessert table.
As a holiday gift: Place the squares in a decorative tin lined with parchment paper. Add a handwritten label for a thoughtful homemade gift.
With ice cream: Crumble a square over vanilla ice cream or serve it alongside a scoop of chocolate ice cream.
For parties: Cut the fudge into small bite-sized pieces so guests can enjoy a little chocolate without needing a large serving.
Variations to Try
1. Chocolate Walnut Fudge
Fold 1/2 cup of chopped walnuts into the finished mixture before transferring it to the pan. The nuts add a pleasant crunch that contrasts with the creamy chocolate.
2. Chocolate Pecan Fudge
Replace the walnuts with chopped pecans for a buttery, nutty flavor that works particularly well during the holiday season.
3. Vanilla Chocolate Fudge
Add 1 teaspoon of vanilla extract after removing the mixture from the heat. Vanilla enhances the chocolate flavor and adds a warm aroma.
4. Chocolate Sea Salt Fudge
Sprinkle a very small amount of flaky sea salt over the surface before the fudge sets. The salt balances the sweetness and gives the fudge a more sophisticated flavor.
5. Double Chocolate Fudge
For an especially rich variation, use dark chocolate chips instead of semi-sweet chips. The resulting fudge will have a deeper cocoa flavor and may taste less sweet.
Storage Instructions
At room temperature: Store the fudge in an airtight container in a cool, dry place for several days, provided the environment is not too warm.
In the refrigerator: Keep the fudge in an airtight container for approximately 2–3 weeks for best quality.
In the freezer: Wrap the fudge tightly and place it in a freezer-safe container. Freeze for up to 2–3 months for best quality. Thaw it in the refrigerator while still wrapped to help prevent condensation from forming on the surface.
For the best flavor and texture, allow refrigerated fudge to sit at room temperature briefly before serving.
Frequently Asked Questions
Can I make this fudge without a candy thermometer?
Yes. A candy thermometer is helpful, but you can use a traditional cold-water soft-ball test if you are experienced with sugar cooking. Drop a small amount of syrup into cold water; it should form a soft, pliable ball. A thermometer is generally more reliable for beginners.
Why did my fudge not become firm?
The mixture may not have been cooked to the correct temperature, or the ingredient measurements may have been inaccurate. Chill it first to see whether it firms up.
Can I use milk instead of evaporated milk?
Evaporated milk is concentrated and has less water than regular milk. Substituting ordinary milk may change the cooking behavior and texture, so evaporated milk is recommended for this recipe.
Can I use milk chocolate chips?
Yes, but the fudge will be sweeter and may have a softer texture. Semi-sweet chocolate chips provide a more balanced chocolate flavor.
How should I cut the fudge neatly?
Allow it to set completely, then use a sharp knife warmed under hot water and wiped dry between cuts.
Can I prepare this recipe ahead of time?
Absolutely. Fudge is an excellent make-ahead dessert. Prepare it a day before a party or holiday gathering, then store it in an airtight container until serving.
Conclusion
Mackinac Island Fudge is a wonderful way to bring the charm of an old-fashioned candy shop into your own kitchen. Its deep chocolate flavor, creamy texture, and simple ingredients make it a delicious treat for family gatherings, holidays, parties, and homemade gifts.
The secret to success is careful temperature control, thorough mixing, and patience while the fudge cools. Once you master the process, this recipe can become a favorite that you return to whenever you want something sweet and nostalgic.
Whether you serve it beside a cup of coffee, share it with friends, or wrap it up as a thoughtful gift, every square offers a little taste of traditional chocolate candy-making.
For the Love of Homemade Fudge
Some desserts are memorable because of their ingredients, while others are remembered because of the moments shared around them. Homemade fudge belongs to both categories.
It is the kind of treat that can bring families together in the kitchen, fill a holiday dessert table, and make an ordinary afternoon feel special. The rich chocolate aroma, the smooth mixture in the saucepan, and the neat little squares ready to share all contribute to its timeless appeal.
Make a batch for someone you love, save a few pieces for yourself, and enjoy the simple pleasure of a classic homemade chocolate confection.