
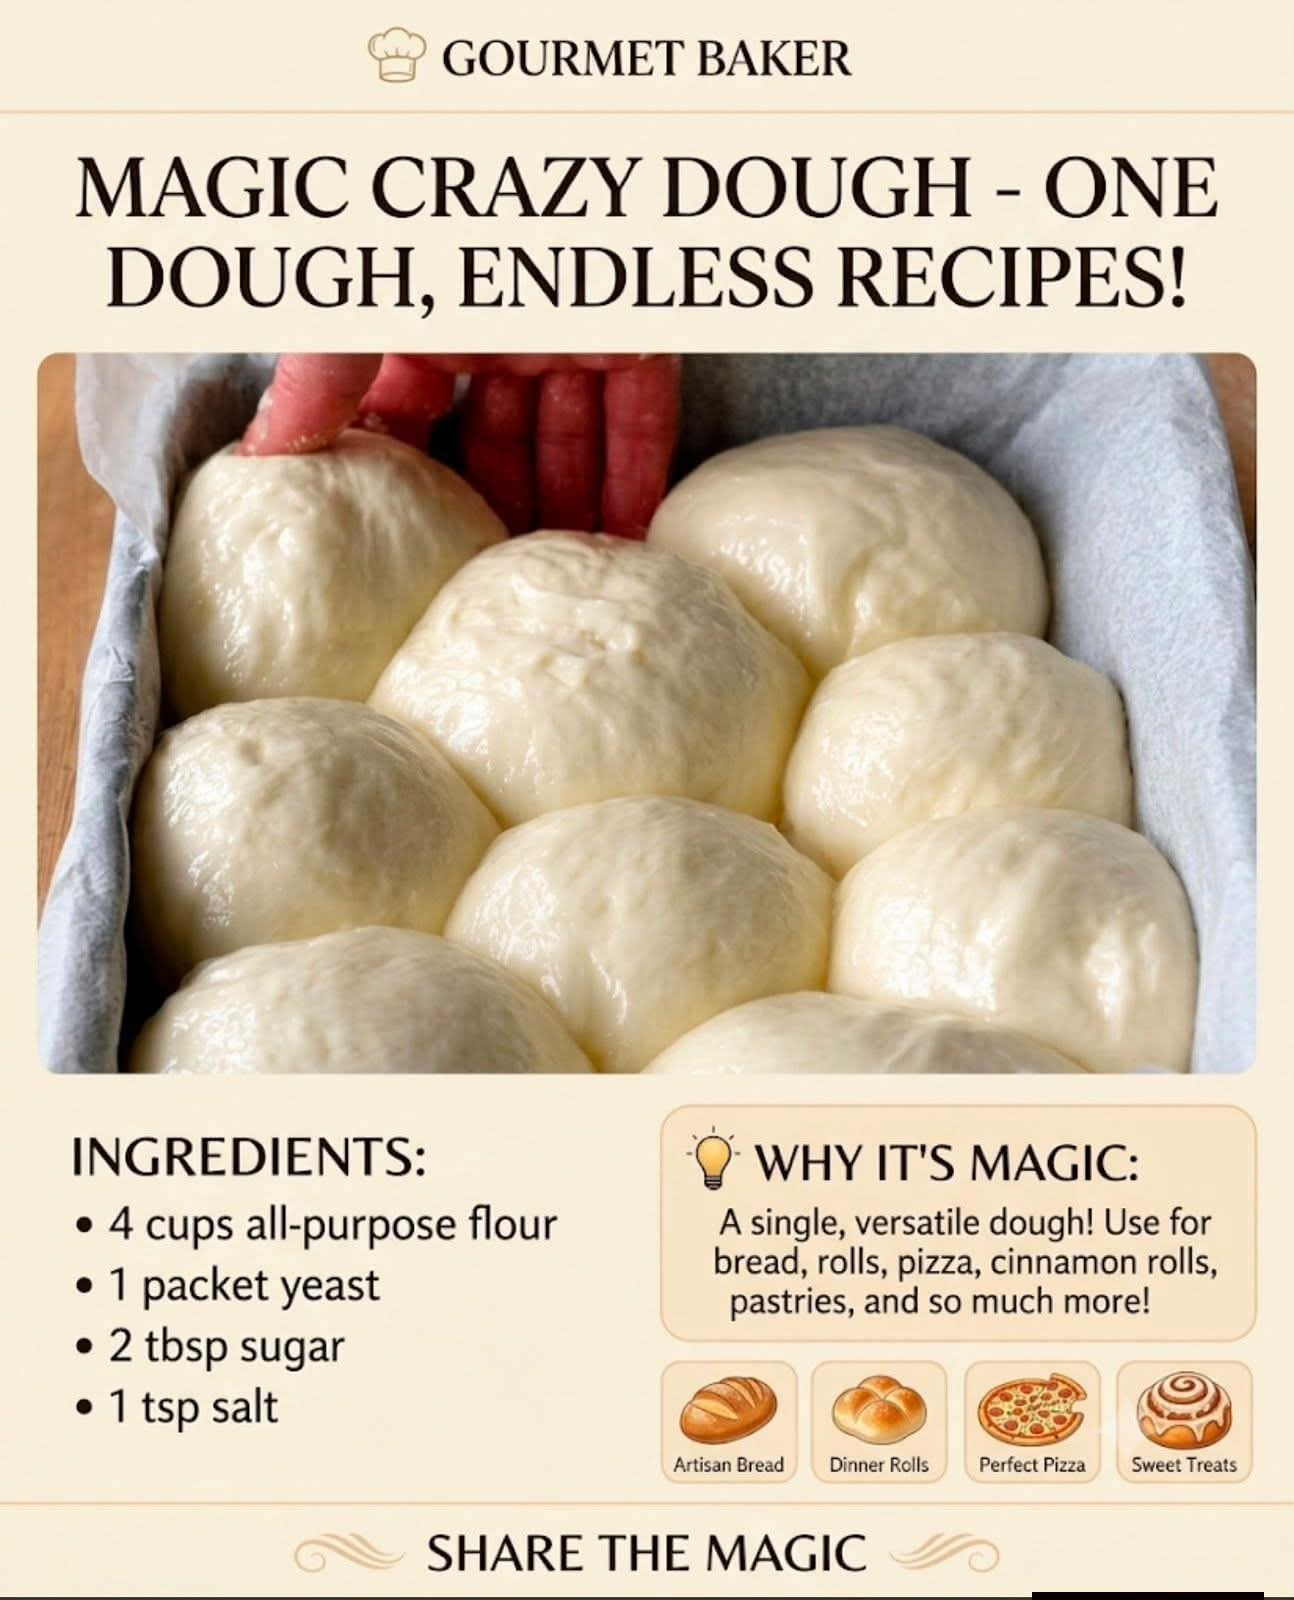
Magic Crazy Dough – One Dough, Many Delicious Recipes
Introduction
Magic Crazy Dough is one of the most versatile homemade dough recipes you can prepare in your kitchen. With a handful of simple ingredients, you can create a soft, stretchy, and wonderfully tender dough that works for an incredible variety of sweet and savory baked goods. From fluffy dinner rolls and homemade pizza to cinnamon rolls, breadsticks, soft pretzels, and filled pastries, this recipe gives you a flexible foundation for countless delicious creations.
The secret behind this dough is the combination of yeast, yogurt, milk, egg, and baking powder. Yeast helps the dough rise and develop a light texture, while yogurt contributes tenderness and a subtle tang. Milk adds richness, and the egg helps create a soft, satisfying crumb. Baking powder provides additional leavening, making this dough especially adaptable to different baking styles.
What makes Magic Crazy Dough so popular is its convenience. Instead of preparing a completely different dough for every recipe, you can make one versatile batch and divide it into portions for several meals or treats. It is perfect for busy families, weekend baking, holiday preparations, and anyone who enjoys making homemade bread without complicated techniques.
Ingredients
Makes approximately 12–16 rolls or enough dough for several smaller baking projects, depending on portion size.

Dry ingredients
- 4 cups (approximately 500 g) all-purpose flour, plus extra for kneading
- 2 teaspoons active dry yeast
- 2 tablespoons granulated sugar
- 1 teaspoon baking powder
- 1 teaspoon salt
Wet ingredients
- 1 cup (240 ml) warm milk
- 1/2 cup (120 g) plain yogurt, preferably unsweetened
- 1 large egg, at room temperature
Optional ingredients
- 2 tablespoons melted butter or olive oil for a richer dough
- 1–2 tablespoons additional flour if the dough is very sticky
- 1 tablespoon milk or beaten egg for brushing the tops before baking
Important note: The exact amount of flour may vary depending on the yogurt’s thickness, the size of the egg, and the flour you use. Add the flour gradually and aim for a soft, slightly tacky dough rather than a stiff one.
Equipment Needed
- Large mixing bowl
- Measuring cups or kitchen scale
- Measuring spoons
- Wooden spoon or spatula
- Clean kitchen towel or plastic wrap
- Baking tray or suitable baking pan
- Rolling pin, if needed
- Oven
A stand mixer with a dough hook can make kneading easier, but this recipe can also be prepared entirely by hand.
Instructions: How to Make Magic Crazy Dough

Step 1: Activate the yeast
Pour the warm milk into a small bowl. The milk should feel comfortably warm, not hot. Add the sugar and active dry yeast, then stir gently.
Allow the mixture to stand for approximately 5–10 minutes. If the yeast is active, the surface should begin to look foamy or bubbly.
If nothing happens, check the yeast’s expiration date and the milk temperature before continuing. Milk that is too hot can damage the yeast.
Step 2: Combine the wet ingredients
In a large mixing bowl, whisk the egg until the yolk and white are combined.
Add the plain yogurt and the activated yeast mixture. Stir until everything is evenly blended.
The mixture should look creamy and slightly thick. The yogurt adds moisture and tenderness, helping the finished dough remain soft after baking.
Step 3: Mix the dry ingredients
In another bowl, combine the flour, baking powder, and salt.
Stir the dry ingredients together to distribute the salt and baking powder evenly throughout the flour.
Add approximately three-quarters of the flour mixture to the wet ingredients. Stir with a wooden spoon until a rough, sticky dough forms.
Gradually add the remaining flour until the dough begins to hold together. You may not need every last spoonful, depending on your ingredients.
Step 4: Knead the dough
Transfer the dough to a lightly floured work surface.
Knead for approximately 8–10 minutes by hand, folding the dough over itself and pushing it away with the heel of your hand. Turn it regularly and repeat the movement.
At first, the dough may feel sticky, but it should gradually become smoother, softer, and more elastic.
Add only small amounts of extra flour when necessary. Adding too much flour can make the finished rolls and pastries dense.
If using a stand mixer, knead with the dough hook for approximately 5–7 minutes, checking the texture as you go.
Step 5: Allow the dough to rise
Place the kneaded dough in a lightly greased bowl. Turn it once so the surface is lightly coated with oil, then cover the bowl with a clean kitchen towel or plastic wrap.
Leave the dough in a warm, draft-free place for approximately 60–90 minutes, or until it has roughly doubled in size.
The rising time depends on the temperature of your kitchen and the activity of your yeast. A cooler room may require additional time.
Step 6: Check the dough
Once the dough has risen, gently press it with a fingertip. The indentation should slowly spring back.
Transfer it to a lightly floured work surface and gently press out some of the accumulated gas.
The dough is now ready to be divided and shaped into different baked goods.
Step 7: Divide and shape
Divide the dough according to what you want to make.
- For dinner rolls, divide into equal pieces and shape into smooth balls.
- For pizza, roll or stretch the dough into your preferred shape.
- For cinnamon rolls, roll into a rectangle and spread with butter, cinnamon, and sugar.
- For breadsticks, divide into strips and roll them into long pieces.
- For filled pastries, roll portions flat and add your chosen filling before sealing.
Place the shaped dough on a prepared baking tray or in a greased pan.
Step 8: Let the shaped dough rest
Cover the shaped pieces and leave them to rise for another 20–40 minutes, depending on their size and the recipe you are making.
They should look slightly puffier before baking.
For pizza, you can shape the dough and allow it to relax briefly before adding the toppings. Thicker pizza bases may benefit from a longer rise.
Step 9: Bake until golden
Preheat the oven according to the type of baked good you are preparing.
For basic dinner rolls, a useful starting point is 180°C (350°F) for approximately 18–25 minutes. Smaller pieces may bake faster, while larger pieces may need more time.
For pizza, cinnamon rolls, breadsticks, and other variations, adjust the oven temperature and baking time to suit the particular recipe.
If desired, brush savory rolls with melted butter after baking or brush the dough with milk or beaten egg before baking for a more golden surface.
Allow the finished baked goods to cool slightly before serving.
Methods: Different Ways to Use Magic Crazy Dough
The wonderful thing about this recipe is that the same basic dough can become many different foods. Once you understand its texture and how it rises, you can adapt it to your family’s tastes.

1. Soft Homemade Dinner Rolls
Divide the dough into 12–16 equal portions and shape each into a ball. Arrange in a greased baking pan, cover, and allow to rise until puffy. Bake at 180°C (350°F) for approximately 18–25 minutes, until golden and cooked through. Brush with melted butter for a soft finish.

2. Sweet Cinnamon Rolls
Roll the dough into a rectangle. Spread with softened butter, then sprinkle with brown sugar and ground cinnamon. Roll tightly, slice into pieces, and arrange in a greased pan. Let rise until puffy and bake at approximately 180°C (350°F) until golden and cooked through. Finish with a simple powdered-sugar glaze if desired.

3. Homemade Pizza
Stretch or roll a portion of dough into a pizza base. Add pizza sauce, mozzarella, and your favorite toppings. Bake in a preheated oven at approximately 220°C (425°F), or according to your oven and preferred crust, until the base is cooked and the cheese is bubbling. This dough makes a softer, bread-like pizza crust.

4. Garlic Butter Breadsticks
Divide the dough into small portions and roll into strips. Arrange on a baking sheet and allow to rest until slightly puffy. Bake at approximately 190°C (375°F) until golden. Brush with melted butter mixed with minced garlic and herbs immediately after baking.

5. Cheese-Filled Bread Pockets
Roll small portions into circles and add grated cheese, cooked vegetables, or seasoned cooked meat to the center. Fold the dough over the filling and seal the edges securely. Let rest briefly, brush with egg wash if desired, and bake until golden and the filling is hot. Avoid overfilling to prevent the pockets from opening.

6. Pretzel-Style Bread
Roll portions into long ropes and shape into pretzels. For a more traditional pretzel finish, use a suitable baking-soda bath before baking, following a reliable pretzel method. Brush or sprinkle with the toppings of your choice and bake until deeply golden. This dough produces a softer bread-style pretzel rather than an exact traditional pretzel texture.
History of Magic Crazy Dough
Magic Crazy Dough is best understood as a modern home-baking concept rather than one recipe with a single documented inventor or historical origin.
For generations, home bakers have relied on versatile doughs to prepare different foods from the same basic mixture. Bread dough could be shaped into loaves, buns, rolls, and other baked goods depending on the ingredients available, the occasion, and the baker’s needs.
As home cooking developed, recipes using yogurt, milk, eggs, and yeast became popular ways to produce softer and richer breads. Yogurt has long been used in various baking traditions to add moisture and tenderness, while yeast has played a central role in leavened breadmaking for centuries.
The modern idea of Magic Crazy Dough brings these principles together in a convenient, adaptable recipe. Its appeal comes from the ability to use one batch for multiple preparations instead of following a separate dough recipe for every dish.
Although versions differ in their proportions and methods, the central idea remains the same: make a flexible dough once, divide it, and transform it into a variety of homemade favorites.
Formation: What Makes This Dough Special?
The texture of Magic Crazy Dough depends on how its ingredients work together.
Flour provides structure. When flour is mixed with liquid and kneaded, gluten develops. This elastic network helps the dough stretch, trap gas, and hold its shape.
Yeast creates a light texture. Active dry yeast feeds on available sugars and produces carbon dioxide during fermentation. The gas becomes trapped in the dough, causing it to expand and develop a softer crumb.
Yogurt adds moisture and tenderness. Plain yogurt contributes moisture and a slight tang. Its acidity also affects the dough’s overall chemistry and flavor.
Milk adds richness. Milk contributes proteins, sugars, and moisture that help produce a tender interior and a nicely browned crust.
Egg improves the structure. The egg adds richness and helps the dough develop a satisfying texture and color.
Baking powder provides additional leavening. Baking powder releases gas when activated by moisture and heat. It can complement yeast, although it does not replace the fermentation and flavor development provided by yeast.
Salt balances the flavor. Salt improves taste and helps regulate yeast activity, so it should be measured rather than omitted casually.
The final dough should be soft, elastic, and easy to shape. If it is too dry, add a small amount of milk. If it is excessively sticky, add flour one tablespoon at a time and knead briefly before deciding whether more is needed.
Tips for Perfect Magic Crazy Dough
- Use warm, not hot, milk. Excessive heat can damage the yeast and prevent the dough from rising properly.
- Check the yeast before mixing. Fresh, active yeast is essential for reliable results.
- Measure flour carefully. Weighing flour gives more consistent results than scooping it directly into a measuring cup.
- Avoid adding too much flour. A slightly tacky dough usually produces softer bread than a stiff dough.
- Knead until elastic. Proper kneading helps the dough stretch and retain the gas produced by yeast.
- Allow enough rising time. Use the dough’s appearance and volume rather than relying entirely on the clock.
- Choose fillings carefully. Cook watery vegetables and meat fillings before using them, and allow hot fillings to cool.
- Adjust baking times. Small rolls cook faster than large stuffed breads or thick loaves.
- Store baked goods properly. Once completely cool, keep them in an airtight container at room temperature for about 2–3 days.
- Freeze extra baked goods. Wrap cooled rolls or breadsticks well and freeze for approximately 2–3 months for best quality.
Frequently Asked Questions
Can I prepare Magic Crazy Dough ahead of time?
Yes. You can prepare the dough, cover it, and refrigerate it for a slow rise. Because fermentation continues in the refrigerator, the timing may vary. Keep the dough covered and use it within about 24 hours for best results. Allow it to lose some of its chill before shaping if it feels too firm.
Can I freeze the dough?
Yes. Divide the dough into portions, wrap them well, and freeze. For best results, use within approximately 1–2 months. Thaw in the refrigerator, then allow the dough to warm slightly and rise as needed before shaping and baking. Rising performance may be less predictable after freezing than with fresh dough.
Why did my dough not rise?
Possible causes include inactive yeast, milk that was too hot, a cold kitchen, or insufficient rising time. Check the yeast’s freshness and give the dough additional time in a comfortably warm place.
Can I make this dough without yogurt?
You can substitute plain yogurt with a similar amount of thick buttermilk or another suitable dairy alternative, but the dough’s flavor and moisture may change. Add the replacement gradually and adjust the flour as needed.
Can I make this recipe sweet or savory?
Absolutely. For sweet preparations, use cinnamon, sugar, dried fruit, or suitable fillings. For savory recipes, try herbs, garlic butter, cheese, or cooked vegetables. Keep the basic dough balanced so that the additional ingredients do not make it too wet or heavy.
Can I use this dough for every type of bread?
It works well for many soft breads and enriched dough preparations. However, it is not a perfect substitute for every bread recipe. Traditional sourdough, crusty artisan loaves, laminated pastries, and some specialized doughs require different techniques and ingredient ratios.
Serving Ideas and Favorite Combinations
Magic Crazy Dough can become the centerpiece of a family meal or a table full of homemade treats.
- For breakfast: Serve soft rolls with butter, jam, honey, or cheese.
- For lunch: Make mini pizzas or stuffed bread pockets with cooked vegetables and cheese.
- For dinner: Pair garlic breadsticks or warm rolls with soup, roasted chicken, or pasta.
- For parties: Prepare bite-sized cheese rolls, pizza pinwheels, or small stuffed buns.
- For dessert: Make cinnamon rolls or sweet filled buns with a simple glaze.
For a beautiful presentation, arrange several varieties in separate baskets or on a serving board. Serve warm where appropriate and label sweet and savory fillings separately.
Conclusion
Magic Crazy Dough is a practical recipe for anyone who loves homemade baking and wants more possibilities from a single batch. Its combination of flour, milk, yogurt, egg, yeast, baking powder, sugar, and salt creates a soft, adaptable dough that can be shaped into dinner rolls, pizza bases, cinnamon rolls, breadsticks, and many other delicious creations.
The key to success is to keep the dough soft, knead it properly, give it enough time to rise, and adapt the shaping and baking method to the food you want to prepare.
Once you become familiar with the texture, this recipe can save time, reduce the need for multiple dough recipes, and make homemade baking more enjoyable. Whether you are preparing a simple family dinner or a table full of freshly baked treats, Magic Crazy Dough offers a wonderful starting point for creativity in the kitchen.
For the Lovers of Homemade Baking
This recipe is for everyone who loves the smell of freshly baked bread filling the kitchen, the comfort of warm homemade rolls, and the pleasure of sharing something made from scratch.
It is for the home baker who wants one reliable starting point and the freedom to create something different every time. One day, the dough might become fluffy dinner rolls; another day, it could turn into cheesy bread pockets, cinnamon rolls, or a delicious homemade pizza.
The best part is that you do not need complicated ingredients or professional baking equipment to get started. With patience, careful measuring, and a little creativity, one batch of dough can become many memorable homemade treats.
One dough, countless possibilities, and a new favorite waiting to come out of the oven.