
Malted Milk Ball Crunch Bars: A Sweet and Irresistible No-Fuss Dessert
Introduction
If you love easy homemade desserts that combine crunchy candy, rich chocolate, and a sweet, buttery base, these Malted Milk Ball Crunch Bars are sure to become a favorite. Made with whole, uncrushed malted milk balls and just four additional basic ingredients, this delightful treat delivers a wonderful combination of textures and flavors in every bite.
The best part is that you do not need complicated baking techniques, expensive ingredients, or hours in the kitchen. Simply arrange the candy in a sheet pan, prepare the sweet mixture, layer everything together, and let the ingredients transform into a delicious dessert that looks beautiful and tastes even better.
These bars are perfect for family gatherings, holiday dessert tables, potlucks, birthday celebrations, or a special weekend treat. Serve them after dinner with coffee, share them with friends, or keep a batch ready in the refrigerator whenever a chocolate craving strikes.
The combination of creamy chocolate, malty sweetness, and satisfying crunch makes these bars especially appealing to anyone who loves candy-inspired desserts. One bite is often enough to make people ask how you made them.
Ingredients
This recipe uses five simple ingredients.
Main Ingredients
- 2 cups whole malted milk balls, uncrushed
- 2 cups semi-sweet chocolate chips
- 1 can (14 ounces) sweetened condensed milk
- 4 tablespoons unsalted butter
- 2 cups graham cracker crumbs
Optional Ingredients
- 1 teaspoon vanilla extract for extra flavor
- A small pinch of salt to balance the sweetness
- Additional malted milk balls for decorating the top
Note: The optional ingredients are not included in the five-ingredient base recipe.
Instructions
Step 1: Prepare the Sheet Pan
Line a 9-by-13-inch baking pan with parchment paper, leaving a little extra paper over the sides to make removing the finished bars easier.
Lightly grease the parchment paper if necessary.
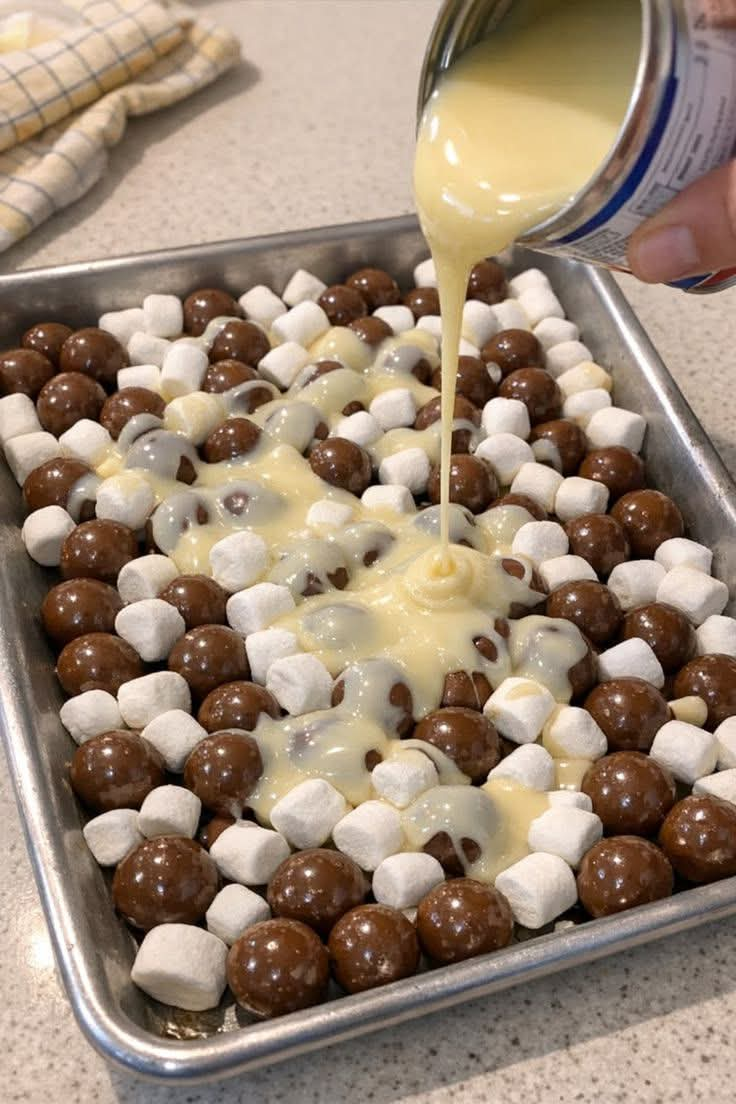
Arrange the whole malted milk balls across the bottom of the pan. Spread them into an even layer, leaving some space between the candies so the chocolate mixture can settle around them.
Keep the candies whole to preserve their characteristic crunchy centers.
Step 2: Prepare the Graham Cracker Base
Place the graham cracker crumbs in a medium mixing bowl.
Melt the butter in a microwave-safe bowl or in a small saucepan over low heat.
Pour the melted butter over the crumbs and mix thoroughly until the crumbs are evenly moistened.
Press the mixture gently into an even layer over the malted milk balls. You can use the back of a spoon or the bottom of a measuring cup to help distribute it.
Because the candies are already in the pan, work carefully to create a reasonably even base without crushing them unnecessarily.
Step 3: Make the Chocolate Mixture
Place the semi-sweet chocolate chips and sweetened condensed milk in a microwave-safe bowl.
Heat in 20- to 30-second intervals, stirring between each interval, until the chocolate is melted and the mixture is smooth. Avoid overheating the chocolate.
Alternatively, place the ingredients in a heatproof bowl over a saucepan of gently simmering water. Stir until completely melted and combined.
If desired, stir in the vanilla extract and a small pinch of salt.
The finished mixture should be glossy, thick, and easy to spread.
Step 4: Assemble the Dessert
Pour the melted chocolate mixture evenly over the prepared layers.
Use a spatula to spread the chocolate into the corners and across the entire surface.
If you want an extra decorative finish, gently press a few additional malted milk balls into the top before chilling.
Avoid stirring the layers together too much. Keeping them distinct gives the bars an attractive appearance and a more interesting texture.
Step 5: Chill Until Firm
Place the pan in the refrigerator for approximately 2 to 3 hours, or until the chocolate mixture has set firmly.
For the cleanest slices, allow the dessert to chill thoroughly before cutting.
Once firm, lift the entire slab from the pan using the parchment paper.
Place it on a cutting board and use a sharp knife to cut it into squares or rectangular bars.
For neat edges, wipe the knife with a warm, clean cloth between cuts.
Step 6: Serve and Enjoy
Arrange the bars on a serving plate and allow them to sit at room temperature for about 5 to 10 minutes before serving.
This short resting period helps soften the chocolate slightly while preserving the satisfying crunch of the malted milk balls.
Serve them on their own or alongside a cup of coffee, tea, or cold milk.
Methods of Preparation
No-Bake Refrigerator Method
The refrigerator method is ideal for anyone who wants a simple dessert without turning on the oven.
Prepare the layers, melt the chocolate mixture, assemble the dessert, and refrigerate until firm. This approach keeps the preparation straightforward and helps preserve the candy’s original crunch.
Double-Boiler Method
For a particularly smooth chocolate mixture, use a double boiler.
Place the chocolate chips and condensed milk in a heatproof bowl over gently simmering water. Stir slowly until smooth, ensuring that the bottom of the bowl does not touch the water.
This method provides gentle heat and reduces the risk of scorching the chocolate.
Microwave Method
The microwave is the fastest way to prepare the chocolate mixture.
Use short heating intervals and stir frequently. Chocolate can retain its shape even after it begins melting, so stirring between intervals is essential.
Never add water to the melted chocolate mixture, as this can cause the chocolate to seize.
The History Behind Malted Milk Ball Desserts
Malted milk has a long history in confectionery and dessert making. Malted milk powder was developed in the late nineteenth century from malted barley, wheat, and milk ingredients. It became popular in beverages, ice cream, and sweets because of its distinctive toasted, creamy flavor.
Malted milk balls later became a recognizable candy, combining a crunchy malted center with a chocolate coating. Their contrasting textures made them a natural ingredient for homemade treats.
Over time, home cooks began incorporating chocolate-covered candies into cookies, brownies, refrigerator cakes, fudge, and dessert bars. These recipes became popular because they made it easy to turn familiar sweets into something new without requiring advanced baking skills.
This malted milk ball crunch bar recipe follows that same tradition. It brings together pantry staples and a beloved candy to create a dessert that is simple enough for everyday enjoyment but special enough for celebrations.
Although this particular combination is a modern homemade variation rather than a documented historical recipe, it reflects the enduring appeal of chocolate-and-candy desserts.
Formation and Texture
The secret to these bars is the contrast between their layers.
The buttery graham cracker crumbs provide a lightly crisp, crumbly foundation. The condensed milk and melted chocolate form a rich, fudgy layer that binds the dessert together as it cools.
Meanwhile, the whole malted milk balls add crunchy centers and a distinctive malty flavor. As you bite into the bars, the smooth chocolate and crisp candy create a satisfying contrast.
Chilling is important because it allows the chocolate mixture to firm up and hold the ingredients together. Cutting the bars only after they are thoroughly chilled helps prevent the layers from separating.
For the best texture, avoid crushing the malted milk balls or leaving the assembled dessert in a warm place for too long.
Tips for Perfect Malted Milk Ball Crunch Bars
- Use whole candies. Keeping the malted milk balls intact preserves their crunchy centers.
- Choose good-quality chocolate chips. Semi-sweet chocolate helps balance the sweetness of the condensed milk and candy.
- Melt the chocolate gently. Excessive heat can make the chocolate mixture thick or grainy.
- Line the pan with parchment paper. This makes lifting and slicing the dessert much easier.
- Chill completely. Cutting the bars too early can cause them to fall apart.
- Use a sharp knife. Clean the blade between cuts for more attractive portions.
- Adjust the sweetness if desired. Dark chocolate chips can provide a less-sweet finish than milk chocolate chips.
- Store them properly. Keep the bars in an airtight container in the refrigerator to maintain their shape and freshness.
Delicious Variations
Peanut Butter Chocolate Crunch Bars
Add 2 to 3 tablespoons of creamy peanut butter to the melted chocolate mixture. Stir until smooth before spreading it over the prepared layers.
The peanut butter complements the chocolate and malt flavor beautifully.
Dark Chocolate Malt Bars
Replace the semi-sweet chocolate chips with dark chocolate chips. This creates a richer flavor and balances the sweetness of the condensed milk.
Extra Crunch Candy Bars
Sprinkle a small amount of chopped roasted peanuts over the chocolate layer before chilling. The nuts provide another crunchy element.
White Chocolate Malt Bars
Replace part of the semi-sweet chocolate with white chocolate chips for a sweeter, creamier flavor. White chocolate can behave differently when melted, so heat it slowly and stir frequently.
Holiday Dessert Bars
Decorate the top with festive-colored candy pieces or a light drizzle of contrasting melted chocolate. Cut the chilled slab into small squares for a holiday dessert platter.
Storage Instructions
Store the finished bars in an airtight container in the refrigerator for up to 5 to 7 days, provided they are handled and stored properly.
Separate layers with parchment paper if stacking the bars to prevent them from sticking together.
For longer storage, freeze the bars in a freezer-safe container for up to 2 months. Thaw them in the refrigerator before serving.
Because the candy centers can soften if exposed to moisture or prolonged warmth, keep the bars in a cool, dry environment and avoid leaving them out for extended periods.
Serving Suggestions
These bars are wonderfully versatile and can be served in several ways.
- Serve small squares with coffee after dinner.
- Arrange them on a dessert tray alongside cookies and brownies.
- Pack individual portions into lunch boxes as an occasional sweet treat.
- Cut them into bite-sized pieces for parties and potlucks.
- Serve them with vanilla ice cream for a more indulgent dessert.
- Wrap individual bars in parchment paper for homemade edible gifts.
Since the bars are rich and sweet, smaller portions are often enough to satisfy a dessert craving.
Conclusion
Malted Milk Ball Crunch Bars are proof that a delicious homemade dessert does not need a long ingredient list or complicated preparation. With whole malted milk balls and four basic ingredients, you can create a chocolatey, crunchy, and satisfying treat that is perfect for sharing.
The buttery crumb layer, smooth chocolate mixture, and crunchy malted centers make every bite enjoyable. Best of all, the no-bake preparation means you can assemble the dessert ahead of time and let the refrigerator do most of the work.
Whether you prepare these bars for your husband, your children, visiting friends, or a special family gathering, they offer a wonderful combination of simplicity and indulgence.
Make a batch, let it chill, slice it into generous squares, and watch how quickly the plate disappears.
For the Lovers of Chocolate and Easy Desserts
If you love chocolate, crunchy candy, and homemade treats that come together without complicated baking, this recipe deserves a place in your collection.
It is especially suited to busy home cooks who want something impressive without spending the entire afternoon in the kitchen. The ingredients are familiar, the preparation is manageable, and the finished bars are easy to portion and share.
For the best results, keep the malted milk balls whole, melt the chocolate gently, and give the dessert enough time to set before slicing.
One batch may be all you need for a family dessert, but if you are preparing them for a party, consider making two pans. These sweet, crunchy bars are easy to serve and tempting to reach for again.
Enjoy every chocolatey, malty, crunchy bite.