
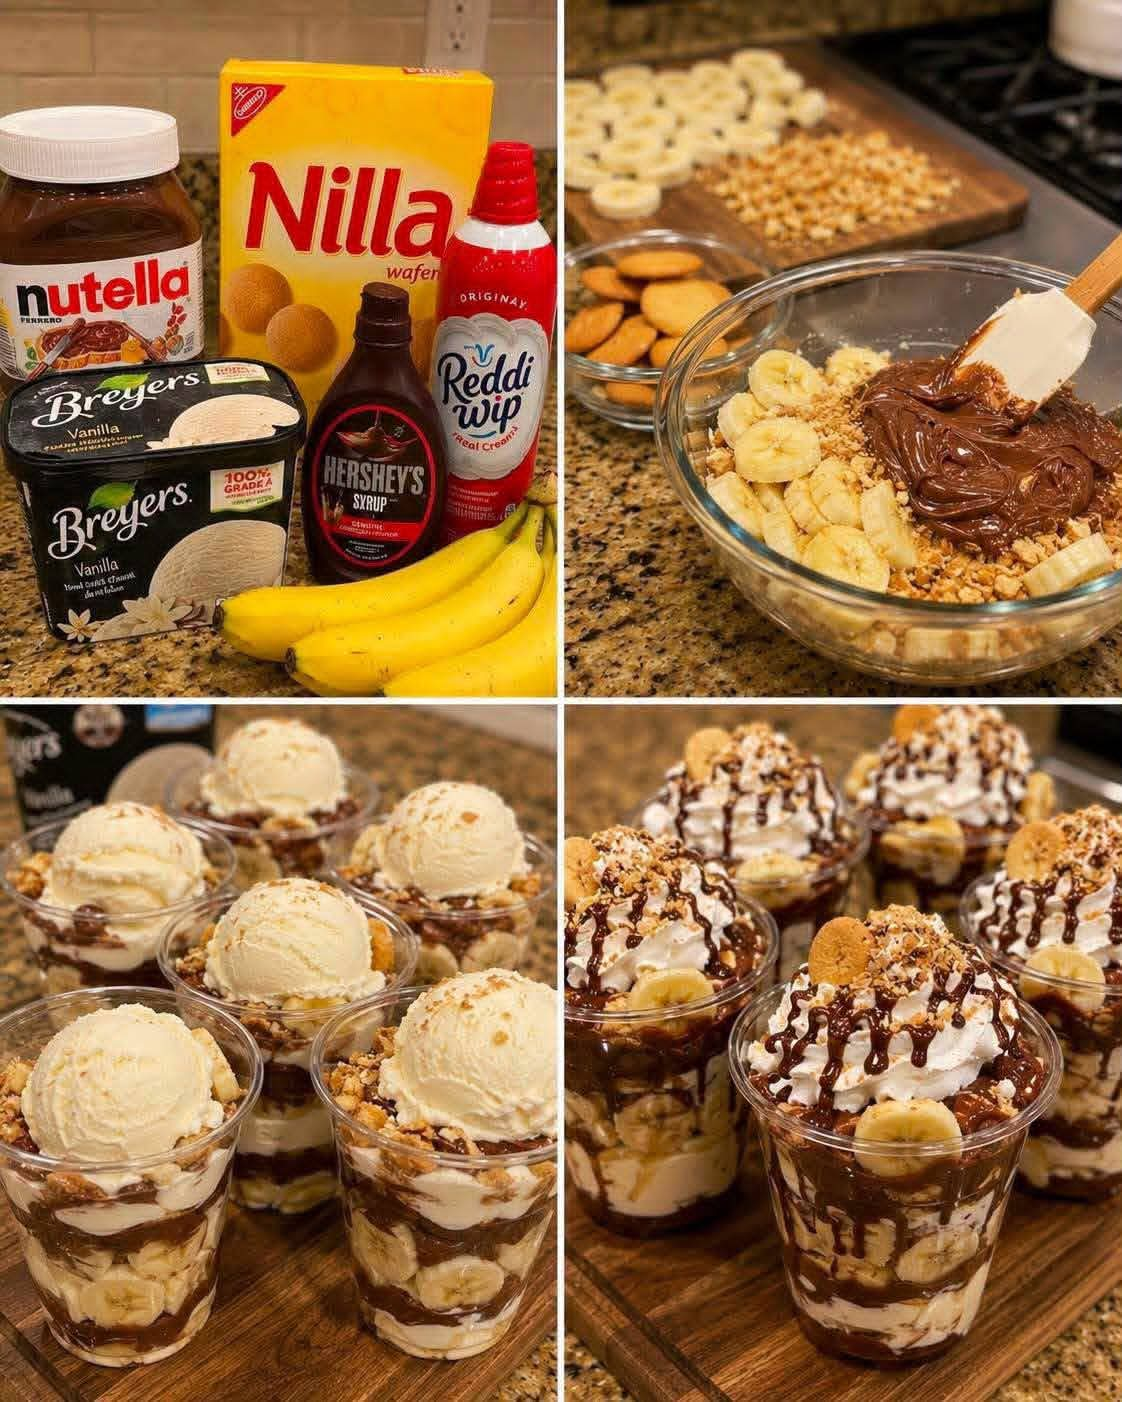
🍌🍫 Nutella Banana Pudding Sundae Cups
A Decadent No-Bake Dessert That Brings Together Bananas, Cookies, Ice Cream & Hazelnut Chocolate Magic
🌟 Introduction
Nutella Banana Pudding Sundae Cups are the ultimate celebration of creamy, crunchy, fruity, and chocolatey flavors in one beautiful dessert. This easy no-bake treat combines the nostalgic comfort of classic banana pudding with the indulgence of a rich ice cream sundae. Every spoonful delivers layers of soft vanilla cookies, sweet ripe bananas, silky pudding, cold vanilla ice cream, fluffy whipped cream, and ribbons of Nutella.
Perfect for birthdays, family gatherings, summer parties, holidays, or simply when you want a special dessert without turning on the oven, these individual cups are as beautiful as they are delicious.
📖 History of the Dessert
Banana pudding has a long tradition in American kitchens. It became especially popular in the late 1800s and early 1900s when packaged vanilla wafers and convenient pudding mixes became widely available. The classic version usually featured layers of vanilla pudding, bananas, whipped cream, and Nilla Wafers.
Over time, creative bakers began transforming the traditional pudding into new desserts by adding chocolate, caramel, peanut butter, and other flavors. Nutella, the famous hazelnut chocolate spread created in Italy in the 1960s, became a favorite ingredient around the world and brought a luxurious chocolate-hazelnut twist to classic desserts.
These Sundae Cups are a modern combination of two beloved treats: banana pudding and an ice cream sundae.
🍌🍫 Ingredients
For the Layers:
- 1 box Nilla Wafers (11 ounces)
- 3 ripe bananas, sliced
- 1 cup Nutella Hazelnut Spread
- 1½ quarts natural vanilla ice cream
- 1 cup prepared vanilla pudding, chilled
- 1 can whipped topping
- ½ cup chocolate syrup
- ½ cup chopped toasted hazelnuts (optional)
- Extra crushed Nilla Wafers for topping
- Extra banana slices for decoration
Equipment:
- 6–8 clear dessert cups
- Large mixing bowl
- Rubber spatula
- Ice cream scoop
- Microwave-safe bowl
- Serving tray
👩🍳 Preparation Method
Step 1: Prepare the Nilla Wafers
Take about half of the vanilla wafers and crush them into coarse crumbs. Do not crush them too finely because a little texture makes the dessert more enjoyable.
Keep some whole cookies aside for decoration and extra crunch.
Step 2: Prepare the Bananas
Peel the ripe bananas and slice them into even rounds.
Choose bananas that are yellow with a few brown spots because they will provide the sweetest flavor.
Reserve a few slices for the final decoration.
Step 3: Melt the Nutella
Place the Nutella in a microwave-safe bowl.
Warm it for about 15–20 seconds until it becomes smooth and easy to drizzle.
Be careful not to overheat it.
Step 4: Create the Nutella Pudding Cream
Place the chilled vanilla pudding into a mixing bowl.
Gently fold in about ¼ cup of warm Nutella.
Mix lightly so you create beautiful chocolate-hazelnut swirls while keeping the creamy texture.
🍨 Formation and Assembly Method
Step 5: Build the First Layer
In each clear dessert cup:
- Add a layer of crushed Nilla Wafers.
- Add several banana slices.
- Spoon in a layer of Nutella pudding mixture.
This creates the foundation of your sundae cup.
Step 6: Add the Ice Cream
Place one generous scoop of vanilla ice cream into each cup.
The cold ice cream creates the classic sundae experience.
Step 7: Continue Layering
Add:
- More Nutella pudding
- More banana slices
- Broken Nilla Wafers
- A drizzle of Nutella
Repeat layers until the cups are beautifully filled.
Step 8: Add the Whipped Cream
Top each dessert cup with a tall swirl of whipped topping.
This gives the sundae its classic finishing touch.
Step 9: Decorate
Finish each cup with:
- Chocolate syrup drizzle
- Warm Nutella drizzle
- Crushed Nilla Wafers
- Toasted hazelnuts
- A fresh banana slice
- A whole Nilla Wafer
Step 10: Serve Immediately
Serve the dessert cups right away while:
- The ice cream is perfectly cold
- The cookies still have a pleasant crunch
- The Nutella is smooth and creamy
❤️ Secrets for the Best Nutella Banana Pudding Sundae Cups
🍌 Use ripe bananas
The sweeter the banana, the better the flavor.
🍫 Warm Nutella gently
A little warmth makes it easier to drizzle and creates beautiful layers.
🍪 Keep cookie texture
Do not crush every wafer. Whole pieces add a wonderful crunch.
❄️ Assemble quickly
Because ice cream melts, prepare your ingredients before building the cups.
🌰 Toast the hazelnuts
Toasting brings out their natural flavor and adds a gourmet touch.
💕 Why Dessert Lovers Love This Recipe
This dessert is loved because it combines everything people crave:
- Creamy pudding
- Rich chocolate-hazelnut flavor
- Fresh fruit
- Crunchy cookies
- Smooth ice cream
- Beautiful presentation
It is a dessert that feels fancy but is simple enough for anyone to make.
🍽️ Serving Ideas
Serve these cups at:
🎉 Birthday parties
🍦 Summer gatherings
☕ Family dinners
🎄 Holiday celebrations
💛 Weekend dessert nights
You can also prepare the pudding and cookie layers ahead of time, then add ice cream and toppings just before serving.
🌟 Conclusion
Nutella Banana Pudding Sundae Cups are a delicious modern twist on two classic favorites. They bring together the comforting memories of homemade banana pudding and the excitement of an ice cream sundae. With layers of cookies, bananas, creamy pudding, Nutella, and whipped topping, every bite is a perfect balance of flavor and texture.
Whether you make them for guests or enjoy them as a special treat with family, this dessert is guaranteed to create smiles and happy memories.
A beautiful dessert, an easy recipe, and a sweet moment everyone will love. 🍌🍫✨