
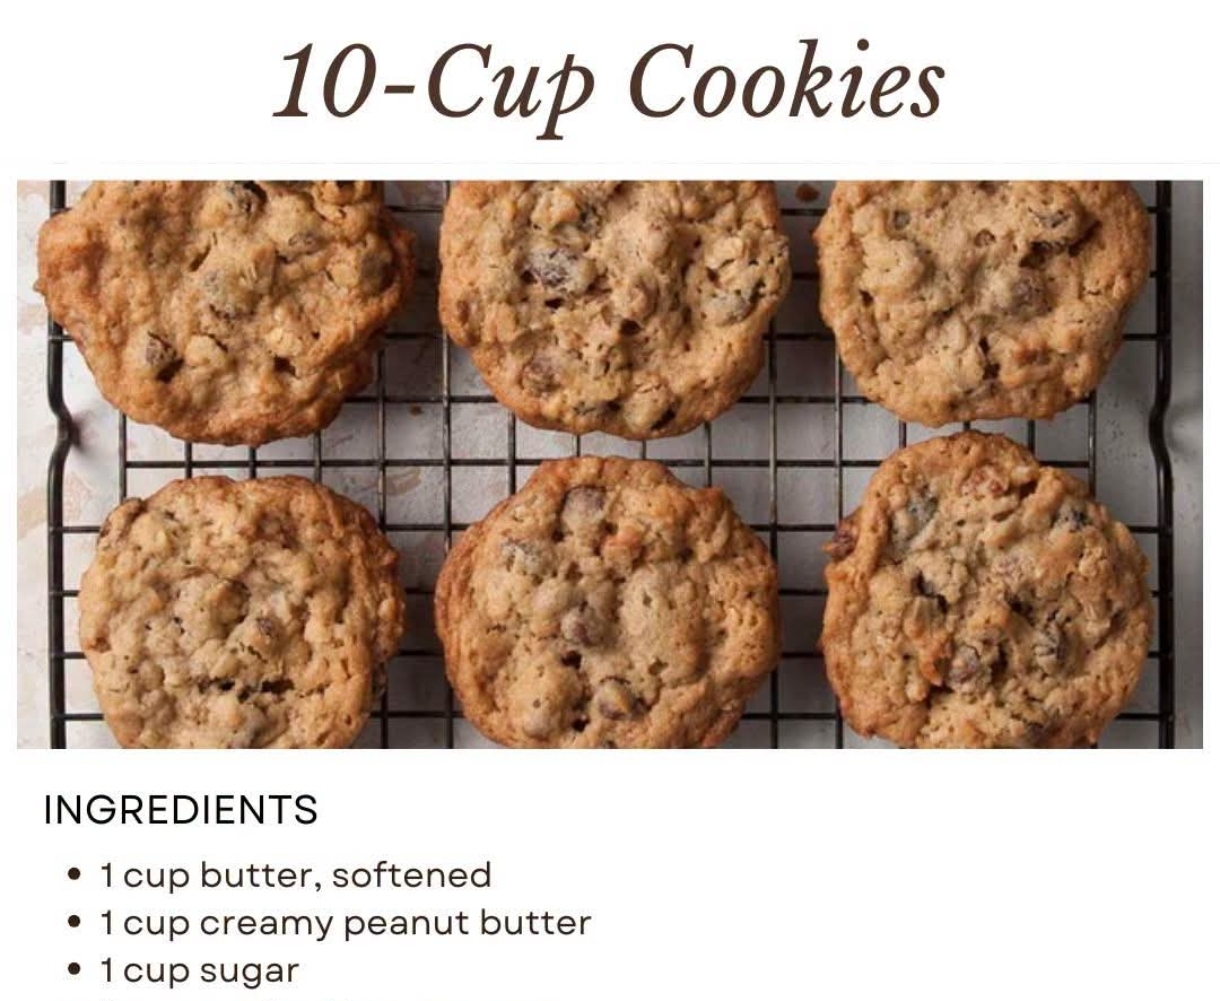
Old-Fashioned 10-Cup Cookies
Introduction
There is something wonderfully comforting about a cookie recipe that comes with a family story. These Old-Fashioned 10-Cup Cookies are the kind of homemade treat that turns an ordinary afternoon into a special memory. They are simple to prepare, generous in size, and filled with a delicious combination of familiar pantry ingredients.
The name comes from the easy-to-remember method of using approximately one cup of several main ingredients. Chocolate, coconut, raisins, and nuts can all make an appearance, so every bite offers something different. The result is a hearty, chewy cookie with crisp golden edges, a tender center, and plenty of texture.
This is the sort of recipe that is perfect for baking with children, sharing with family, taking to a gathering, or keeping in the cookie jar for an everyday sweet treat.
Ingredients
For the Cookies
- 1 cup unsalted butter, softened
- 1 cup granulated sugar
- 1 cup packed brown sugar
- 1 cup vegetable oil
- 1 cup quick-cooking oats
- 1 cup shredded sweetened coconut
- 1 cup raisins
- 1 cup chopped nuts, such as pecans or walnuts
- 1 cup chocolate chips
- 1 cup crushed cornflakes or crispy cereal
- 2 large eggs
- 1 teaspoon vanilla extract
- 3 cups all-purpose flour
- 1 teaspoon baking soda
- 1/2 teaspoon baking powder
- 1/2 teaspoon salt
Optional Additions
You can easily personalize these cookies according to your family’s favorite ingredients. Consider adding:
- White chocolate chips
- Butterscotch chips
- Chopped almonds
- Dried cranberries
- Chopped dates
- Peanut butter chips
- Dark chocolate chunks
- Extra coconut
- A small amount of cinnamon
Preparation
Before beginning, place the butter on the counter and allow it to soften naturally. Softened butter should be easy to press with your finger but should not be melted.
Preheat the oven to 350°F (175°C). Line baking sheets with parchment paper or lightly grease them.
Measure all of the ingredients before starting. Because this is a generously filled cookie dough, having everything prepared makes mixing much easier.
Instructions
Step 1: Cream the Butter and Sugars
Place the softened butter in a large mixing bowl. Add the granulated sugar and brown sugar.
Beat together until the mixture becomes creamy, smooth, and slightly fluffy.
Add the vegetable oil gradually and continue mixing until well combined.
Step 2: Add the Eggs and Vanilla
Beat in the eggs one at a time.
Make sure the first egg is incorporated before adding the second.
Add the vanilla extract and mix again until the wet ingredients are evenly combined.
Step 3: Prepare the Dry Ingredients
In a separate bowl, whisk together the flour, baking soda, baking powder, and salt.
This step distributes the leavening agents and salt throughout the flour so they are evenly incorporated into the cookie dough.
Step 4: Combine Wet and Dry Ingredients
Gradually add the dry ingredients to the butter mixture.
Mix just until the flour disappears. Avoid overmixing, because excessive mixing can make the finished cookies tougher.
The dough should be thick and substantial.
Step 5: Add the Favorite Ingredients
Now comes the best part.
Fold in the oats, coconut, raisins, chopped nuts, chocolate chips, and crushed cereal.
Use a sturdy wooden spoon or spatula because the dough becomes quite thick once all of the additions are incorporated.
Make sure the ingredients are distributed evenly throughout the dough so every cookie receives a little of everything.
Step 6: Form the Cookies
Using a tablespoon or cookie scoop, portion the dough onto the prepared baking sheets.
Leave about 2 inches of space between the cookies because they will spread slightly while baking.
For larger bakery-style cookies, use approximately 2 tablespoons of dough per cookie.
Gently flatten each mound with your fingertips or the bottom of a glass if you prefer a slightly flatter cookie.
Step 7: Bake
Place the baking sheet in the preheated oven.
Bake for approximately 10 to 14 minutes, depending on the size of the cookies.
The edges should be lightly golden while the centers may still look slightly soft.
Do not wait until the centers are completely firm. The cookies will continue cooking from the residual heat after they come out of the oven.
Step 8: Cool
Remove the baking sheet from the oven and allow the cookies to rest for approximately 5 minutes.
This gives the cookies time to set.
Transfer them carefully to a wire rack and allow them to cool completely.
Method for Perfect Cookies
The secret to these cookies is not complicated technique. It is the balance of ingredients and careful baking.
Use softened butter rather than melted butter. Softened butter helps create the proper texture during mixing.
Do not overmix after adding the flour. Once the flour has disappeared, stop mixing.
When adding the oats, coconut, raisins, nuts, chocolate, and cereal, fold them in gently but thoroughly.
For softer cookies, remove them from the oven while the centers still appear slightly underdone.
For crispier cookies, allow them to bake for another minute or two.
The History and Family Tradition
Recipes such as these are often treasured because they are more than instructions for making food. They become part of a family’s history.
The idea behind a 10-cup cookie is especially appealing because the recipe is easy to remember. Rather than relying on a complicated list of unusual measurements, the baker can think in terms of generous cups of familiar ingredients.
That simplicity makes this kind of cookie ideal for family kitchens. Children can help measure ingredients, stir the dough, scoop cookies onto baking sheets, and eventually develop their own favorite combinations.
Chocolate lovers might reach for extra chocolate chips. Someone who enjoys fruit might add more raisins or dried cranberries. Nut lovers can increase the pecans or walnuts. Coconut fans can add another handful.
The recipe becomes a starting point for family creativity.
Formation and Texture
These cookies have a wonderfully substantial texture.
The oats give them a hearty chewiness. Coconut adds softness and a pleasant bite. Raisins provide little bursts of natural sweetness, while nuts bring crunch.
Chocolate chips melt into pockets of richness throughout the cookie.
The crushed cereal contributes additional texture and helps create those wonderfully crisp edges.
When baked properly, the outside becomes lightly golden while the middle remains tender and chewy.
Storage
Allow the cookies to cool completely before storing them.
Place them in an airtight container and keep them at room temperature for approximately 4 to 5 days.
For longer storage, freeze the baked cookies in a freezer-safe container or bag. Separate layers with parchment paper if necessary.
Frozen cookies can generally be enjoyed after thawing at room temperature.
Freezing the Cookie Dough
The dough can also be prepared ahead of time.
Scoop the dough into individual portions and place them on a parchment-lined tray.
Freeze until firm, then transfer the portions to a freezer-safe container or bag.
When ready to bake, place the frozen dough portions on a baking sheet and allow a little additional baking time.
This makes it easy to have freshly baked cookies whenever the craving strikes.
Tips for Success
Measure Carefully
Even though this is a forgiving cookie recipe, accurate measurements help produce consistent results.
Use Room-Temperature Ingredients
Room-temperature eggs and softened butter blend more easily and help create a smoother dough.
Do Not Overbake
The cookies should be removed when the edges are golden and the centers are still slightly soft.
Customize the Mix-Ins
The beauty of these cookies is that you can adjust the additions to suit your family.
Give Them Room
Leave enough space between portions of dough so the cookies can spread without touching.
Let Them Rest
Allow the cookies to cool on the baking sheet for several minutes before transferring them to a rack. This helps prevent them from breaking while they are still warm.
Serving Suggestions
These cookies are delicious on their own, but they can also be served in several comforting ways.
Serve them with a cold glass of milk for a classic combination.
Enjoy one alongside a cup of coffee or tea in the afternoon.
Place a scoop of vanilla ice cream between two cookies for an easy homemade ice cream sandwich.
For holidays and family gatherings, arrange the cookies on a large platter with other homemade treats.
They also make a thoughtful addition to a packed lunch, bake sale, cookie exchange, or care package.
Why Everyone Loves These Cookies
There is a reason recipes like this remain popular from one generation to another.
They are easy.
They are generous.
They use familiar ingredients.
They can be changed according to personal taste.
Most importantly, they create memories.
A child may remember standing beside a mother in the kitchen, sneaking chocolate chips from the bowl or waiting impatiently for the first batch to cool.
Years later, that same person can make the cookies for their own family and recreate a little piece of those childhood moments.
Conclusion
Old-Fashioned 10-Cup Cookies are more than a simple homemade dessert. They are the kind of recipe that belongs in a family cookbook, written on a well-used recipe card and passed from one generation to the next.
With oats, coconut, raisins, nuts, chocolate, and crispy cereal packed into every bite, these cookies offer something for almost everyone.
They are chewy, crunchy, buttery, chocolatey, nutty, and wonderfully homemade.
Most of all, they remind us that some of the best recipes are not complicated. Sometimes the recipes we remember most are the ones made in an ordinary kitchen, with ingredients already in the pantry and people we love gathered nearby.
Bake a batch, fill the cookie jar, and make your own memories with this classic family-style treat.
A Little Love for the Cookie Jar
The best part of a recipe like this is sharing it.
Make a batch for your family. Save a few for yourself. Give some to a neighbor, friend, teacher, coworker, or someone who could use a homemade treat.
Because a homemade cookie is never just a cookie. It is a small reminder of home, family, generosity, and the simple pleasure of making something delicious with your own hands.