
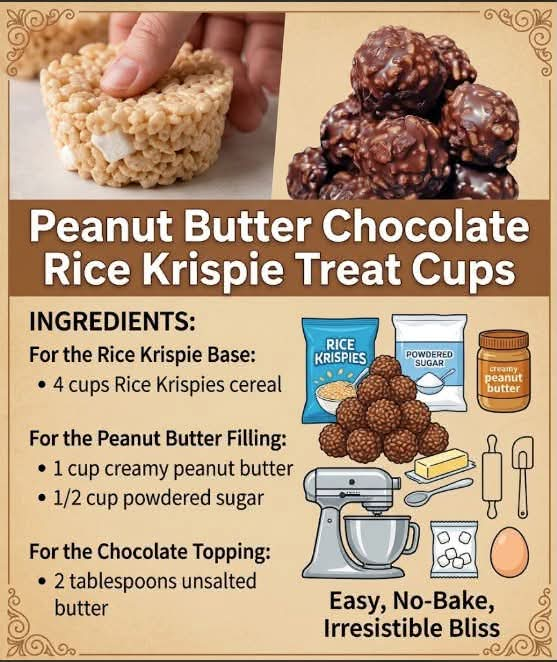
Peanut Butter Chocolate Rice Krispie Treat Cups
.
Introduction
Peanut Butter Chocolate Rice Krispie Treat Cups are a delicious combination of three irresistible textures: crisp and crunchy cereal, creamy peanut butter, and a smooth layer of rich chocolate. They are simple enough for a beginner baker but impressive enough to serve at parties, holidays, bake sales, family gatherings, or as an afternoon treat.
Instead of making traditional square Rice Krispie treats, this recipe transforms the classic cereal mixture into individual cups. Each cup has a crisp, slightly chewy Rice Krispie shell filled with a creamy peanut butter center and finished with a generous layer of melted chocolate.
The contrast between the crunchy cereal, salty-sweet peanut butter, and rich chocolate makes these treats especially satisfying. They require no complicated baking techniques and can be prepared with only a few basic ingredients.
Ingredients
For the Rice Krispie Base
- 4 cups Rice Krispies cereal
- 4 tablespoons unsalted butter
- 4 cups mini marshmallows
- 1 teaspoon vanilla extract
- Pinch of salt
For the Peanut Butter Filling
- 1 cup creamy peanut butter
- 1/2 cup powdered sugar
- 1/4 cup unsalted butter, softened
- 1 teaspoon vanilla extract
- Pinch of salt
For the Chocolate Topping
- 1 1/2 cups semi-sweet chocolate chips
- 1 tablespoon coconut oil or vegetable shortening, optional, for a smoother melted chocolate
For Preparation
- Nonstick cooking spray or softened butter for greasing the muffin pan
- Paper or silicone muffin liners, optional
Equipment
- Large mixing bowl
- Large saucepan or heavy-bottomed pot
- Wooden spoon or rubber spatula
- Muffin pan
- Small microwave-safe bowl or double boiler
- Measuring cups and spoons
- Small cookie scoop or spoon
History
Rice Krispie treats are based on the classic combination of crisped rice cereal, melted marshmallows, and butter. The dessert became popular in the United States during the twentieth century because it was inexpensive, quick to prepare, and required no oven.
Over time, home cooks began adapting the original recipe by adding ingredients such as chocolate, peanut butter, nuts, caramel, cookies, and other candies. Turning the mixture into individual cups is another creative variation that makes the treats easier to portion and gives each serving its own chocolate topping and peanut butter center.
The combination of peanut butter and chocolate has become one of the most popular flavor pairings in American-style desserts. Adding these flavors to a Rice Krispie treat creates a dessert that combines familiar childhood nostalgia with a richer candy-like finish.
Preparation of the Rice Krispie Base
Begin by preparing the muffin pan. Lightly grease each cavity with nonstick cooking spray or a thin layer of butter. You can also place paper or silicone liners into the pan if you prefer easier removal.
Measure the Rice Krispies cereal into a large bowl and set it aside.
Place a large saucepan over low to medium-low heat. Add the butter and allow it to melt gently.
Once the butter has melted, add the mini marshmallows. Stir continuously with a rubber spatula or wooden spoon until the marshmallows are completely melted and the mixture becomes smooth.
Remove the saucepan from the heat immediately. Stir in the vanilla extract and a small pinch of salt.
Pour the melted marshmallow mixture over the Rice Krispies cereal. Carefully fold everything together until the cereal is evenly coated.
Do not crush the cereal while mixing. Gentle folding helps preserve the crisp texture.
Forming the Rice Krispie Cups
While the mixture is still warm, spoon a small amount into each muffin-pan cavity.
Using lightly buttered fingers, the back of a spoon, or a small piece of parchment paper, press the mixture around the sides and bottom of each cavity. The goal is to create a small cup with enough space in the center for the peanut butter filling.
Do not press the mixture too firmly. Excessive pressure can make the cups hard and dense instead of pleasantly chewy.
Continue until all of the Rice Krispie mixture has been used.
Allow the cups to cool for approximately 15 to 20 minutes, or until they are firm enough to hold their shape.
Preparing the Peanut Butter Filling
While the Rice Krispie cups are cooling, prepare the peanut butter filling.
Place the softened butter and peanut butter in a mixing bowl. Beat or stir until smooth and creamy.
Add the powdered sugar, vanilla extract, and a small pinch of salt.
Mix thoroughly until the filling is smooth and thick.
If the filling seems too soft, add a little more powdered sugar. If it seems too thick, allow it to sit at room temperature for a few minutes and stir again.
Filling the Cups
Once the Rice Krispie cups have firmed up, spoon or pipe a small amount of peanut butter filling into the center of each cup.
Do not overfill them. Leave enough room for the chocolate topping.
Smooth the peanut butter filling gently with the back of a small spoon.
For an especially neat presentation, place the peanut butter filling into a piping bag or a sturdy food-storage bag with one corner snipped off, then pipe the filling into each cup.
Preparing the Chocolate Topping
Place the semi-sweet chocolate chips in a microwave-safe bowl.
Microwave for approximately 20 to 30 seconds at a time, stirring thoroughly between each interval.
Continue until the chocolate is mostly melted. Stir until the remaining chocolate melts from the residual heat.
If desired, add one tablespoon of coconut oil or vegetable shortening. This helps create a smoother chocolate topping that is easier to spread.
Alternatively, melt the chocolate gently over a double boiler, making sure that no water comes into contact with the chocolate.
Finishing the Treat Cups
Spoon melted chocolate over the peanut butter filling in each Rice Krispie cup.
Spread the chocolate gently toward the edges so that the peanut butter filling is covered.
For a thicker chocolate topping, allow the first layer to sit for several minutes and then add another small spoonful of melted chocolate.
Place the finished cups in the refrigerator for approximately 20 to 30 minutes, or until the chocolate has completely set.
Formation and Texture
The formation of these treats is based on layering.
The first layer is the Rice Krispie shell. The melted marshmallow and butter mixture acts as the binder, holding the crisp rice cereal together while still allowing it to retain some crunch.
The second layer is the peanut butter filling. Powdered sugar gives the peanut butter a thicker, softer texture, while butter adds richness and helps create a smooth consistency.
The final layer is melted chocolate. Once chilled, the chocolate becomes firm and provides a satisfying contrast to the softer peanut butter center and chewy-crisp Rice Krispie base.
The finished result should have a firm exterior, a slightly chewy center, a creamy peanut butter layer, and a smooth chocolate top.
Important Methods and Tips
Use Low Heat
When melting the marshmallows, keep the heat relatively low. High heat can cause the marshmallow mixture to become overly sticky and can result in harder Rice Krispie treats.
Work Quickly
The cereal mixture becomes more difficult to shape as it cools. Form the cups while the mixture is still warm and flexible.
Do Not Compress Too Much
Pressing the cereal mixture extremely firmly can produce dense, hard cups. Use enough pressure to hold the shape without crushing the cereal.
Use Creamy Peanut Butter
Creamy peanut butter produces the smoothest filling. Natural peanut butter can also be used, but it should be thoroughly stirred before measuring because the oil can separate.
Avoid Overheating Chocolate
Chocolate can become thick, grainy, or scorched if overheated. Melt it gradually and stir frequently.
Chill Before Serving
Allowing the chocolate to set completely makes the cups easier to handle and gives them a cleaner appearance.
Variations
Milk Chocolate Version
Replace the semi-sweet chocolate chips with milk chocolate chips for a sweeter and creamier topping.
Dark Chocolate Version
Use dark chocolate chips for a deeper chocolate flavor and a less sweet finish.
Crunchy Peanut Butter Version
Replace creamy peanut butter with crunchy peanut butter to add pieces of roasted peanuts throughout the filling.
Extra Chocolate Version
Add a thin layer of melted chocolate to the bottom of each cup before adding the Rice Krispie mixture. This creates an additional chocolate layer.
Chocolate Drizzle
After the main chocolate layer has set, drizzle a small amount of melted white, milk, or dark chocolate across the top.
Peanut Garnish
Sprinkle finely chopped roasted peanuts over the chocolate before it sets for additional crunch.
Mini Cups
Use a mini muffin pan to create smaller individual treats. These are especially convenient for parties and dessert tables.
Storage
Store the finished Rice Krispie treat cups in an airtight container.
They can generally be kept at room temperature for several days in a cool, dry environment. If your kitchen is warm, refrigerating them can help keep the chocolate firm.
Place parchment paper between layers if you are stacking the cups.
Allow refrigerated treats to sit at room temperature for a few minutes before serving. This allows the peanut butter center to soften slightly and improves the texture.
Serving Suggestions
These treats are excellent served as individual desserts at parties, birthdays, family gatherings, bake sales, holiday dessert tables, or afternoon snacks.
They can also be placed into small cupcake liners and arranged on a serving platter for an attractive presentation.
For a dessert platter, combine them with cookies, brownies, chocolate truffles, or other small treats.
A glass of cold milk, a cup of coffee, or a warm cup of tea pairs particularly well with the rich peanut butter and chocolate flavors.
Lovers of Peanut Butter and Chocolate
This recipe is particularly appealing to anyone who loves the classic combination of peanut butter and chocolate.
Peanut butter provides richness, saltiness, and creaminess, while chocolate contributes sweetness and a deep cocoa flavor. The Rice Krispie base adds a completely different texture, making every bite more interesting.
The beauty of these cups is that none of the three main components overwhelms the others. The crisp cereal provides structure, the peanut butter creates the creamy center, and the chocolate finishes everything with a rich, smooth layer.
Troubleshooting
The Rice Krispie Mixture Is Too Sticky
Allow it to cool for a few minutes before shaping. Lightly buttering your hands or spoon can also make the mixture easier to handle.
The Cups Are Falling Apart
The cereal may not have been coated evenly with enough marshmallow mixture, or the cups may not have been pressed firmly enough into shape.
The Cups Are Too Hard
The marshmallow mixture may have been heated too long or at too high a temperature. Melt the marshmallows gently and remove them from the heat as soon as they become smooth.
The Peanut Butter Filling Is Too Runny
Add additional powdered sugar, one tablespoon at a time, until the filling reaches a thick, spreadable consistency.
The Chocolate Is Too Thick
Stir in a very small amount of coconut oil or vegetable shortening and mix until smooth.
Make-Ahead Method
These treats are excellent for preparing ahead of time.
Prepare the cups completely, allow the chocolate to set, and store them in an airtight container.
For parties or gatherings, they can be prepared the day before serving. This makes them a convenient dessert when you need to prepare several dishes in advance.
Conclusion
Peanut Butter Chocolate Rice Krispie Treat Cups are a simple but impressive dessert that combines three beloved flavors and textures in one individual treat.
The crisp Rice Krispie shell provides the foundation, the creamy peanut butter filling adds richness, and the semi-sweet chocolate topping brings everything together with a smooth and satisfying finish.
They require no complicated baking skills, making them an excellent choice for beginners as well as experienced home bakers. They are also easy to customize with different chocolates, peanut butter varieties, nuts, or additional toppings.
For peanut butter and chocolate lovers, these little cups offer everything that makes the combination so appealing: crunch, chewiness, creaminess, and chocolate richness in every bite.
The best part is their simplicity. With a handful of familiar ingredients and a little careful shaping, you can create a dessert that looks special, tastes indulgent, and is easy to share with family and friends.
Final Recipe at a Glance
Prepare the Rice Krispie mixture with butter, marshmallows, vanilla, salt, and cereal. Shape the warm mixture into individual cups. Prepare a creamy peanut butter filling with peanut butter, butter, powdered sugar, vanilla, and salt. Fill each Rice Krispie cup with the peanut butter mixture. Melt the semi-sweet chocolate and spoon it over the top. Chill until the chocolate is set, then serve and enjoy.
These Peanut Butter Chocolate Rice Krispie Treat Cups are best enjoyed when the chocolate is firm but the peanut butter center remains soft and creamy.