
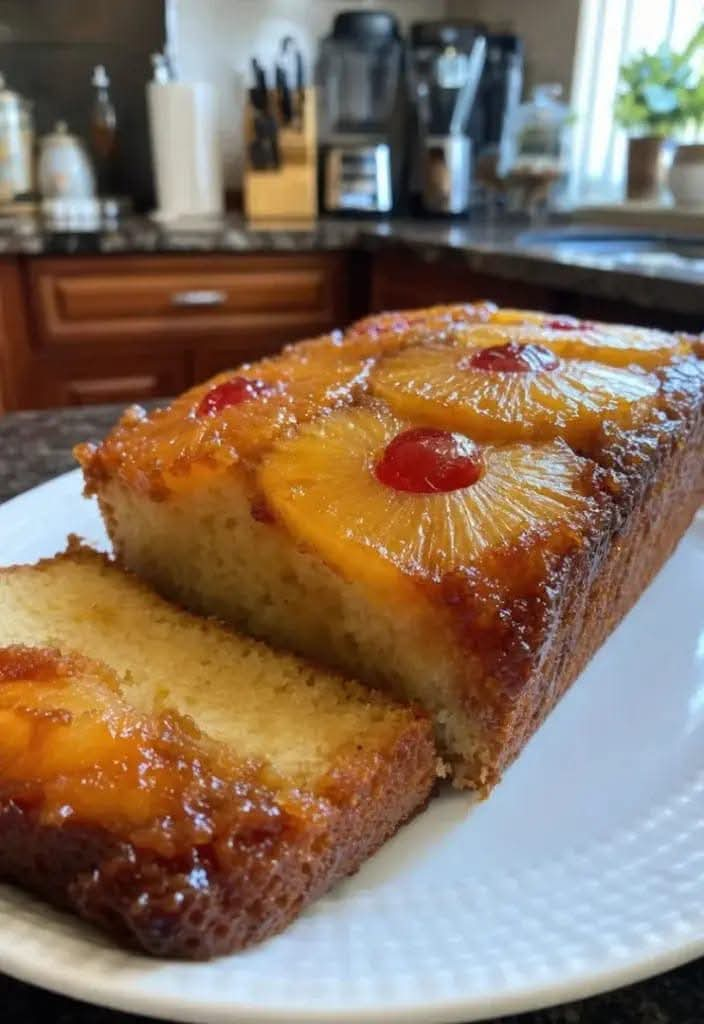
Pineapple Upside Down Bread
🍍 Pineapple Upside Down Bread
Caramelized Pineapple, Buttery Soft Crumb & Old-Fashioned Sweetness
🌴 Introduction
Pineapple Upside Down Bread is a delicious twist on the beloved pineapple upside-down cake. Instead of making a traditional round cake, this version is baked as a beautiful loaf, making it wonderfully easy to slice, serve, and share.
The magic happens when pineapple rings, cherries, butter, and brown sugar are placed at the bottom of the loaf pan. As the bread bakes, the brown sugar melts into a rich caramel-like topping while the pineapple releases its sweet, tropical juices into the buttery cake.
Then comes the best part: after baking, the loaf is carefully turned upside down, revealing glossy golden pineapple rings and beautiful caramelized fruit on top. 🍍🍒
It is soft, moist, buttery, fruity, and wonderfully nostalgic—the kind of dessert that makes the kitchen smell absolutely irresistible.
🛒 Ingredients
🍍 For the Pineapple Topping
- 5–6 pineapple rings, canned or fresh
- ½ cup packed light brown sugar
- 4 tablespoons unsalted butter, melted
- 1 teaspoon vanilla extract
- 6–8 maraschino cherries, optional
- 1 tablespoon pineapple juice
🍞 For the Bread
- 1½ cups all-purpose flour
- 1½ teaspoons baking powder
- ¼ teaspoon baking soda
- ½ teaspoon salt
- ½ cup unsalted butter, softened
- ¾ cup granulated sugar
- 2 large eggs, room temperature
- 1 teaspoon vanilla extract
- ½ cup sour cream or plain yogurt
- ¼ cup pineapple juice
- ¼ cup milk
- ½ cup finely chopped pineapple, well drained
🍍 Equipment
- 9 × 5-inch loaf pan
- Mixing bowls
- Whisk
- Electric mixer or hand mixer
- Rubber spatula
- Measuring cups and spoons
- Wire cooling rack
- Parchment paper, optional
👩🍳 Instructions
Step 1: Prepare the Pan
Preheat your oven to 350°F (175°C).
Grease a 9 × 5-inch loaf pan very thoroughly. For easier removal, line the bottom with a piece of parchment paper and lightly grease the parchment as well.
Because the topping contains melted butter and brown sugar, good preparation is important. You don’t want the caramelized pineapple sticking to the pan.
Step 2: Make the Pineapple Topping
Melt the 4 tablespoons of butter.
Stir the melted butter together with:
- Brown sugar
- Vanilla
- Pineapple juice
Spread this mixture evenly over the bottom of the prepared loaf pan.
Arrange the pineapple rings over the brown sugar mixture.
If necessary, cut one ring into smaller pieces so everything fits neatly.
Place a maraschino cherry in the center of each pineapple ring.
The pan should already look beautiful before it even goes into the oven! 🍍🍒
🥣 Step 3: Prepare the Dry Ingredients
In a medium bowl, whisk together:
- Flour
- Baking powder
- Baking soda
- Salt
Whisking the dry ingredients helps distribute the leavening agents evenly throughout the flour.
Set the bowl aside.
🧈 Step 4: Cream the Butter and Sugar
In a large mixing bowl, beat the softened butter and granulated sugar together for approximately 2–3 minutes.
The mixture should become lighter, creamy, and fluffy.
This step helps incorporate air into the batter and contributes to a soft texture.
🥚 Step 5: Add the Eggs
Add the eggs one at a time, beating well after each addition.
Add the vanilla extract.
If the mixture looks slightly curdled, don’t worry—it will come together when the dry ingredients are added.
🍍 Step 6: Add the Wet Ingredients
In a separate small bowl, combine:
- Sour cream or yogurt
- Pineapple juice
- Milk
Add the dry ingredients to the butter mixture in portions, alternating with the pineapple mixture.
For example:
Dry ingredients → wet ingredients → dry ingredients → wet ingredients → remaining dry ingredients
Mix just until combined.
Do not overmix the batter.
🍍 Step 7: Add the Chopped Pineapple
Fold the finely chopped, well-drained pineapple gently into the batter using a rubber spatula.
Make sure the pineapple isn’t carrying too much liquid. Excess moisture can make the loaf heavy or cause the center to remain underbaked.
🍞 Step 8: Fill the Loaf Pan
Carefully spoon the batter over the pineapple arrangement.
Spread it gently with a spatula until the surface is relatively even.
Don’t press aggressively into the pineapple topping.
🔥 Step 9: Bake
Place the loaf in the center of the preheated oven.
Bake for approximately 50–65 minutes, depending on your oven and the exact size of your loaf pan.
Begin checking around the 50-minute mark.
The top should be golden brown and a toothpick inserted into the center of the cake portion should come out clean or with a few moist crumbs.
If the top begins browning too quickly, loosely cover it with aluminum foil during the final portion of baking.
❄️ Step 10: Cool
Remove the loaf from the oven and allow it to cool in the pan for approximately 15–20 minutes.
Don’t leave it in the pan for hours, because the caramelized brown sugar may begin sticking as it cools.
Run a thin knife carefully around the edges.
Place a serving plate over the loaf pan.
Then carefully flip the pan and plate together.
Lift the loaf pan away slowly.
✨ And there it is!
Golden pineapple rings, shiny caramelized brown sugar, and a gorgeous buttery loaf.
🍯 The Formation & Texture
The beauty of this dessert comes from several layers working together.
🍍 Pineapple Layer
The pineapple becomes tender and juicy as it bakes.
🍯 Brown Sugar Caramel Layer
Butter and brown sugar melt together during baking, creating a glossy, caramel-like coating.
🧈 Buttery Cake Layer
The combination of butter, eggs, sour cream or yogurt, and pineapple juice creates a tender crumb.
🍒 Cherry Centers
Maraschino cherries add a bright pop of color and a classic pineapple-upside-down-cake appearance.
When the loaf is inverted, all these layers come together beautifully.
❤️ Methods for the Best Results
1. Drain the Pineapple Well
This is especially important if you’re using canned pineapple.
Too much liquid can make the bread soggy.
2. Use Room-Temperature Eggs
Room-temperature eggs incorporate more easily into the batter and help produce a smoother mixture.
3. Don’t Overmix
Once the flour is added, mix only until you no longer see dry flour.
Overmixing can make the loaf dense or chewy.
4. Don’t Rush the Flip
Allow the loaf to cool for about 15–20 minutes before turning it over.
5. Use a Metal Loaf Pan
A metal pan generally provides reliable heat distribution and helps the loaf bake evenly.
6. Watch the Center
Pineapple adds moisture, so don’t rely only on the color of the crust. Always test the center before removing the loaf from the oven.
🌺 A Little History
Pineapple upside-down cake became especially popular in the United States during the early 20th century, when canned pineapple became widely available.
The famous upside-down preparation itself is older than the modern pineapple version. Fruit and sugar were traditionally placed beneath cake batter so that, after baking, the dessert could be inverted and the caramelized fruit would become the topping.
Pineapple became a particularly popular choice because its ring shape naturally created an attractive presentation.
The classic combination of pineapple rings, brown sugar, butter, and cherries became a nostalgic American baking favorite.
This loaf version takes those familiar flavors and gives them a more casual, everyday form.
🍽️ Serving Ideas
Serve slices of Pineapple Upside Down Bread:
- Warm from the oven
- At room temperature
- With whipped cream
- With vanilla ice cream
- With a drizzle of caramel sauce
- With toasted coconut
- Alongside coffee or tea
- As an afternoon snack
- As a holiday dessert
- As a brunch sweet bread
For an extra-special serving, warm a slice for about 10–15 seconds and add a scoop of vanilla ice cream on top.
The warm pineapple and cold ice cream are absolutely delicious together. 🍍🍨
💕 For Pineapple Lovers
If you are a true pineapple lover, you can make the tropical flavor even stronger.
Try adding:
- ½ teaspoon coconut extract
- ¼ cup shredded coconut
- Extra pineapple pieces
- A little lime zest
- Toasted coconut on top
- A light coconut glaze
You can even replace some of the milk with coconut milk for a richer tropical flavor.
🍒 For Cherry Lovers
Love the cherries?
Don’t stop at one cherry per pineapple ring!
You can scatter additional maraschino cherries throughout the topping or gently fold chopped cherries into the batter.
Just make sure to drain them thoroughly first.
🥥 Tropical Variation
For a tropical version, add:
- ¼ cup shredded coconut
- ¼ cup chopped macadamia nuts
- Extra pineapple
- A little lime zest
The result is a pineapple-coconut loaf with a wonderful island-inspired flavor.
🍫 Dessert Lover’s Variation
For something completely different, serve each slice with:
- Warm chocolate sauce
- Vanilla ice cream
- Caramel sauce
- Toasted pecans
The combination of caramelized pineapple and chocolate creates a surprisingly delicious dessert.
🧁 Mini Loaf Method
This recipe can also be turned into individual mini loaves.
Divide the pineapple topping among several small loaf pans, arrange a pineapple piece and cherry in each, then divide the batter evenly.
Begin checking them much earlier than the full-size loaf because smaller loaves bake faster.
They’re wonderful for gifts, bake sales, parties, and family gatherings.
🫙 Storage
Allow the bread to cool completely before storing.
Keep it covered at room temperature for a short period, or refrigerate it for longer storage.
Because the bread contains fruit and dairy ingredients, refrigeration is the safer choice for extended storage.
To serve, allow refrigerated slices to come closer to room temperature or gently warm them before serving.
❄️ Freezing
For longer storage, individual slices can be wrapped tightly and frozen.
Place wrapped slices in a freezer-safe container or bag.
When ready to enjoy, thaw in the refrigerator and bring to room temperature before serving.
For the best texture, avoid repeatedly freezing and thawing the entire loaf.
🌟 Troubleshooting
Why did my pineapple stick to the pan?
The brown sugar caramel may have cooled and hardened.
Next time, grease the pan very well and turn the loaf out while it’s still slightly warm.
Why is my loaf dense?
The most common causes are overmixing, too much liquid, or insufficient baking time.
Why is the middle still wet?
Pineapple contains a lot of moisture. Make sure the pineapple is well drained and bake until a toothpick inserted into the center comes out clean or with only a few moist crumbs.
Why did my topping slide off?
Let the loaf cool briefly before flipping it, and make sure the pineapple rings are arranged flat on the bottom of the pan.
💛 Conclusion
Pineapple Upside Down Bread is the perfect combination of old-fashioned comfort and tropical sweetness.
Every slice brings together buttery soft cake, juicy pineapple, caramelized brown sugar, and those beautiful little cherries. It’s simple enough for a weekend baking project but pretty enough to serve at a family celebration.
The best part is the moment you turn the loaf upside down and reveal that golden pineapple topping. 🍍✨
Serve it with coffee for breakfast, tea in the afternoon, or vanilla ice cream after dinner.
It is sweet, soft, buttery, fruity, nostalgic, and made for sharing.
❤️ A Recipe Made for Lovers of Homemade Baking
For everyone who loves pineapple desserts, caramelized fruit, old-fashioned cakes, and cozy homemade treats—this loaf is for you.
Bake it, flip it, slice it, and watch everyone’s face light up when they see that beautiful pineapple topping.
One loaf, one unforgettable aroma, and plenty of delicious slices to share. 🍍🍒💛
🍰 Final Baker’s Tip
Don’t worry if your pineapple rings aren’t perfectly arranged. Homemade baking doesn’t need to look perfect to taste incredible.
The real magic is in the buttery crumb, caramelized fruit, and the love you put into making it.