
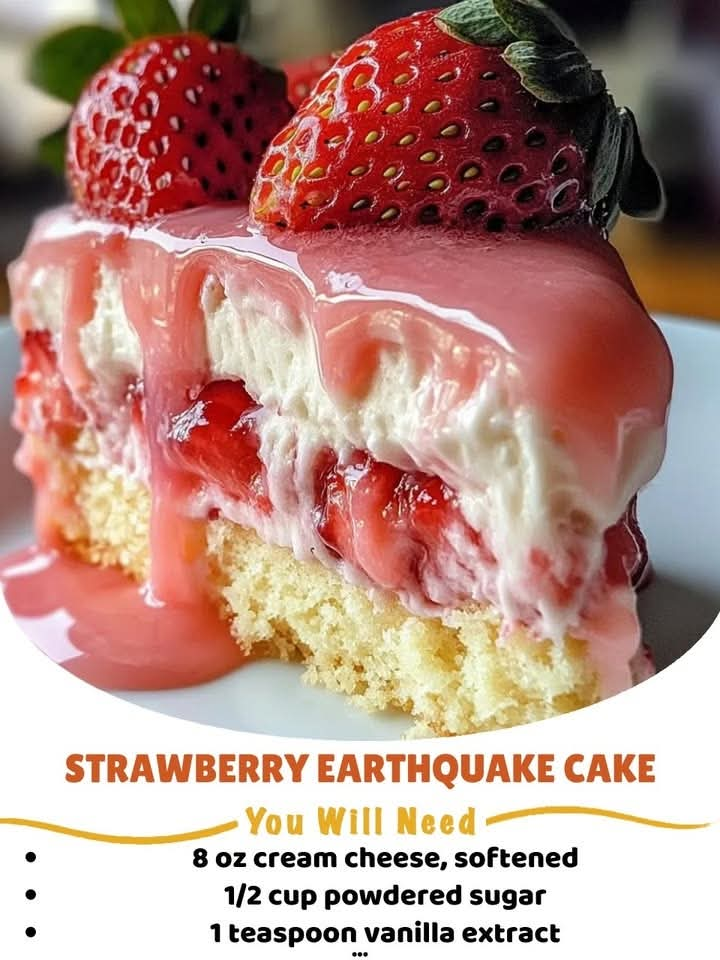
🍓🍰✨ Strawberry Earthquake Cake ✨🍰🍓
Introduction
Strawberry Earthquake Cake is a wonderfully indulgent dessert that combines the softness of strawberry cake with a rich, creamy cheesecake filling and sweet pockets of strawberries. Its name comes from its appearance: as the cake bakes, the creamy filling and other ingredients shift and sink, creating beautiful cracks and valleys across the surface—almost as if a little earthquake happened inside the pan!
This is an especially easy dessert because it begins with a boxed strawberry cake mix, but the finished result tastes much more elaborate. Fresh strawberries add natural fruitiness, while the cream cheese mixture creates deliciously rich pockets throughout the cake.
It is perfect for birthdays, family gatherings, potlucks, afternoon coffee, celebrations, or simply whenever you want a spectacular strawberry dessert without spending hours in the kitchen.
🍓 Ingredients
For the Strawberry Cake
- 1 box (15.25 ounces / 432 g) strawberry cake mix
- 3 large eggs
- 1/2 cup (120 ml) vegetable oil
- 1 cup (240 ml) water
- 1 cup (150 g) fresh strawberries, finely diced
For the Cream Cheese Filling
- 8 ounces (226 g) cream cheese, softened
- 1/2 cup (113 g) unsalted butter, softened
- 2 cups (240 g) powdered sugar
- 1 teaspoon vanilla extract
- Pinch of salt
For the Strawberry Swirl
- 1/2 cup (75 g) finely chopped fresh strawberries
- 2 tablespoons strawberry jam or preserves
- 1 tablespoon granulated sugar, optional
Optional Toppings
- Fresh strawberries, sliced
- Powdered sugar
- Whipped cream
- Strawberry sauce
- White chocolate drizzle
- Crushed freeze-dried strawberries
- Vanilla ice cream
🍰 Equipment
- 9 × 13-inch (23 × 33 cm) baking dish
- Mixing bowls
- Electric hand mixer or stand mixer
- Rubber spatula
- Measuring cups and spoons
- Wooden skewer or butter knife
👩🍳 Instructions
Step 1: Prepare the Oven and Pan
Preheat your oven to 350°F (175°C).
Lightly grease a 9 × 13-inch baking dish with butter or nonstick cooking spray.
For easier serving, you can also line the bottom with parchment paper, leaving a little overhang on two sides.
Step 2: Prepare the Strawberry Cake Batter
Place the strawberry cake mix into a large mixing bowl.
Add:
- 3 eggs
- 1/2 cup vegetable oil
- 1 cup water
Beat for approximately 2 minutes, scraping down the sides of the bowl as needed.
The batter should become smooth and fairly thick.
Gently fold in 1 cup of finely diced fresh strawberries.
Don’t overmix after adding the strawberries because excessive mixing can make the cake heavier.
🧀 Step 3: Make the Cream Cheese Filling
In a separate bowl, beat the softened cream cheese and butter until smooth and creamy.
Gradually add the powdered sugar.
Add:
- 1 teaspoon vanilla
- A small pinch of salt
Continue beating until the mixture becomes fluffy and smooth.
If your cream cheese is still cold, the filling may become lumpy, so allowing it to soften at room temperature first is helpful.
🍓 Step 4: Prepare the Strawberry Swirl
Combine the chopped strawberries with the strawberry jam.
If you prefer a sweeter strawberry flavor, add 1 tablespoon of sugar.
Stir gently until the strawberries are coated.
This mixture creates little pockets of extra strawberry flavor throughout the cake.
🌸 Step 5: Assemble the Cake
Pour approximately two-thirds of the strawberry cake batter into the prepared baking dish.
Spread it gently into an even layer.
Spoon portions of the cream cheese mixture over the batter.
Don’t worry about making it perfectly even. In fact, the irregular distribution helps create the beautiful earthquake effect.
Add spoonfuls of the strawberry mixture between the cream cheese portions.
Pour the remaining strawberry cake batter over the top.
Use a spatula to gently spread it without completely mixing the layers.
🌋 Step 6: Create the Earthquake Effect
Take a butter knife or wooden skewer and gently swirl through the batter.
Make several loose figure-eight motions.
Do not over-swirl.
You want distinct ribbons and pockets of cream cheese rather than completely mixing the filling into the cake.
This uneven structure is what helps create those gorgeous cracks and valleys during baking.
🔥 Step 7: Bake
Place the cake in the preheated oven.
Bake for approximately 40–50 minutes.
Because ovens and cake mixes vary, begin checking around 40 minutes.
The cake should look set around the edges while the center remains slightly soft.
A toothpick inserted into an area containing only cake batter should come out with a few moist crumbs.
Avoid overbaking because the cake will continue to firm up as it cools.
❄️ Step 8: Cool
Remove the cake from the oven and place the pan on a cooling rack.
Allow it to cool for at least 30–45 minutes.
For an especially creamy texture, refrigerate it for approximately 1–2 hours before serving.
The cooling process allows the cream cheese filling to set and makes the cake easier to cut.
🍓 Step 9: Decorate
Once cooled, decorate the cake however you like.
For a beautiful strawberry presentation, add:
- Sliced fresh strawberries
- A dusting of powdered sugar
- Whipped cream
- Strawberry sauce
- A little white chocolate drizzle
For an extra-special dessert, serve each slice with a scoop of vanilla ice cream.
🍰 The Method Behind the “Earthquake”
The magic of this cake comes from the different textures and densities of its layers.
The strawberry cake batter rises as it bakes, while the rich cream cheese mixture remains heavier and moves through the batter. As everything expands and settles, the surface develops cracks, valleys, swirls, and pockets.
Instead of trying to make the cake perfectly smooth, embrace the imperfections.
The cracks are the beauty of an earthquake cake!
📜 A Little History
Earthquake cakes belong to a family of American-style desserts that became popular because they were simple to assemble while producing dramatic results.
The general concept is similar to other “dump” and layered cakes: ingredients are combined in a baking dish without requiring complicated pastry techniques.
The term “earthquake cake” refers to the cracked, uneven appearance that develops during baking. Different versions have appeared over the years, including chocolate, coconut, German chocolate, pumpkin, and other fruit variations.
Strawberry versions are particularly popular because the pink cake, red berries, and creamy white filling create a beautiful combination.
💕 Why Strawberry Lovers Adore It
Strawberry lovers get several layers of strawberry flavor in one dessert:
🍓 Strawberry cake
🍓 Fresh diced strawberries
🍓 Strawberry jam
🍓 Creamy cheesecake filling
🍓 Optional strawberry sauce
Every bite gives you a combination of fruity, creamy, soft, and rich textures.
It’s almost like combining strawberry cake and cheesecake in one pan.
💡 Helpful Baking Tips
Use room-temperature cream cheese
Softened cream cheese blends much more smoothly and gives you a creamy filling without lumps.
Don’t overmix
Once the flour-based cake mix is hydrated, excessive mixing can make the finished cake less tender.
Pat the strawberries dry
Fresh strawberries contain a lot of moisture. After washing them, dry them thoroughly before chopping.
Don’t over-swirl
A few gentle swirls are enough. Too much swirling can completely blend the cream cheese into the cake and reduce the dramatic marbled effect.
Watch the baking time
The center should look set but still moist. Overbaking can turn the cake dry.
Chill before slicing
A short period in the refrigerator makes the cream cheese pockets firmer and the slices cleaner.
🍓 Variations
🍫 Chocolate-Strawberry Earthquake Cake
Use chocolate cake mix instead of strawberry cake mix and add strawberries for a chocolate-covered-strawberry version.
🍋 Strawberry Lemon Earthquake Cake
Add 1–2 teaspoons of lemon zest to the cream cheese filling and use a little lemon juice in the strawberry swirl.
🥥 Strawberry Coconut Earthquake Cake
Add shredded sweetened coconut to the batter and sprinkle toasted coconut over the finished cake.
🍫 White Chocolate Strawberry Cake
Add white chocolate chips to the batter and drizzle melted white chocolate over the cooled cake.
🍰 Strawberry Cheesecake Celebration Cake
Serve chilled with whipped cream, fresh strawberries, strawberry sauce, and a scoop of vanilla ice cream.
🍽️ Serving Suggestions
Cut the cooled cake into squares and place each piece on a dessert plate.
For a restaurant-style presentation, add a small spoonful of strawberry sauce to the plate, place the cake on top, and finish with whipped cream and fresh strawberries.
A cup of coffee, tea, or cold milk makes a wonderful companion.
❤️ Storage
Store leftover cake covered in the refrigerator because of the cream cheese filling.
It is best enjoyed within approximately 3–4 days.
You can also freeze individual portions. Wrap them tightly and place them in an airtight freezer-safe container. Thaw them in the refrigerator before serving.
👩🍳 The Formation of the Perfect Cake
The final cake should have:
Top: beautiful cracks and strawberry-colored valleys
Middle: soft, moist strawberry cake with creamy cheesecake pockets
Inside: pieces of juicy strawberry throughout
Bottom: tender cake with rich fruity flavor
The goal isn’t a perfectly uniform cake.
The goal is a dessert that looks wonderfully imperfect and tastes absolutely irresistible.
🌟 Conclusion
Strawberry Earthquake Cake is one of those desserts that proves you don’t need complicated pastry techniques to create something memorable.
With a simple strawberry cake base, fresh berries, sweet strawberry preserves, and a rich cream cheese filling, you get a dessert that is colorful, creamy, fruity, and wonderfully comforting.
And the best part?
Every cake develops its own unique cracks and swirls.
So don’t worry if your cake doesn’t look exactly like someone else’s. Those beautiful imperfections are part of what makes an earthquake cake special.
🍓❤️ For the Strawberry Lovers
If you’re a true strawberry lover, serve this cake slightly chilled with a generous spoonful of whipped cream, fresh strawberries, and strawberry sauce.
One bite gives you:
Soft cake + creamy cheesecake + juicy strawberries + sweet strawberry flavor = pure dessert happiness. 🍓🍰❤️
Final Recipe at a Glance
Prep: 20 minutes
Bake: 40–50 minutes
Cooling: 30–45 minutes
Optional chilling: 1–2 hours
Servings: approximately 12–15 slices
Oven: 350°F (175°C)
Pan: 9 × 13 inches
❤️ Final Thought
Bake it for your family, bring it to a gathering, or simply make it because you’re craving something sweet.
One pan, plenty of strawberries, creamy cheesecake pockets, and beautiful earthquake cracks—what’s not to love? 🍓🍰✨
Enjoy every delicious bite! ❤️