
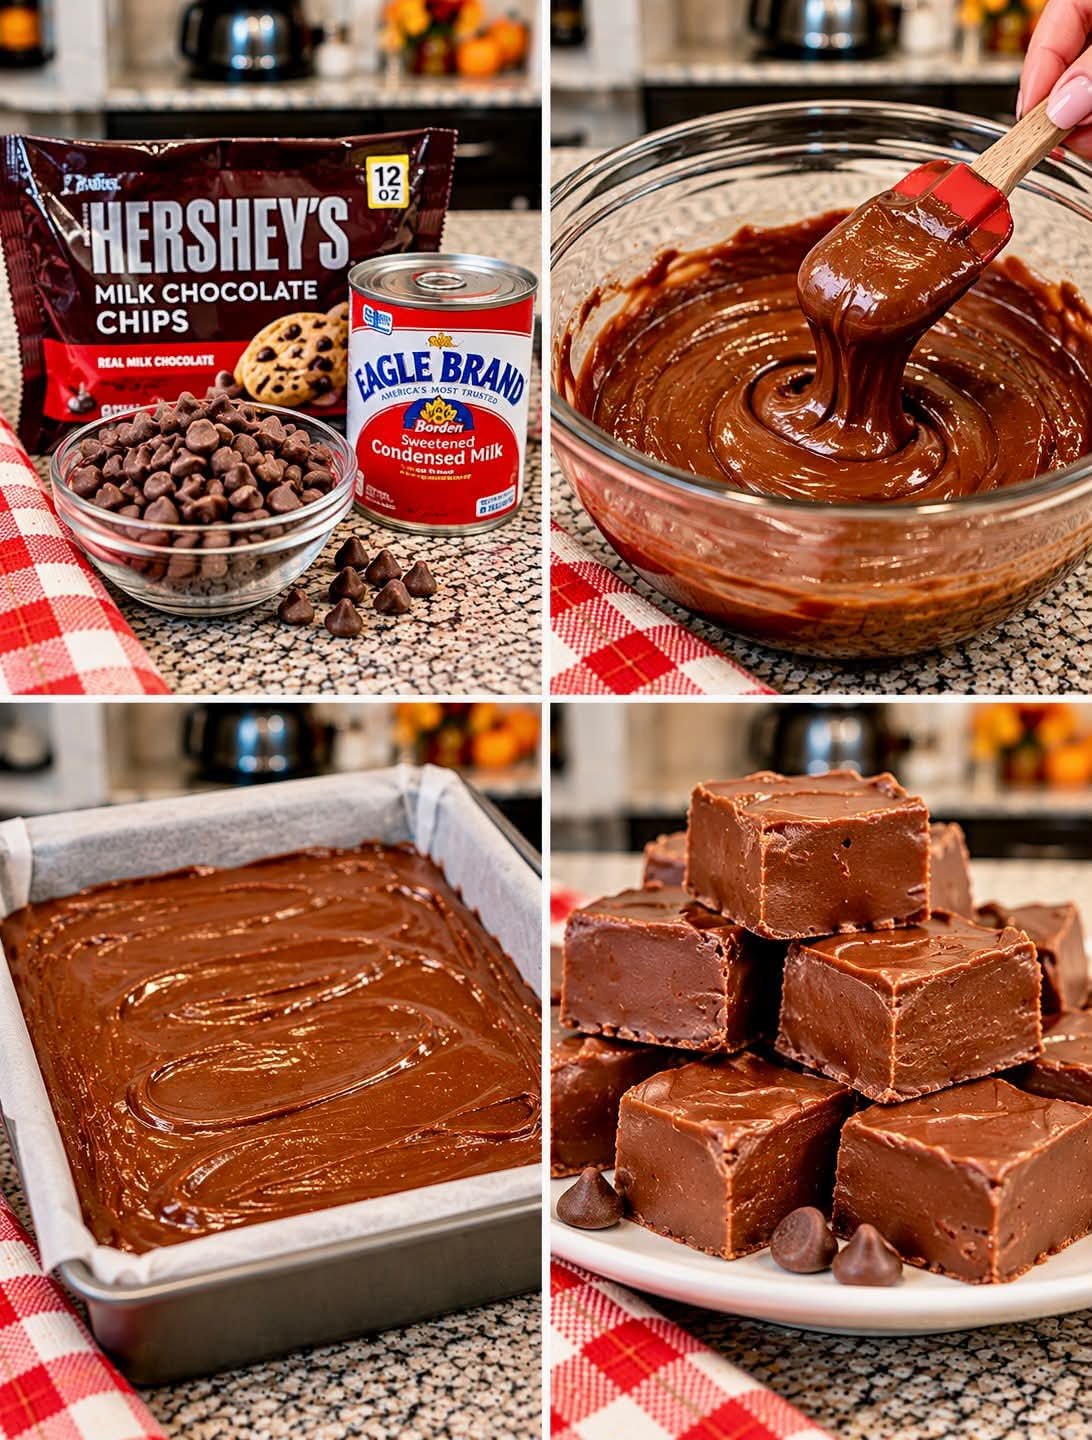
2-Ingredient Microwave Chocolate Fudge – Rich, Creamy, and Ready in Minutes
Introduction
If you love chocolate and enjoy simple homemade desserts, this 2-Ingredient Microwave Chocolate Fudge is a recipe you will want to keep close. It is rich, smooth, creamy, and wonderfully chocolatey, with a melt-in-your-mouth texture that makes every bite feel like a special treat.
The best part is that you only need two basic ingredients and a microwave. There is no complicated candy-making process, no need for a candy thermometer, and no long list of ingredients to measure. With just a few minutes of preparation, you can create a delicious homemade fudge that looks beautiful, tastes amazing, and is perfect for sharing.
This easy chocolate fudge is ideal for Christmas dessert trays, holiday gift boxes, birthday celebrations, family gatherings, potlucks, or those evenings when you simply want something sweet. It is also a wonderful recipe for beginners who want to make homemade candy without spending hours in the kitchen.
The microwave does most of the work, while the refrigerator helps the chocolate mixture set into firm, creamy squares. Once chilled and sliced, the fudge becomes a beautiful little dessert that everyone will want to try.
Ingredients
Preparation time: 3–5 minutes
Chilling time: 2–3 hours
Total time: Approximately 2–3 hours
Yield: 16–25 small squares, depending on how you cut them
The Two Ingredients
1. Chocolate chips – 2 cups (approximately 340 g)
Semi-sweet chocolate chips are an excellent choice because they provide a balanced chocolate flavor without making the fudge excessively sweet. You can also use milk chocolate chips for a sweeter, creamier result or dark chocolate chips for a richer and more intense chocolate flavor.
2. Sweetened condensed milk – 1 can (14 oz or approximately 397 g)
Sweetened condensed milk gives the fudge its creamy texture and sweetness. It helps the melted chocolate form a smooth mixture that firms up as it cools.
Make sure you use sweetened condensed milk, not evaporated milk. They are different products and cannot be substituted for one another in this simple recipe.
Optional Ingredients for Decoration
The recipe requires only two ingredients, but you can personalize the finished fudge with:
- A small pinch of flaky sea salt.
- Chopped walnuts or pecans.
- Mini chocolate chips.
- Crushed peppermint candies.
- A light drizzle of melted white chocolate.
These additions are optional and are not necessary for the original two-ingredient version.
Kitchen Equipment
You will need:
- A microwave-safe mixing bowl.
- A silicone spatula or sturdy spoon.
- An 8-by-8-inch square baking pan.
- Parchment paper.
- A sharp knife.
- A refrigerator.
An 8-by-8-inch pan creates relatively thick fudge squares. If you prefer thinner pieces, you can use a slightly larger pan.
Instructions
Step 1: Prepare the Baking Pan
Line an 8-by-8-inch square pan with parchment paper. Leave a little extra paper hanging over two opposite sides so you can lift the fudge out easily after it has set.
Smooth the parchment paper into the corners of the pan. This small preparation step makes removing and cutting the finished fudge much easier.
Step 2: Combine the Ingredients
Place the chocolate chips in a large microwave-safe bowl. Pour the sweetened condensed milk over the chocolate.
Stir gently to distribute the condensed milk throughout the chocolate chips. The mixture will initially look thick and uneven, which is completely normal.
Step 3: Microwave the Mixture
Microwave the bowl for 30 seconds at a time, stirring thoroughly after each interval.
Continue heating in short intervals until the chocolate is mostly melted and the mixture looks smooth. Depending on your microwave and the chocolate you use, this may take approximately 1½–3 minutes in total.
The chocolate can burn if heated too aggressively, so avoid automatically microwaving the mixture for three full minutes without stopping to stir.
If a few small chocolate pieces remain, stir the mixture for another 20–30 seconds. The residual heat will often melt them without additional microwaving.
Use oven mitts when handling the bowl, as it may become hot.
Step 4: Stir Until Smooth
Once the chocolate has melted, stir slowly until the mixture becomes thick, glossy, and evenly combined.
Scrape the sides and bottom of the bowl to make sure there are no unmelted chocolate pieces hiding underneath.
The finished mixture should be thick enough to hold its shape but soft enough to spread into the prepared pan.
If you want to add nuts, peppermint pieces, or another optional ingredient, gently fold them in at this stage.
Step 5: Transfer to the Pan
Pour the chocolate mixture into the parchment-lined pan.
Use a spatula to spread it evenly from corner to corner. Smooth the top so that the finished fudge has a neat, professional appearance.
For an attractive finish, you can sprinkle a few chopped nuts or a tiny amount of flaky sea salt over the surface before chilling.
Step 6: Chill Until Firm
Place the pan in the refrigerator for approximately 2–3 hours, or until the fudge is completely firm.
The exact chilling time depends on the thickness of the fudge and your refrigerator temperature.
Avoid cutting the fudge while it is still soft. Allowing it to set completely produces cleaner squares and a better texture.
Step 7: Cut Into Squares
Once firm, lift the fudge out of the pan using the parchment paper.
Place it on a cutting board and use a sharp knife to cut it into small squares. For cleaner cuts, warm the knife slightly with hot water, dry it thoroughly, and wipe the blade between cuts.
Your homemade two-ingredient chocolate fudge is now ready to serve.
Method: The Easy Microwave Technique
The secret to this recipe is gentle melting rather than prolonged heating.
Chocolate contains fats and other components that can become grainy or scorched when overheated. Sweetened condensed milk helps create a creamy mixture, but it does not make chocolate immune to overheating.
For the best results:
- Use a microwave-safe bowl that is large enough for easy stirring.
- Heat the ingredients in short intervals.
- Stir after every interval, even if the chocolate does not appear completely melted.
- Stop heating as soon as the mixture becomes smooth.
- Spread the mixture into the pan immediately.
- Refrigerate until completely firm before slicing.
This method is simple, reliable, and suitable for anyone who wants homemade fudge without the traditional stovetop candy-making process.
The History of Chocolate Fudge
Fudge became popular in the United States during the late nineteenth century. Early versions were typically made by cooking sugar, butter, milk, and chocolate together, then cooling and beating the mixture to create a smooth, creamy candy.
As fudge grew in popularity, it became a familiar treat at confectionery shops, holiday gatherings, fairs, and family celebrations. Homemade fudge also became a favorite gift because it could be cut into small pieces, arranged in decorative boxes, and shared with friends and relatives.
Traditional fudge recipes require careful temperature control. The cook must heat the mixture to the correct stage and then cool it properly to achieve the desired texture.
Modern shortcuts have made fudge much easier to prepare. Sweetened condensed milk provides sweetness and creaminess, while chocolate chips supply the chocolate flavor and structure. The microwave further reduces preparation time.
Although this two-ingredient recipe is a modern simplified version rather than a traditional confectioner’s formula, it carries on the same idea: turning a few familiar ingredients into a rich, shareable chocolate treat.
Formation: How the Fudge Becomes Creamy and Firm
Understanding how the ingredients work together helps explain why this recipe is so successful.
The Role of Chocolate
Chocolate chips provide the main flavor and much of the structure. When heated gently, the cocoa butter and other fats melt, allowing the chocolate to blend with the condensed milk.
As the mixture cools, the chocolate fats firm up, helping the fudge hold its shape.
The Role of Sweetened Condensed Milk
Sweetened condensed milk is milk that has had much of its water removed and sugar added. It gives the mixture a smooth consistency and rich sweetness.
It also makes the preparation process easier because you do not need to cook sugar syrup to a specific temperature.
The Cooling Process
While the chocolate mixture is warm, it remains soft and easy to spread. As it chills, the fats solidify and the fudge becomes firm enough to cut.
This is why the refrigeration stage is essential. The microwave melts the ingredients, but cooling creates the finished fudge texture.
Why the Two Ingredients Work Together
Chocolate supplies structure and flavor, while sweetened condensed milk contributes sweetness and a creamy consistency.
Together, they produce a dense, smooth confection that can be sliced into neat squares without the more demanding steps required by traditional fudge.
Tips for Perfect Chocolate Fudge
Choose Good-Quality Chocolate
The chocolate is the main flavor of the recipe, so use a brand you enjoy eating on its own.
Semi-sweet chocolate is a good starting point for most people, while dark chocolate is ideal if you prefer a less sweet taste.
Do Not Overheat
Overheating is one of the most common reasons chocolate becomes thick, dry, or grainy.
Use short microwave intervals and stir frequently. Remember that chocolate continues to melt from its residual heat after you remove it from the microwave.
Measure the Ingredients Carefully
The ratio of chocolate to condensed milk affects the final texture. Too much liquid can make the fudge softer, while too much chocolate may make it overly firm.
For the most reliable results, measure the chocolate by weight when possible and use a standard 14-ounce can of sweetened condensed milk.
Line the Pan Properly
Parchment paper makes it easy to remove the fudge without breaking the edges.
Avoid pouring the mixture directly into an unlined pan unless you are certain it releases easily.
Allow Enough Chilling Time
If the center is still soft, return the pan to the refrigerator for another 30–60 minutes.
For especially neat squares, make sure the entire slab is firm before cutting.
Store It Correctly
Keep the fudge in an airtight container in the refrigerator for approximately 1–2 weeks for best quality.
You can also freeze it in a well-sealed, freezer-safe container for about 2–3 months. Separate layers with parchment paper to prevent sticking, and thaw the pieces in the refrigerator before serving.
These are practical quality guidelines; actual storage life depends on handling and refrigerator conditions.
Delicious Variations
Once you have mastered the basic recipe, you can experiment with different flavors while keeping the same simple preparation method.
1. Dark Chocolate Fudge
Use dark chocolate chips for a deep cocoa flavor. This variation is perfect for people who enjoy a more intense chocolate taste.
2. Milk Chocolate Fudge
Use milk chocolate chips for a sweeter, milder fudge with a familiar candy-bar flavor.
3. Chocolate Walnut Fudge
Stir approximately ½ cup of chopped walnuts into the melted mixture before spreading it into the pan. The nuts add a pleasant crunch that contrasts with the creamy chocolate.
4. Chocolate Peanut Butter Fudge
Swirl 2–3 tablespoons of smooth peanut butter through the mixture just before chilling. This creates a delicious chocolate-and-peanut-butter combination.
Keep in mind that additional ingredients may change the firmness of the finished fudge.
5. Peppermint Chocolate Fudge
Fold in a small amount of crushed peppermint candy or sprinkle it over the top. This variation is especially suitable for Christmas dessert trays.
6. Sea Salt Chocolate Fudge
Sprinkle a small pinch of flaky sea salt over the surface before chilling. The salt balances the sweetness and makes the chocolate flavor stand out.
7. White Chocolate Fudge
For a white chocolate version, use white chocolate chips instead of semi-sweet chocolate chips. White chocolate behaves differently when melted, so heat it especially gently and expect a sweeter result.
Serving Suggestions
This chocolate fudge is delicious straight from the refrigerator, but it also works beautifully as part of a dessert spread.
Serve small squares alongside coffee, tea, or a glass of cold milk. Arrange them on a dessert platter with cookies, brownies, and other homemade candies.
For a festive presentation, place the squares in miniature paper candy cups and arrange them in a decorative box. They also make a lovely addition to Christmas cookie exchanges, birthday dessert tables, and homemade food gifts.
If serving at a gathering, keep the fudge cool until shortly before dessert. This helps it maintain its shape and makes it easier for guests to pick up individual pieces.
Common Mistakes and How to Avoid Them
The fudge is too soft: It may need more chilling time, or the ingredient ratio may have been inaccurate. Refrigerate it longer before cutting.
The chocolate looks grainy: The chocolate may have overheated or come into contact with moisture. Use shorter heating intervals and stir gently.
The fudge is too hard: Too much chocolate or too little condensed milk can make the mixture excessively firm. Measure both ingredients accurately.
The fudge sticks to the knife: Chill it longer and wipe the knife clean between cuts.
The surface looks uneven: Spread the mixture while it is still warm and smooth the top before placing it in the refrigerator.
The flavor is too sweet: Try semi-sweet or dark chocolate chips next time rather than milk chocolate.
Frequently Asked Questions
Can I really make fudge with only two ingredients?
Yes. Chocolate chips and sweetened condensed milk are enough to make a simple microwave fudge. Additional ingredients are optional.
Does the microwave really need three minutes?
Not necessarily. Three minutes is an approximate upper preparation target, not a fixed cooking time. Some microwaves will melt the chocolate more quickly. Stop and stir frequently to avoid overheating.
Can I make this recipe without a microwave?
Yes. Place the chocolate and condensed milk in a heatproof bowl over a saucepan of gently simmering water. Stir until smooth, taking care not to let the bowl touch the water. Transfer the mixture to the prepared pan and chill.
Can I use evaporated milk instead of condensed milk?
No, not as a direct substitute. Evaporated milk is unsweetened and has a different composition. Sweetened condensed milk is essential to this particular two-ingredient method.
Can I make it ahead of time?
Absolutely. You can prepare the fudge a day or two before a celebration and keep it covered in the refrigerator until needed.
Does the fudge need to stay refrigerated?
Refrigeration is the best choice for maintaining its firmness and quality, especially in warm conditions. Keep it covered to prevent it from absorbing other refrigerator odors.
Conclusion
This 2-Ingredient Microwave Chocolate Fudge proves that homemade desserts do not have to be complicated to taste wonderful. With chocolate chips, sweetened condensed milk, a microwave, and a little patience while it chills, you can prepare a rich, creamy chocolate treat that is perfect for almost any occasion.
The recipe is easy enough for beginners, quick enough for busy days, and versatile enough to adapt to your favorite flavors. Whether you enjoy classic semi-sweet chocolate, crunchy walnuts, a touch of sea salt, or a festive peppermint variation, this fudge offers plenty of opportunities to make it your own.
Prepare a batch for your family, share it with friends, or package a few squares as a thoughtful homemade gift. Once you see how easy it is to make, you may find yourself returning to this simple recipe whenever a chocolate craving strikes.
For Chocolate Lovers
If you are a true chocolate lover, this recipe deserves a place in your collection. Every square delivers a rich chocolate flavor and a smooth, creamy texture without requiring hours in the kitchen.
It is the kind of simple dessert that brings people together: a small homemade treat to enjoy after dinner, share during the holidays, or serve when unexpected guests arrive.
The beauty of this recipe lies in its simplicity. Two ingredients, a few minutes of preparation, and a little time in the refrigerator are all you need to create a delicious batch of homemade chocolate fudge.
Make it once, discover your favorite chocolate variation, and enjoy sharing this easy sweet treat with the people you love.