
Black Velvet Cake
Introduction
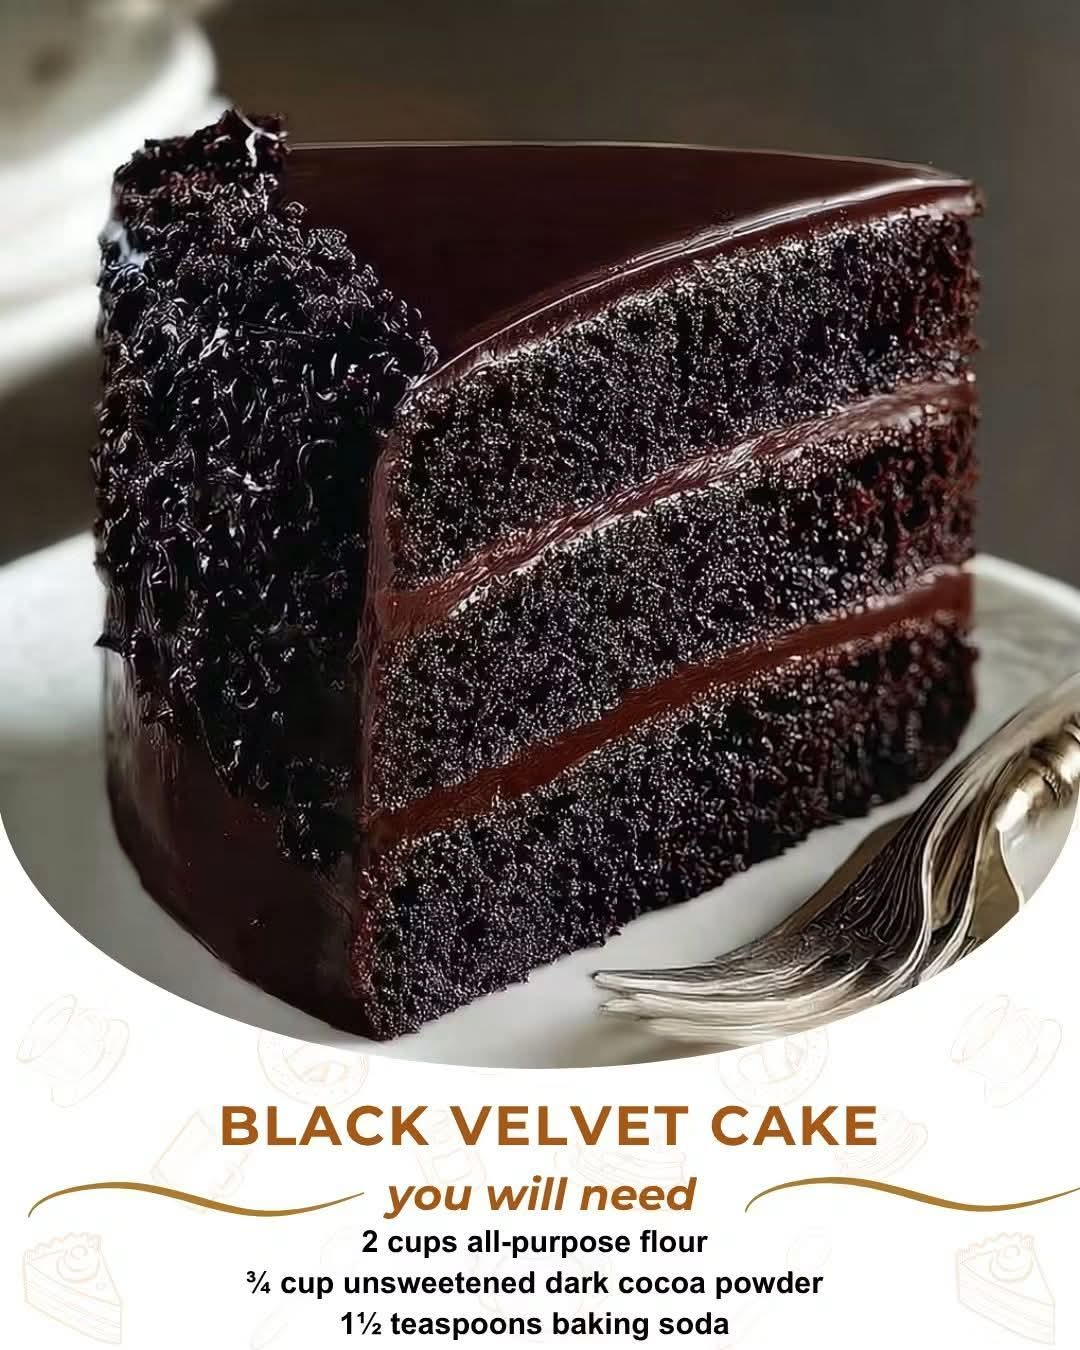
Black Velvet Cake is an impressive dessert for anyone who loves a rich, deeply chocolatey cake with a soft and wonderfully moist crumb. Its dramatic dark color gives it an elegant appearance, while the combination of dark cocoa, brown sugar, buttermilk, hot coffee, and creamy frosting creates a dessert that is rich without becoming dry or heavy.
The cake has the luxurious appearance of a classic red velvet cake, but instead of relying on a bright red color, Black Velvet Cake celebrates the intense color and flavor of dark cocoa. A small amount of black gel food coloring can be added when an especially deep black appearance is desired, but it is completely optional.
This cake is perfect for birthdays, celebrations, dinner parties, holidays, anniversaries, or simply those occasions when you want to serve an unforgettable homemade chocolate dessert.
Ingredients
For the Cake
- 2 cups all-purpose flour
- ¾ cup unsweetened dark cocoa powder
- 1½ teaspoons baking soda
- 1 teaspoon baking powder
- ½ teaspoon salt
- 1½ cups granulated sugar
- ½ cup packed brown sugar
- 2 large eggs, preferably at room temperature
- 1 cup buttermilk
- ½ cup vegetable oil
- 2 teaspoons vanilla extract
- 1 cup hot brewed coffee
- 1 teaspoon black gel food coloring, optional
For the Creamy Frosting
- 8 ounces cream cheese, softened
- ½ cup unsalted butter, softened
- 3½ to 4 cups powdered sugar
- 2 teaspoons vanilla extract
- 2 to 4 tablespoons heavy cream or milk
- Pinch of salt
Optional Garnish
- Dark chocolate shavings
- Finely grated chocolate
- A light dusting of cocoa powder
- Chocolate curls
Equipment
- Two 9-inch round cake pans
- Mixing bowls
- Whisk
- Electric hand mixer or stand mixer
- Rubber spatula
- Measuring cups and spoons
- Wire cooling rack
- Cake plate or serving stand
Instructions
Step 1: Prepare the Cake Pans
Preheat the oven to 350°F (175°C).
Grease two 9-inch round cake pans thoroughly. Line the bottoms with parchment paper, then lightly grease the parchment as well. This makes it much easier to remove the cakes after baking.
Set the prepared pans aside.
Step 2: Combine the Dry Ingredients
In a large mixing bowl, whisk together the flour, dark cocoa powder, baking soda, baking powder, and salt.
Mix thoroughly so the cocoa and leavening agents are evenly distributed throughout the flour.
Set the bowl aside.
Step 3: Mix the Sugars and Wet Ingredients
In another large bowl, combine the granulated sugar and brown sugar.
Add the eggs and whisk until the mixture becomes smooth.
Pour in the buttermilk, vegetable oil, and vanilla extract. Mix until everything is well combined.
The mixture will be relatively thin, which is normal for this cake.
Step 4: Add the Dry Ingredients
Gradually add the dry ingredients to the wet mixture.
Stir gently until the flour is almost completely incorporated. Avoid overmixing because excessive mixing can produce a tougher cake.
Step 5: Add the Hot Coffee
Slowly pour the hot coffee into the batter while stirring gently.
The batter will become very thin. Do not worry. This is one of the characteristics that helps produce an exceptionally moist chocolate cake.
The hot coffee also intensifies the chocolate flavor without necessarily making the finished cake taste strongly of coffee.
If you want the cake to have an especially dark appearance, stir in the black gel food coloring at this stage.
Step 6: Divide the Batter
Pour the batter evenly between the two prepared cake pans.
Gently tap each pan against the counter once or twice to release large air bubbles.
Step 7: Bake
Place the pans in the preheated oven.
Bake for approximately 28 to 35 minutes, or until a toothpick inserted into the center comes out with a few moist crumbs attached.
Do not overbake the cakes. Because this recipe is designed to be very moist, removing them when they are just finished baking helps preserve their soft texture.
Step 8: Cool the Cakes
Remove the cakes from the oven and allow them to cool in their pans for about 10 to 15 minutes.
Carefully run a knife around the edges, then turn the cakes onto a wire rack.
Remove the parchment paper and allow the cakes to cool completely before frosting.
Never frost a warm cake, as the frosting can melt and slide away.
Method for the Creamy Frosting
Step 1: Beat the Butter and Cream Cheese
Place the softened cream cheese and butter into a large mixing bowl.
Beat them together until smooth, creamy, and completely combined.
Step 2: Add the Vanilla
Add the vanilla extract and a small pinch of salt.
Mix briefly.
Step 3: Add the Powdered Sugar
Gradually add the powdered sugar, approximately ½ cup at a time.
Beat after each addition until smooth.
If the frosting becomes too thick, add heavy cream or milk, one tablespoon at a time.
If it is too thin, add a little more powdered sugar.
Continue beating until the frosting is creamy, smooth, and easy to spread.
Forming and Assembling the Cake
Place the first completely cooled cake layer on a serving plate.
Spread a generous layer of frosting evenly over the top.
Place the second cake layer on top, keeping it centered.
Spread frosting over the top of the cake, then work your way down the sides.
For a rustic appearance, leave gentle swirls in the frosting with a spatula. For a more polished appearance, smooth the frosting completely.
Finish with dark chocolate shavings, chocolate curls, or a very light dusting of cocoa powder if desired.
The Best Method for a Perfect Black Velvet Cake
The secret to this cake is balancing moisture, cocoa, and acidity.
Dark cocoa powder gives the cake its deep chocolate character, while buttermilk contributes tenderness and a slight tang. Vegetable oil keeps the crumb moist even after refrigeration. Brown sugar adds additional moisture and a subtle caramel-like depth.
The hot coffee is especially useful in chocolate cakes because it enhances the cocoa flavor. It does not need to be a premium coffee; freshly brewed coffee works perfectly.
If you want a naturally very dark cake, choose a high-quality dark cocoa powder. Black gel food coloring can be used when you want the dramatic nearly-black appearance associated with Black Velvet Cake.
History and Inspiration
Black Velvet Cake is best understood as a modern variation inspired by the tradition of rich chocolate cakes and the popularity of velvet-style cakes.
Velvet cakes became famous for their exceptionally soft, fine texture. Red velvet cake eventually became one of the best-known versions, combining cocoa with buttermilk and a creamy frosting.
Black Velvet Cake takes that general idea in a darker direction. Instead of emphasizing a red color, it highlights dark cocoa and an almost-black appearance. Modern bakers often use dark or black cocoa and, when desired, black food coloring to create the dramatic finish.
The result is a cake that looks sophisticated and dramatic while still delivering the familiar comfort of homemade chocolate cake.
Why This Cake Is So Moist
Several ingredients contribute to the cake’s soft texture.
Buttermilk: The acidity helps create a tender crumb and works with the baking soda.
Vegetable oil: Oil remains liquid at room temperature and helps keep the cake moist.
Brown sugar: Brown sugar contains molasses, which contributes moisture and flavor.
Hot coffee: The hot liquid helps bloom the cocoa and intensify the chocolate flavor.
Eggs: Eggs provide structure while contributing richness and moisture.
The combination creates a cake that stays soft and tender rather than becoming dry and crumbly.
Tips for Success
Use room-temperature eggs and buttermilk when possible. They blend more easily into the batter.
Do not pack the flour into the measuring cup. Spoon it into the cup and level it for a more accurate measurement.
Do not overmix after adding the flour. Mix only until the ingredients are combined.
Expect a thin batter. This is completely normal for this recipe.
Do not skip the parchment paper if you want easy cake removal.
Allow the cake layers to cool completely before frosting.
For the darkest appearance, use dark cocoa powder and black gel food coloring.
For the cleanest slices, refrigerate the fully assembled cake for about 30 to 60 minutes before cutting.
Storage
Store the frosted cake covered in the refrigerator because of the cream cheese frosting.
It can generally be kept refrigerated for several days while maintaining a good texture.
For the best flavor, allow individual slices to sit at room temperature for approximately 15 to 20 minutes before serving.
The unfrosted cake layers can also be wrapped tightly and refrigerated or frozen for later assembly.
Serving Suggestions
Black Velvet Cake is delicious served on its own, but it can also be paired with:
- Fresh berries
- Whipped cream
- Vanilla ice cream
- Chocolate sauce
- Fresh strawberries
- Raspberry sauce
- Additional chocolate shavings
- A light dusting of cocoa powder
For a special occasion, serve each slice with a small scoop of vanilla ice cream and a drizzle of warm chocolate sauce.
Conclusion
Black Velvet Cake is the kind of dessert that makes an impression before the first bite. Its deep, dramatic appearance makes it perfect for celebrations, while its moist chocolate crumb and creamy frosting make it comforting enough for an ordinary family dessert.
The dark cocoa provides an intense chocolate flavor, the buttermilk keeps the crumb tender, the oil helps maintain moisture, and the hot coffee brings out the richness of the chocolate.
Whether you prepare it for a birthday, holiday gathering, dinner party, or weekend baking project, this Black Velvet Cake is a beautiful centerpiece that chocolate lovers will remember.
For Chocolate Lovers
If you are a true chocolate lover, this is the type of cake that deserves a permanent place in your dessert collection. Every bite combines soft, dark chocolate cake with smooth cream cheese frosting, creating a rich contrast between the slightly bittersweet cocoa and the sweet, creamy topping.
For an even more indulgent version, add a layer of chocolate ganache beneath the frosting or scatter dark chocolate shavings over the finished cake.
Cut the cake into generous slices, serve it with your favorite hot drink, and enjoy a deeply chocolatey homemade dessert with an elegant black velvet finish.