
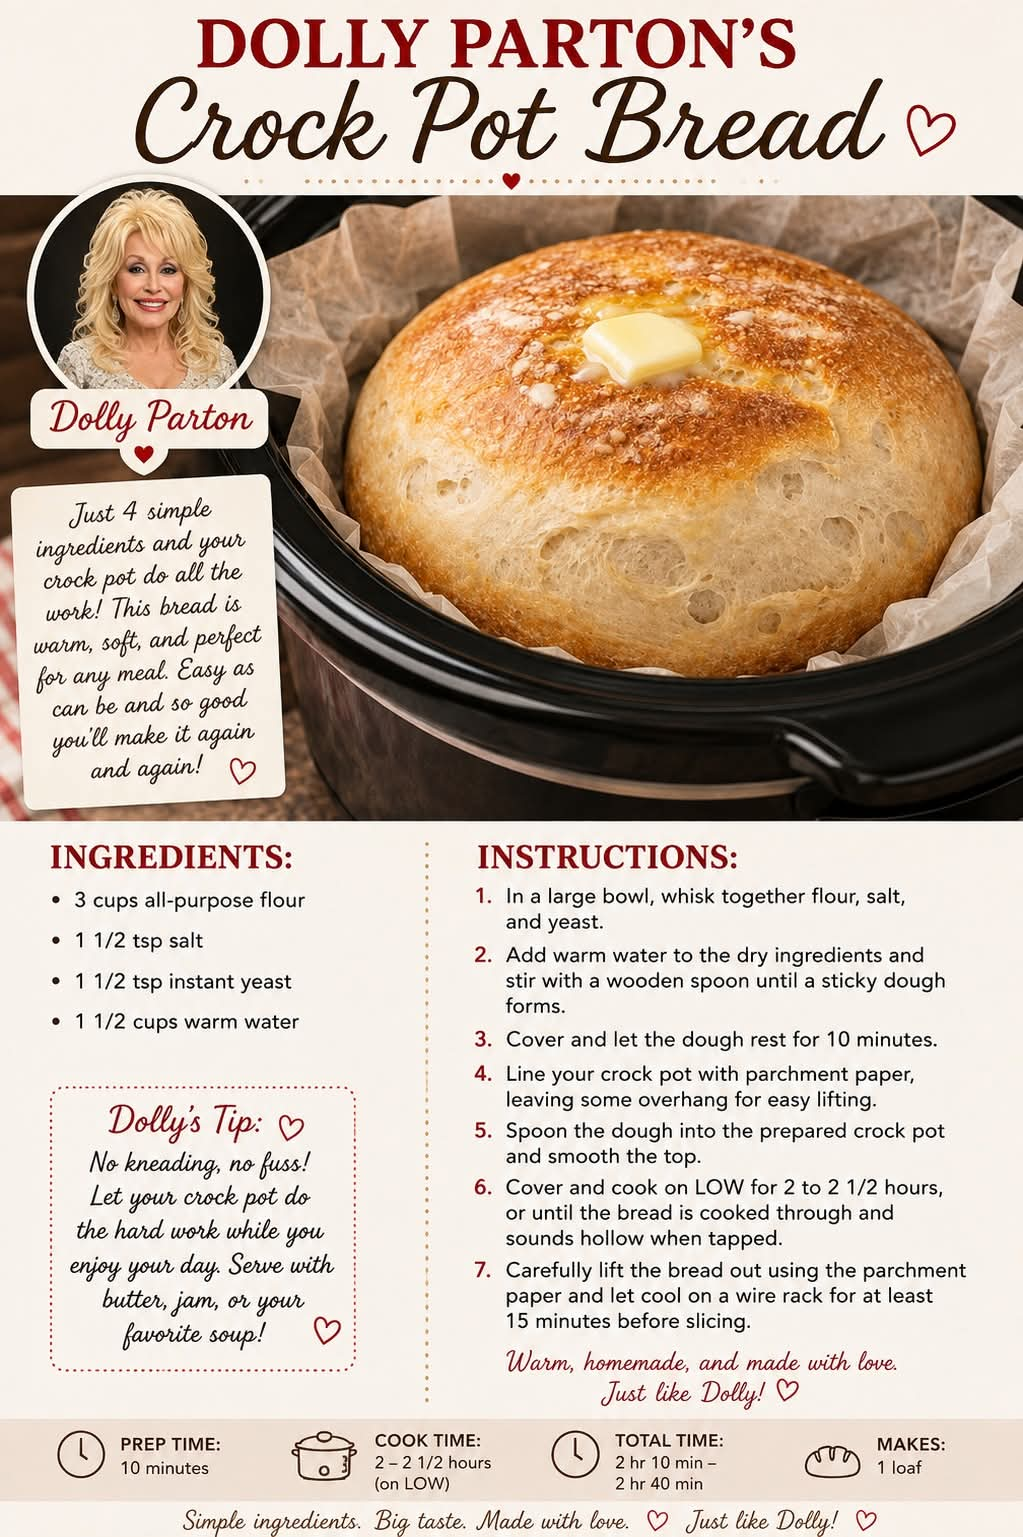
Dolly Parton’s Crock-Pot Bread
Introduction
There is something wonderfully comforting about homemade bread. The aroma that fills the kitchen, the soft interior, the golden crust, and that first warm slice spread with butter can turn an ordinary meal into something special.
Dolly Parton is beloved not only for her music, generosity, and larger-than-life personality, but also for her connection to simple Southern-style cooking and comforting family food. This crock-pot bread is inspired by the kind of practical, homemade baking that makes fresh bread accessible without requiring a traditional bread oven.
The beauty of making bread in a slow cooker is its simplicity. Instead of relying on a conventional oven to bake the loaf, the slow cooker provides a gentle, enclosed cooking environment. The result is a tender, moist loaf that is particularly delicious when served warm.
Whether you are making it for breakfast, alongside a hearty dinner, or simply because you are craving homemade bread, this recipe is a wonderful project for a relaxed afternoon.
Ingredients
For the Bread
- 3 cups all-purpose flour
- 2 1/4 teaspoons active dry yeast, or 1 standard packet
- 1 tablespoon granulated sugar
- 1 teaspoon salt
- 1 cup warm water, approximately 105–110°F (40–43°C)
- 2 tablespoons melted unsalted butter
- 1 large egg
- 1 tablespoon olive oil or vegetable oil
For the Top
- 1 tablespoon melted butter
- 1 teaspoon sesame seeds, optional
- 1 teaspoon poppy seeds, optional
- A small pinch of coarse salt, optional
Equipment
- Large mixing bowl
- Wooden spoon or sturdy spatula
- Clean kitchen towel
- 5- to 6-quart slow cooker
- Parchment paper
- Wire cooling rack
- Instant-read thermometer, if available
Preparation
Before beginning, prepare your slow cooker. Cut a piece of parchment paper large enough to line the bottom and come slightly up the sides of the cooker. This will make it much easier to remove the finished loaf.
The water should be warm but not hot. Water that is too hot can damage the yeast, while water that is too cool may slow the rising process considerably.
Step-by-Step Instructions
Step 1: Activate the Yeast
Place the warm water in a large mixing bowl.
Add the sugar and active dry yeast. Stir gently and allow the mixture to stand for approximately 5 to 10 minutes.
The surface should become slightly foamy. This indicates that the yeast is active.
If there is no visible activity after about 10 minutes, the yeast may be inactive and should be replaced before continuing.
Step 2: Add the Wet Ingredients
Add the melted butter, egg, and olive oil to the yeast mixture.
Whisk or stir until the ingredients are reasonably well combined.
The melted butter should be warm rather than extremely hot so that it does not interfere with the yeast.
Step 3: Add the Flour
Add approximately 2 1/2 cups of the flour along with the salt.
Stir until a sticky dough begins to form.
Gradually add the remaining flour, a little at a time, until the dough becomes soft and manageable.
Do not automatically add all the flour if the dough does not require it. Humidity, flour type, and measuring methods can affect how much flour is needed.
Step 4: Knead the Dough
Transfer the dough to a lightly floured work surface.
Knead for approximately 7 to 10 minutes.
The dough should become smoother and more elastic as you knead it. It should feel soft and slightly tacky but should not cling heavily to your hands.
If it is extremely sticky, add flour one tablespoon at a time. Avoid adding too much flour because this can produce a dense loaf.
Step 5: First Rise
Lightly grease a clean bowl with a little oil.
Place the dough inside and turn it once so the surface is lightly coated.
Cover the bowl with a clean kitchen towel or plastic wrap.
Allow the dough to rise in a warm, draft-free location for approximately 1 to 1 1/2 hours, or until it has roughly doubled in size.
The exact rising time depends on the temperature of your kitchen.
Step 6: Shape the Loaf
Once the dough has doubled, gently press it down to remove excess air.
Shape it into a smooth round loaf.
Try to create a reasonably tight surface without tearing the dough.
Place the shaped loaf onto the prepared parchment paper.
Step 7: Prepare the Slow Cooker
Place the parchment and dough carefully into the slow cooker.
For best results, place a clean kitchen towel underneath the slow-cooker lid before covering the cooker. The towel helps absorb condensation and prevents excessive moisture from dripping directly onto the bread.
Make sure the towel is positioned safely away from the heating element.
Do not lift the lid repeatedly during cooking because this releases heat and steam.
Step 8: Slow-Cook the Bread
Cover the slow cooker and cook the bread on HIGH for approximately 2 to 2 1/2 hours.
Cooking times can vary significantly depending on the slow cooker.
The bread is ready when the loaf is firm and cooked through. If using a thermometer, the center should generally reach approximately 190–200°F (88–93°C).
Because slow-cooked bread does not brown in exactly the same way as oven-baked bread, the top may remain relatively pale.
Step 9: Optional Browning
If you prefer a golden-brown crust, carefully remove the loaf from the slow cooker.
Place it on a baking sheet and put it under a preheated broiler for a few minutes, watching it closely.
Alternatively, you can place it in a hot oven for several minutes until the surface becomes golden.
This step is optional but gives the bread a more traditional baked appearance.
Step 10: Brush With Butter
While the bread is still warm, brush the top with melted butter.
If desired, sprinkle the top with sesame seeds, poppy seeds, or a small amount of coarse salt.
The butter adds flavor and gives the crust a beautiful soft finish.
Step 11: Cool the Bread
Allow the bread to cool on a wire rack for at least 20 to 30 minutes before slicing.
Although it can be tempting to cut into it immediately, allowing the loaf to cool helps the interior finish setting.
Use a serrated bread knife to cut clean slices.
The Method in Detail
The success of this bread comes from several simple but important techniques.
First, the yeast needs the right environment. Warm water encourages fermentation, while excessive heat can harm the yeast.
Second, kneading develops gluten. Gluten gives the bread structure and allows it to hold the gases produced by the yeast during fermentation.
Third, the first rise gives the dough time to ferment. During this period, the yeast consumes available sugars and produces carbon dioxide, which becomes trapped within the developing gluten network. This is what helps the dough expand.
Finally, the slow cooker provides a moist, enclosed cooking environment. Because a slow cooker does not create the same dry heat as a conventional oven, the bread develops differently from traditional oven-baked bread.
History and Southern Inspiration
Homemade bread has a long history in American home cooking, particularly in rural and Southern kitchens where families often relied on simple ingredients such as flour, yeast, butter, milk, eggs, and water.
Slow cookers became especially popular in American households during the second half of the twentieth century because they allowed families to prepare food gradually while attending to other responsibilities.
The combination of traditional homemade bread and slow-cooker convenience represents an appealing style of home cooking: uncomplicated ingredients, practical equipment, and food designed to be shared.
Dolly Parton has long been associated with Southern culture and home-style cooking, and recipes attributed to or inspired by her culinary traditions often emphasize comforting, familiar flavors rather than complicated techniques.
It is worth noting that recipes circulating online under celebrity names can vary, and not every version is necessarily an officially documented personal recipe. This version is best understood as a Dolly Parton-inspired crock-pot bread recipe rather than a verified historical recipe directly from Dolly Parton.
Formation of the Bread
The formation of the loaf happens through several stages.
The initial mixing combines the flour, liquid, yeast, fat, and other ingredients into a dough.
Kneading then develops the gluten network. This network provides the structure necessary for the bread to rise.
During fermentation, yeast produces carbon dioxide. The gluten traps these gases, creating the small air pockets that eventually become the crumb of the finished bread.
When the dough is cooked, the heat causes the gases inside the dough to expand. The proteins and starches gradually set, transforming the soft dough into a stable loaf.
This is why proper kneading, rising, and cooking are all important.
How to Serve
Fresh crock-pot bread is wonderfully versatile.
Serve thick slices warm with butter for breakfast.
For a sweet version, serve it with honey, fruit preserves, cinnamon butter, or apple butter.
For a savory meal, serve it alongside soups, stews, roasted vegetables, chicken, beef, or beans.
It can also be sliced and used for sandwiches.
For an especially comforting serving, toast the slices in a skillet with a little butter until golden on both sides.
Tips for the Best Results
Use fresh yeast. Old or inactive yeast can prevent the bread from rising properly.
Measure flour carefully. Adding too much flour is one of the easiest ways to make homemade bread heavy and dry.
Do not rush the first rise. The dough needs enough time to develop its structure and flavor.
Avoid repeatedly opening the slow cooker while the bread is cooking.
Use parchment paper to make removal easier.
Allow the bread to cool before slicing.
If you want a crispier, darker crust, finish the loaf briefly in a conventional oven or under a broiler.
Storage
Once completely cooled, store the bread in an airtight container or tightly wrapped at room temperature.
It is best enjoyed within a couple of days.
For longer storage, slice the loaf and freeze the slices in a well-sealed freezer bag. Individual slices can be thawed at room temperature or warmed directly in a toaster or oven.
Variations
Honey Butter Bread
Replace the granulated sugar with honey and add a little extra melted butter to the finished loaf.
Herb Bread
Add dried rosemary, thyme, oregano, or Italian seasoning to the dough.
Garlic Butter Bread
Mix minced garlic with melted butter and brush it over the warm loaf after cooking.
Cinnamon Bread
Add cinnamon and a little additional sugar to the dough for a lightly sweet breakfast bread.
Cheddar Bread
Fold shredded cheddar cheese into the dough before shaping the loaf.
Common Problems and Solutions
The Bread Did Not Rise
The yeast may have been inactive, the water may have been too hot or too cold, or the dough may have been kept in a very cold environment.
The Bread Is Too Dense
Too much flour, insufficient kneading, or inadequate rising time can produce a dense loaf.
The Top Is Pale
This is normal for slow-cooker bread. A brief finishing period in a hot oven can provide a golden crust.
The Bottom Is Too Moist
Excess condensation can collect inside the slow cooker. Using a towel beneath the lid can help reduce dripping moisture.
Why Bread Lovers Enjoy This Recipe
Bread lovers appreciate recipes like this because they demonstrate that homemade bread does not always require specialized equipment.
The ingredient list is simple, the preparation is approachable, and the slow-cooker method offers an alternative to conventional oven baking.
Most importantly, the finished bread has the character of homemade food: warm, comforting, fragrant, and made to be shared.
Conclusion
Dolly Parton-inspired crock-pot bread is a wonderful example of simple home cooking. With basic ingredients and a little patience, you can create a soft, homemade loaf without relying entirely on a traditional oven.
The process is just as rewarding as the finished bread. Watching the dough rise, shaping it by hand, and finally slicing into the warm loaf creates the kind of kitchen experience that makes homemade baking so special.
Serve it with butter, honey, soup, dinner, or your favorite spread, and enjoy it fresh with family and friends.
A simple loaf of bread may not seem extraordinary at first, but once it fills the kitchen with its warm aroma and reaches the table, it becomes something much more meaningful: homemade comfort that everyone can enjoy.