
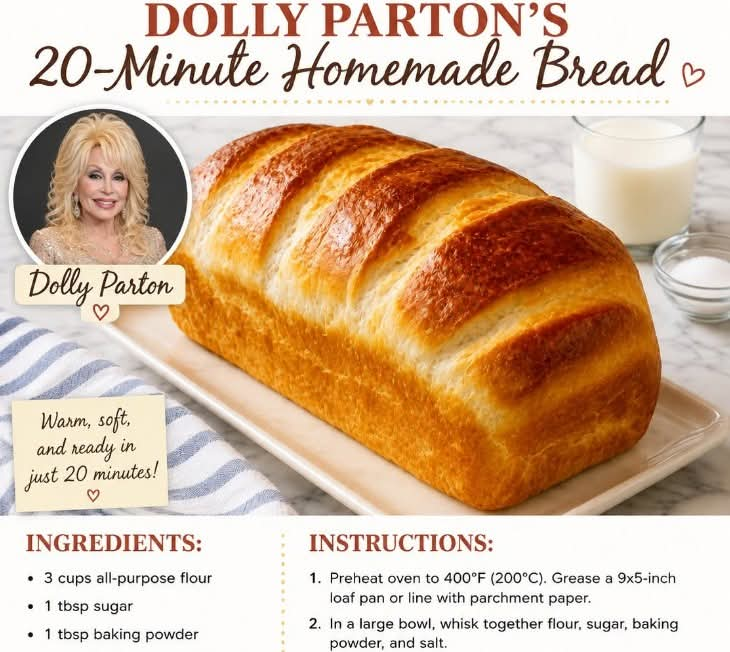
Dolly’s 20-Minute Homemade Bread
Introduction
Dolly’s 20-Minute Homemade Bread is a simple, quick bread designed for those moments when you want something warm and homemade without waiting hours for yeast to rise. It has a tender, lightly crisp exterior and a soft, comforting center. Because it relies on baking powder rather than yeast, there is no lengthy proofing process.
This recipe is especially appealing alongside soups, stews, roasted meats, eggs, or a generous spread of butter and jam. It is also an excellent starting point for beginner bakers because the ingredients are simple and the method requires very little equipment.
Ingredients
For the bread:
- 2 cups (250 g) all-purpose flour
- 1 tablespoon baking powder
- 1 teaspoon salt
- 1 tablespoon granulated sugar
- 3/4 cup (180 ml) milk, plus a little more if needed
- 2 tablespoons melted butter or vegetable oil
- 1 tablespoon melted butter, for brushing the top
Optional additions:
- 1/2 teaspoon garlic powder for a savory loaf
- 1 teaspoon dried herbs such as parsley, thyme, or rosemary
- 1/2 cup shredded cheddar cheese
- 1 tablespoon sesame seeds or poppy seeds for the topping
Equipment
- Large mixing bowl
- Measuring cups and spoons
- Wooden spoon or spatula
- Small baking pan or baking sheet
- Parchment paper, if desired
- Pastry brush
Instructions
1. Prepare the Oven
Preheat the oven to 425°F (220°C). Line a small baking sheet with parchment paper or lightly grease it with butter or oil.
Because this bread comes together quickly, the oven should be fully heated before the dough is ready.
2. Combine the Dry Ingredients
Add the flour, baking powder, salt, and sugar to a large mixing bowl.
Whisk or stir everything together thoroughly. This distributes the baking powder and salt throughout the flour, helping the bread rise evenly.
3. Add the Wet Ingredients
Make a small well in the center of the dry ingredients. Pour in the milk and 2 tablespoons of melted butter or oil.
Using a wooden spoon or spatula, stir until the ingredients begin forming a soft dough.
Do not overmix. The dough does not need to become perfectly smooth. Overworking it can make the finished bread heavier and less tender.
4. Adjust the Dough
If the dough looks very dry or crumbly, add another tablespoon of milk at a time until it comes together.
The finished dough should be soft and slightly tacky but should not be excessively wet.
5. Form the Bread
Lightly flour your hands and transfer the dough to the prepared baking sheet.
Shape it into a round loaf approximately 1 1/2 inches thick. You can also divide the dough into several smaller portions to make individual quick rolls.
For a rustic appearance, leave the surface slightly uneven rather than trying to make it perfectly smooth.
6. Prepare the Top
Brush the surface lightly with melted butter.
If desired, sprinkle the top with sesame seeds, poppy seeds, dried herbs, or a little shredded cheese.
Using a sharp knife, make a shallow cross on the top of the loaf. This allows the bread to expand more evenly during baking.
7. Bake
Place the bread in the preheated oven and bake for approximately 15–20 minutes.
The bread should become lightly golden on top, and the center should feel firm when gently pressed.
For smaller rolls, begin checking them around 12–15 minutes.
8. Cool Briefly
Remove the bread from the oven and brush the top with a little additional melted butter if desired.
Let it rest for approximately 5 minutes before slicing. This short resting period allows the interior to finish setting while keeping the bread warm.
The Method Behind the Bread
The defining feature of this recipe is the use of baking powder instead of yeast.
Traditional yeast bread requires fermentation. Yeast feeds on sugars in the dough and produces carbon dioxide, which becomes trapped in the developing gluten network. This process creates the familiar airy structure of yeast bread but requires additional time.
Quick bread works differently. Baking powder contains ingredients that react when moisture is added and produce carbon dioxide. Heat in the oven accelerates this process, helping the dough expand while it bakes.
For that reason, there is no need to knead the dough extensively or wait for it to double in size.
The key technique is gentle mixing. Once the flour becomes hydrated, excessive stirring can develop too much gluten, resulting in a tougher loaf. A few strokes are usually enough to bring the dough together.
History of Quick Homemade Bread
Quick breads have a long history in home cooking because they provide an alternative to traditional yeast-raised bread.
Before modern convenience foods became widely available, families often relied on whatever ingredients were inexpensive and readily available. Baking powder became particularly useful because it allowed cooks to produce breads without maintaining yeast starters or waiting for dough to rise.
This style of bread became especially popular in American home kitchens, where biscuits, cornbread, soda bread, and other quick breads became important parts of everyday cooking.
The appeal remains the same today: simple ingredients, minimal preparation, and bread that can reach the table quickly.
Formation and Texture
The finished loaf should have a lightly browned exterior with a soft, tender interior.
Because it is a baking-powder bread rather than a traditional yeast loaf, the texture will be somewhat denser and more biscuit-like than sandwich bread. It should not be expected to have the long strands and large air pockets associated with fermented bread.
For the best texture:
- Measure the flour accurately.
- Avoid packing flour tightly into the measuring cup.
- Do not overmix the dough.
- Use fresh baking powder.
- Bake immediately after mixing.
- Avoid adding excessive flour while shaping.
- Allow the bread to rest for a few minutes after baking.
Serving Suggestions
This warm bread is especially delicious when served with butter immediately after baking.
For breakfast, serve it with:
- Butter and honey
- Jam or preserves
- Scrambled eggs
- Cream cheese
- Peanut butter
For lunch or dinner, serve it alongside:
- Chicken soup
- Tomato soup
- Beef stew
- Chili
- Roast chicken
- Baked vegetables
- Creamy pasta dishes
For a savory variation, add garlic powder, herbs, and shredded cheese to the dough before baking.
For a sweeter version, slightly increase the sugar and serve the warm bread with honey, cinnamon butter, or fruit preserves.
Tips for Making the Best 20-Minute Bread
Use the correct flour measurement. Too much flour can make a quick bread dry and heavy.
Do not overmix. Stir only until the ingredients come together.
Do not let the dough sit for a long time. Once the liquid activates the baking powder, the bread benefits from going into the oven promptly.
Preheat the oven completely. A properly heated oven helps the bread rise and develop a golden crust.
Do not slice immediately. Five minutes of cooling is enough to make slicing easier without sacrificing the warm, fresh-baked experience.
Use butter for extra flavor. Brushing melted butter over the finished loaf gives the crust a richer taste and softer finish.
Storage
This bread is best served warm on the day it is made.
If you have leftovers, allow them to cool completely before storing them in an airtight container or wrapped in foil. They can generally be kept at room temperature for about 1–2 days.
To refresh the bread, warm individual slices briefly in the oven or toaster.
Conclusion
Dolly’s 20-Minute Homemade Bread is a practical recipe for anyone who wants fresh bread without the waiting time associated with traditional yeast dough. With flour, baking powder, salt, sugar, milk, and butter, you can create a warm homemade loaf with very little preparation.
Its greatest charm is its simplicity. There is no yeast to activate, no dough to knead for an extended period, and no rising time to worry about. Just mix, shape, bake, and enjoy.
For bread lovers, it is the kind of recipe worth keeping close at hand: uncomplicated enough for an ordinary weekday, yet warm and comforting enough to make a family meal feel special.