
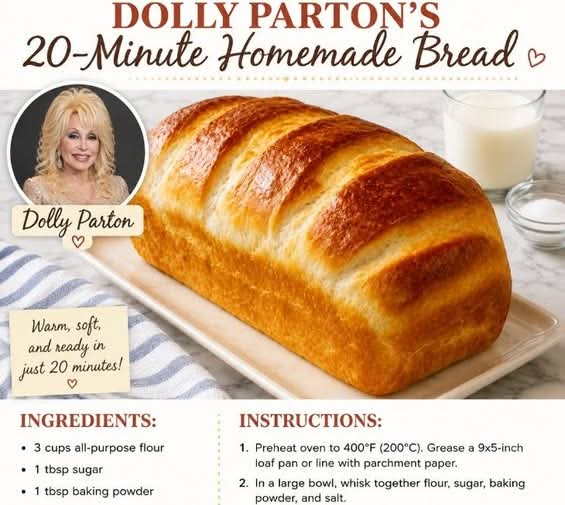
Dolly’s 20-Minute Homemade Bread
Introduction
There is something wonderfully comforting about homemade bread, especially when it can be prepared and baked in a fraction of the time required for traditional yeast bread. Dolly’s 20-Minute Homemade Bread is a simple, rustic-style quick bread made with everyday pantry ingredients. There is no yeast, no lengthy rising period, and no complicated kneading process.
The recipe relies on baking powder for its lift. The result is a tender, lightly crisp bread with a soft interior and a pleasant homemade flavor. It is especially useful when you want fresh bread quickly for breakfast, lunch, dinner, or an afternoon snack.
Ingredients
Dry Ingredients
- 2 cups (250 g) all-purpose flour
- 1 tablespoon baking powder
- 1 teaspoon salt
- 1 tablespoon granulated sugar
Wet Ingredients
The original ingredient list is very short. To turn the dry ingredients into a workable dough, add:
- 3/4 cup (180 ml) milk, approximately
- 2 tablespoons melted butter or vegetable oil
You may need a small additional splash of milk if the dough appears too dry.
Optional Additions
For variations, you can add:
- 1/2 teaspoon garlic powder
- 1 teaspoon dried Italian herbs
- 1/2 cup shredded cheddar cheese
- 2 tablespoons grated Parmesan
- 1 tablespoon chopped fresh herbs
- A pinch of black pepper
- 1 tablespoon sesame or poppy seeds for the top
Equipment
- Large mixing bowl
- Measuring cups and spoons
- Wooden spoon or spatula
- Baking sheet or small baking pan
- Parchment paper
- Pastry brush, if desired
- Wire cooling rack
Instructions
Step 1: Preheat the Oven
Preheat your oven to 425°F (220°C).
Line a baking sheet with parchment paper. If you prefer a more uniform loaf, lightly grease a small loaf pan instead.
Step 2: Combine the Dry Ingredients
Place the flour, baking powder, salt, and sugar into a large mixing bowl.
Whisk or stir everything together thoroughly. This step is important because the baking powder needs to be evenly distributed throughout the flour.
Step 3: Add the Wet Ingredients
Make a small well in the center of the dry ingredients.
Pour in the milk and melted butter or oil.
Using a wooden spoon or spatula, gently mix until the ingredients begin forming a soft dough.
Do not overmix. A quick bread becomes heavier when the dough is worked excessively.
Step 4: Form the Dough
Turn the dough onto a lightly floured work surface.
Gently bring the dough together with your hands. You do not need to knead it like yeast bread.
If the dough feels excessively sticky, sprinkle the surface with a small amount of flour. If it seems dry or crumbly, add milk one teaspoon at a time until it comes together.
Shape the dough into a round loaf approximately 1 1/2 to 2 inches thick.
Alternatively, divide the dough into smaller portions and form individual bread rolls.
Step 5: Prepare the Top
Place the shaped dough onto the prepared baking sheet.
For a traditional homemade appearance, lightly brush the surface with melted butter or milk.
Using a sharp knife, make a shallow cross on the top of the loaf. This allows steam to escape and gives the finished bread an attractive rustic appearance.
Step 6: Bake
Place the bread into the preheated oven.
Bake for approximately 15 to 20 minutes, depending on the size and thickness of the loaf.
The bread should become lightly golden on top, and the center should feel firm rather than wet.
If making smaller rolls, begin checking them after about 12 to 15 minutes.
Step 7: Check for Doneness
Insert a toothpick or thin skewer into the center. It should come out clean or with only a few dry crumbs attached.
The bottom of the bread should also sound somewhat hollow when gently tapped.
Step 8: Cool
Remove the bread from the oven and transfer it to a wire rack.
Allow it to cool for approximately 5 to 10 minutes before slicing.
Although it is tempting to cut into the bread immediately, allowing it to rest helps the interior finish setting.
Method
The main method behind this recipe is the quick-bread method.
Unlike traditional yeast bread, this recipe does not depend on yeast fermentation. Baking powder provides the chemical leavening needed to make the dough expand in the oven.
The process is simple:
- Mix the dry ingredients.
- Add the milk and fat.
- Mix just until a dough forms.
- Shape the dough.
- Bake immediately.
- Rest briefly before serving.
The most important technique is avoiding overmixing. Once the flour has absorbed the liquid and the dough has come together, stop mixing.
The Formation of the Bread
The structure of this bread develops primarily during baking.
The baking powder releases carbon dioxide when it becomes activated by moisture and heat. These small gas bubbles expand inside the dough as the bread heats, creating a lighter texture.
The flour provides the main structure, while the milk contributes moisture and tenderness. Butter or oil adds richness and helps prevent the finished bread from becoming excessively dry.
The sugar is not only there for sweetness. It can also contribute to browning and gives the bread a slightly more rounded flavor.
History of Quick Homemade Bread
Quick breads have been popular in home kitchens for generations because they provide an alternative to traditional yeast breads.
Before modern convenience foods became widely available, many families prepared different types of quick breads using chemical leaveners such as baking soda and baking powder. These breads were particularly useful when there was not enough time to wait for yeast dough to rise.
The development and widespread use of baking powder made homemade bread and biscuits considerably more convenient. Recipes could be mixed, shaped, and placed directly into the oven.
Dolly’s 20-Minute Homemade Bread follows this practical tradition: simple ingredients, minimal preparation, and fresh bread without a lengthy fermentation process.
How to Make It Extra Tender
For a softer loaf, keep the following points in mind:
- Do not add excessive flour.
- Use enough milk to create a soft dough.
- Avoid kneading the dough extensively.
- Do not overbake.
- Brush the finished bread with melted butter while warm.
- Allow the bread to rest briefly before slicing.
A slightly soft dough generally produces a more tender quick bread than a stiff, heavily floured dough.
Butter-Topped Version
For a richer finish, brush the freshly baked bread with melted butter immediately after removing it from the oven.
The butter melts into the warm crust and gives the bread a softer, richer exterior.
For a savory version, combine melted butter with a little garlic powder and dried parsley before brushing it over the loaf.
Cheddar Herb Version
For a flavorful variation, add approximately 1/2 cup shredded cheddar cheese and 1 teaspoon dried herbs to the flour mixture.
Continue with the recipe as written.
The cheese melts during baking, creating pockets of savory flavor throughout the bread.
Garlic Bread Version
Add:
- 1 teaspoon garlic powder
- 1/2 teaspoon dried parsley
- 1/4 teaspoon black pepper
After baking, brush the warm loaf with melted butter mixed with a small amount of garlic powder.
Serve alongside soups, pasta, roasted vegetables, or grilled meats.
Serving Suggestions
Fresh homemade bread can be served in many ways.
For breakfast, slice it and serve warm with butter, honey, jam, or fruit preserves.
For lunch, use the slices for sandwiches filled with cheese, vegetables, chicken, turkey, or other favorite fillings.
At dinner, serve it alongside:
- Tomato soup
- Vegetable soup
- Chicken soup
- Beef stew
- Chili
- Pasta
- Roasted chicken
- Grilled vegetables
It is also delicious simply served warm with butter.
Storage
Allow the bread to cool completely before storing it.
Place it in an airtight container or wrap it tightly in foil or plastic wrap.
It is best enjoyed within 1 to 2 days because quick breads do not usually stay as soft as yeast breads for several days.
For longer storage, wrap the cooled bread securely and freeze it.
To serve, allow it to thaw and warm it gently in the oven.
Troubleshooting
My bread is too dry.
The dough may have contained too much flour or the bread may have been baked too long. Add the flour gradually and use only enough to make the dough manageable.
My bread is dense.
Overmixing can develop too much gluten and make the bread heavy. Mix only until the ingredients come together.
Also make sure your baking powder is fresh.
My dough is too sticky.
Add flour one tablespoon at a time until the dough becomes soft and workable. Avoid adding large amounts of flour at once.
My bread did not rise much.
Check that the baking powder is still active and that the oven has been properly preheated. Baking powder loses strength over time.
The outside browned too quickly.
If the crust becomes dark before the center is completely baked, loosely cover the bread with foil for the final few minutes.
Why People Love This Recipe
This recipe is particularly appealing because it removes many of the difficulties associated with traditional bread baking.
There is no yeast to activate, no long fermentation, and no waiting for the dough to double in size. The ingredients are inexpensive and commonly found in most kitchens.
It is also flexible. The same basic dough can become a plain table bread, savory herb bread, cheesy bread, garlic bread, or individual rolls.
Most importantly, it provides the satisfaction of homemade bread when you do not have several hours available.
Conclusion
Dolly’s 20-Minute Homemade Bread is a practical example of how simple ingredients can create something warm, comforting, and delicious without complicated techniques.
With flour, baking powder, salt, sugar, milk, and a little butter or oil, you can prepare a fresh loaf quickly. The key is to keep the dough soft, mix it gently, and avoid overbaking.
Serve it warm with butter, alongside a hearty meal, or turn it into sandwiches for an easy homemade treat. Once you have mastered the basic recipe, experimenting with cheese, herbs, garlic, or other flavors can make this quick bread a dependable favorite in your kitchen.