
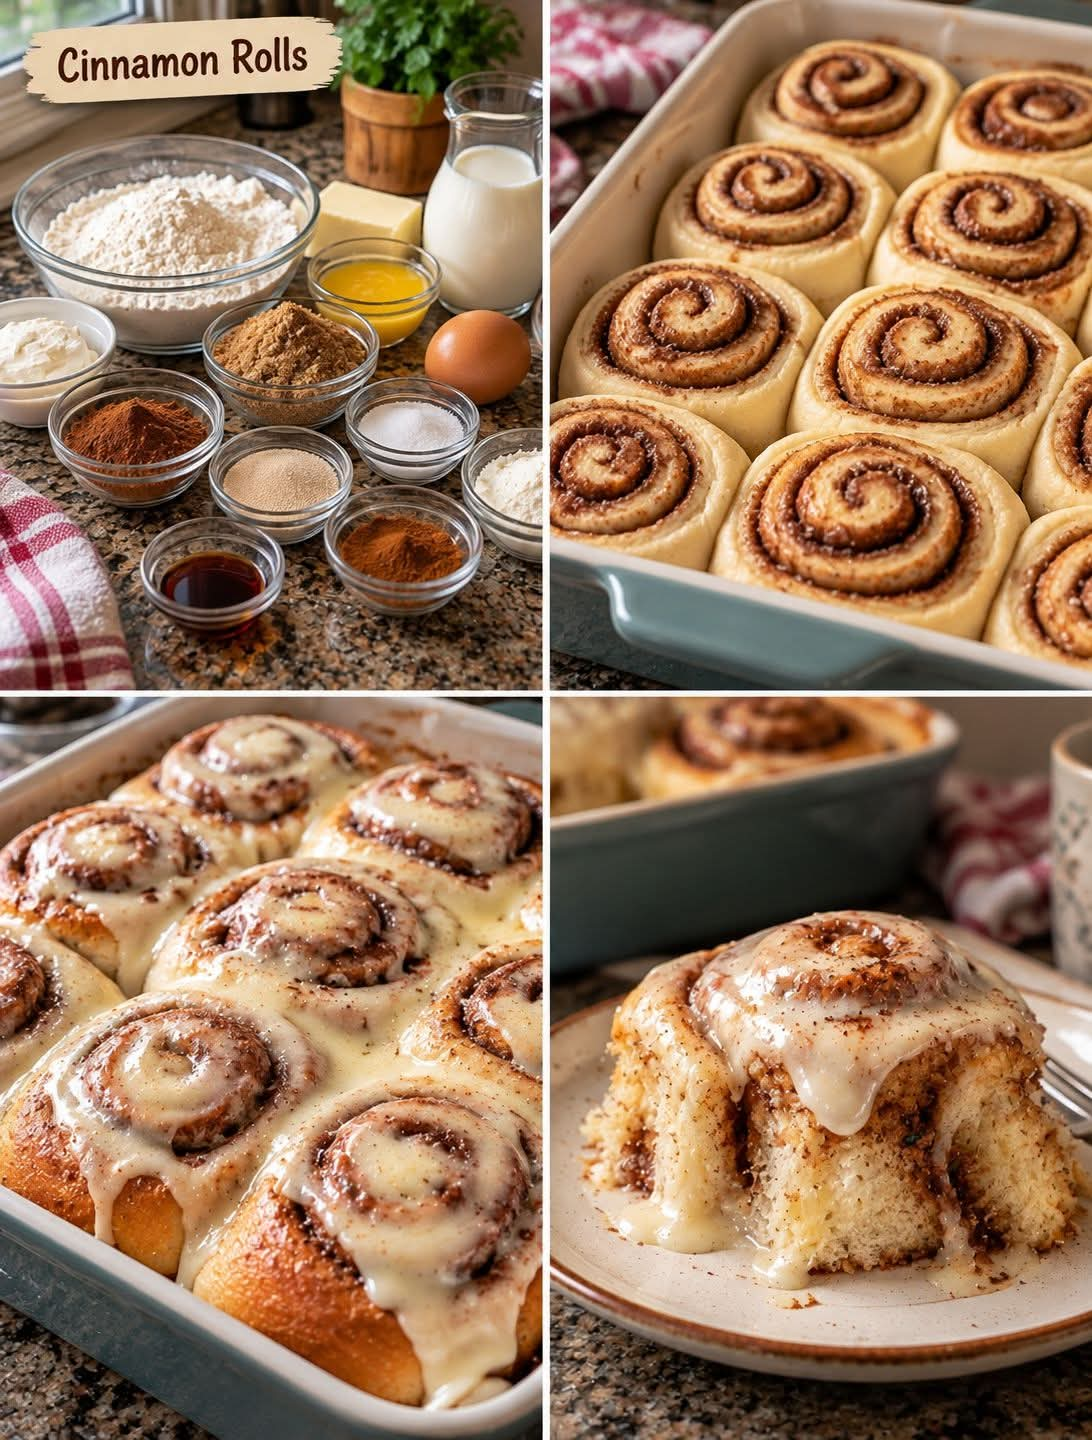
Homemade Cinnamon Rolls with Cream Cheese Icing
Introduction
There is something truly special about homemade cinnamon rolls fresh from the oven. The irresistible aroma of warm cinnamon, melted butter, and sweet brown sugar fills the kitchen, creating the kind of comforting atmosphere that makes everyone eager to gather around the table. These Homemade Cinnamon Rolls with Cream Cheese Icing are soft, fluffy, buttery, and filled with delicious cinnamon-sugar swirls that melt in your mouth with every bite.
Unlike store-bought pastries, homemade cinnamon rolls allow you to control the sweetness, richness, and texture. The dough is made from simple ingredients, including flour, warm milk, yeast, butter, sugar, and eggs. After rising, the dough becomes soft and elastic, ready to be rolled into a rectangle and covered with a generous layer of buttery cinnamon filling.
As the rolls bake, the cinnamon and brown sugar melt together, creating a sweet, fragrant filling that settles between the delicate layers. The outside becomes lightly golden, while the centers remain tender and gooey. The final touch is a smooth cream cheese icing made with softened cream cheese, butter, powdered sugar, vanilla, and a little milk.
Spread the icing over the rolls while they are still warm, allowing it to soften and flow into the cinnamon swirls. The result is a beautiful combination of fluffy bread, sweet cinnamon filling, and creamy frosting.
These cinnamon rolls are perfect for weekend breakfasts, holiday brunches, family gatherings, afternoon coffee, or a special homemade treat. They may look like something from a professional bakery, but with a little patience and a few simple techniques, you can make them right in your own kitchen.
Ingredients

For the Cinnamon Roll Dough
- 3¼ cups (approximately 405 g) all-purpose flour
- 2¼ teaspoons active dry yeast (1 standard packet)
- ¾ cup (180 ml) warm milk
- ¼ cup (50 g) granulated sugar
- ¼ cup (57 g) unsalted butter, melted and slightly cooled
- 1 large egg, at room temperature
- ½ teaspoon salt
For the Cinnamon-Sugar Filling
- ½ cup (100 g) packed brown sugar
- 2 tablespoons ground cinnamon
- ¼ cup (57 g) unsalted butter, softened
For the Cream Cheese Icing
- 4 oz (113 g) cream cheese, softened
- 2 tablespoons (28 g) unsalted butter, softened
- ¾ cup (90 g) powdered sugar
- ½ teaspoon vanilla extract
- 1–2 tablespoons milk, as needed
Optional Ingredients
- ½ teaspoon ground nutmeg for extra warmth
- ½ teaspoon vanilla extract for the dough
- 2 tablespoons chopped pecans or walnuts for a crunchy filling
- A small pinch of cinnamon for sprinkling over the finished icing
Instructions
Step 1: Activate the Yeast
Pour the warm milk into a large mixing bowl. The milk should feel comfortably warm to the touch, approximately 105–110°F (40–43°C), rather than hot.
Add the active dry yeast and granulated sugar. Stir gently to combine, then allow the mixture to stand for 5–10 minutes.
During this time, the yeast should begin to foam or develop a creamy layer on the surface. This indicates that the yeast is active and ready to help the dough rise.
If the mixture does not show any signs of activity after about 10 minutes, check the yeast’s expiration date and the milk temperature before continuing.
Step 2: Add the Wet Ingredients
Add the melted butter, egg, and salt to the yeast mixture.
Whisk gently until the ingredients are well combined.
Make sure the melted butter has cooled slightly before adding it. Butter that is too hot can damage the yeast and affect the dough’s ability to rise.
The egg adds richness and structure, while the butter helps create a tender crumb. Together, these ingredients form the foundation of soft, bakery-style cinnamon rolls.
Step 3: Add the Flour
Gradually add the flour, beginning with approximately 3 cups.
Mix with a wooden spoon or a sturdy spatula until a shaggy dough begins to form.
Add the remaining flour a little at a time until the dough comes together and pulls away from the sides of the bowl. Depending on the humidity and the flour you use, you may not need every gram of flour.
The dough should feel soft and slightly tacky, but it should not be excessively sticky.
Avoid adding too much extra flour, because a dry dough can produce dense cinnamon rolls instead of the light, fluffy texture you want.
Step 4: Knead the Dough
Transfer the dough to a lightly floured work surface.
Knead for approximately 8–10 minutes by hand, folding the dough over itself, pushing it forward with the heel of your hand, and turning it repeatedly.
If using a stand mixer with a dough hook, knead on low to medium-low speed for approximately 5–7 minutes, checking the texture as you go.
The dough is ready when it becomes smooth, elastic, and stretchy. It should spring back slowly when gently pressed with a finger.
Proper kneading develops the gluten structure that allows the rolls to rise and hold their shape while remaining tender.
Step 5: Let the Dough Rise
Lightly grease a large bowl with a little butter or neutral oil.
Place the dough in the bowl, turning it once so the surface is lightly coated. Cover with a clean kitchen towel or plastic wrap.
Leave the dough in a warm, draft-free place for approximately 1 hour, or until it has doubled in size.
The exact rising time depends on the temperature of your kitchen. In a cooler room, the dough may need longer.
Avoid placing the dough in a very hot location, as excessive heat can damage the yeast and affect the texture.
Step 6: Prepare the Cinnamon Filling
While the dough rises, prepare the cinnamon-sugar mixture.
In a small bowl, combine the packed brown sugar and ground cinnamon. Stir until the cinnamon is evenly distributed.
Set the softened butter aside so it is ready to spread over the rolled dough.
The brown sugar provides a deep, caramel-like sweetness, while the cinnamon gives the filling its distinctive warm aroma.
For an extra-rich flavor, you can use dark brown sugar instead of light brown sugar.
Step 7: Roll Out the Dough
Once the dough has doubled in size, gently press it down to release some of the trapped air.
Transfer it to a lightly floured surface.
Using a rolling pin, roll the dough into a rectangle approximately 14 by 18 inches (35 by 46 cm).
Try to maintain an even thickness throughout the rectangle. This helps the rolls bake evenly and ensures that each one contains a similar amount of filling.
If the dough keeps shrinking while you roll it, allow it to rest for 5–10 minutes before continuing. This gives the gluten time to relax.
Step 8: Spread the Butter
Spread the softened butter evenly over the surface of the dough, leaving a small border along one long edge.
The butter helps the cinnamon-sugar mixture adhere to the dough and creates rich, flavorful layers as the rolls bake.
Make sure the butter is soft enough to spread easily but not melted into a liquid. Melted butter can run out of the rolls and leave less filling between the layers.
Step 9: Add the Cinnamon-Sugar Filling
Sprinkle the cinnamon-brown sugar mixture evenly over the buttered dough.
Use your fingers or the back of a spoon to distribute it from edge to edge, avoiding the small border you left along one long side.
Press the filling very gently into the butter so it stays in place when you roll the dough.
For additional texture, sprinkle chopped pecans or walnuts over the filling.
The filling should form a generous, even layer without becoming so thick that it spills out excessively during shaping.
Step 10: Roll the Dough into a Log
Starting from one of the long edges, roll the dough tightly into a log.
Keep the roll even as you work, but avoid stretching the dough or pressing so firmly that the filling is squeezed out.
When you reach the opposite edge, gently pinch the seam to help seal the log.
Place the log seam-side down on the work surface.
Using a sharp knife or unflavored dental floss, divide the log into 12 approximately equal pieces.
Dental floss is particularly useful because it cuts cleanly through the dough without flattening the spirals. Slide the floss underneath the log, cross the ends over the top, and pull to slice through.
Step 11: Arrange the Cinnamon Rolls
Grease a 9-by-13-inch (23-by-33 cm) baking dish with butter or nonstick baking spray.
Arrange the sliced rolls in the dish, leaving a little space between them so they can expand during the second rise.
Cover loosely with a clean kitchen towel or plastic wrap.
Let the rolls rise for another 25–30 minutes, or until they look noticeably puffy.
If the room is cool, they may need a little longer. Properly risen rolls should look light and airy rather than tightly compressed.
Step 12: Preheat the Oven
While the rolls are rising, preheat your oven to 350°F (175°C).
Position the oven rack in the center to encourage even baking.
Check that the rolls have become puffy before placing them in the oven. The second rise helps create the soft, fluffy texture that makes homemade cinnamon rolls so enjoyable.
Step 13: Bake Until Lightly Golden
Place the baking dish in the preheated oven.
Bake for approximately 22–27 minutes, or until the tops are lightly golden and the centers are cooked through.
The exact baking time depends on your oven, the size of the rolls, and how closely they are arranged in the dish.
If the tops brown too quickly, loosely cover the dish with aluminum foil during the final few minutes.
Avoid overbaking, as this can dry out the dough and make the rolls less tender.
For extra reassurance, the center of a fully baked roll should reach approximately 190°F (88°C).
Remove the dish from the oven and place it on a heatproof surface.
Step 14: Prepare the Cream Cheese Icing
While the cinnamon rolls bake, prepare the icing.
Place the softened cream cheese and softened butter in a medium bowl.
Beat with an electric mixer until the mixture becomes smooth and creamy.
Add the powdered sugar and vanilla extract. Mix on low speed initially to prevent the sugar from scattering, then increase the speed until the icing is fluffy.
Add the milk one tablespoon at a time until the icing reaches your preferred consistency.
For thick, rich icing, use less milk. For a thinner glaze that flows easily into the cinnamon swirls, add a little more.
Taste and adjust the sweetness or vanilla if needed.
Step 15: Ice the Warm Cinnamon Rolls
Remove the baked rolls from the oven and allow them to rest for approximately 5 minutes.
Spread the cream cheese icing over the rolls while they are still warm, but not piping hot.
The icing will soften and gently melt into the ridges, creating a delicious combination of creamy frosting and buttery cinnamon filling.
If you prefer a more defined layer of frosting, allow the rolls to cool for 15–20 minutes before icing them.
For an extra-indulgent finish, reserve a little icing and add another spoonful to each roll just before serving.
Step 16: Serve and Enjoy
Serve the cinnamon rolls while they are warm and soft.
Use a spatula to lift individual rolls from the baking dish, allowing the tender layers to separate naturally.
Pair them with coffee, tea, milk, or hot chocolate for a comforting breakfast or dessert.
The centers should be soft and gooey, the edges lightly golden, and the icing creamy enough to settle into every cinnamon swirl.
Methods of Preparation
1. The Yeast Activation Method
The first essential technique is activating the yeast in warm milk with sugar.
Yeast is a living microorganism that produces carbon dioxide as it feeds on available sugars. The gas becomes trapped within the dough’s gluten network, allowing the dough to expand.
Warm milk encourages yeast activity, while excessive heat can damage or kill the yeast.
Allowing the mixture to rest before adding the other ingredients gives you an opportunity to check that the yeast is working properly.
2. The Kneading Method
Kneading develops gluten, the network of proteins responsible for giving bread dough elasticity and strength.
A well-kneaded dough stretches more easily and traps gas more effectively during rising.
For cinnamon rolls, the goal is not an extremely stiff dough. It should be smooth, elastic, and soft enough to produce a tender crumb after baking.
Adding too much flour during kneading is one of the most common reasons homemade cinnamon rolls turn out dry.
3. The First-Rise Method
The first rise, also called bulk fermentation, allows the yeast to produce gas and develop flavor.
During this stage, the dough becomes larger, softer, and more extensible.
Covering the bowl prevents the surface from drying out. A warm, draft-free location encourages a steady rise.
Instead of relying only on the clock, pay attention to the dough’s volume. It should approximately double in size before shaping.
4. The Rolling and Filling Method
Rolling the dough into a rectangle creates the surface needed for an even layer of butter and cinnamon sugar.
The butter holds the filling in place, while the brown sugar and cinnamon create the distinctive swirls.
Rolling the dough into a consistent log helps ensure that each slice contains a similar number of layers.
If the log is rolled too loosely, the centers may separate during baking. If it is rolled too tightly, the dough may have difficulty expanding evenly.
5. The Second-Rise Method
After slicing, the rolls need another period of rising.
This allows the dough to recover from shaping and creates the airy texture associated with soft bakery-style cinnamon rolls.
During the second rise, the rolls should become visibly puffy and begin to expand toward one another.
Allowing sufficient time for this stage helps prevent dense, heavy centers.
6. The Cream Cheese Icing Method
Cream cheese icing combines softened cream cheese, butter, powdered sugar, vanilla, and milk.
The cream cheese provides a slight tang that balances the sweet filling, while butter adds richness and powdered sugar creates a smooth consistency.
Spreading the icing over warm rolls allows it to soften and flow between the layers. Applying it to cooler rolls produces a thicker, more distinct frosting.
Both approaches work well, so choose according to your preferred texture.
History of Cinnamon Rolls
Cinnamon rolls have a long and fascinating history connected to European sweet breads and the use of spices in baking.
Cinnamon has been traded and valued for centuries, and its warm aroma made it a popular ingredient in sweet pastries, enriched breads, and festive baked goods.
In Northern Europe, particularly Sweden, cinnamon buns became an important part of everyday baking culture. The Swedish kanelbulle is traditionally associated with coffee breaks and the social custom known as fika, when people pause to enjoy coffee and something sweet.
Swedish cinnamon buns are often flavored with cardamom and may be topped with pearl sugar rather than thick icing.
Related sweet rolls developed across Scandinavia and other parts of Europe, with different doughs, fillings, and finishing techniques.
As cinnamon rolls became popular in North America, recipes evolved to include richer fillings made with butter and brown sugar. Cream cheese frosting also became a familiar topping, giving American-style cinnamon rolls their characteristic sweet, tangy finish.
Today, cinnamon rolls are enjoyed in many forms, from small breakfast buns to oversized bakery rolls filled with cinnamon sugar and covered in thick icing.
Homemade cinnamon rolls remain especially popular because they combine familiar pantry ingredients with the satisfying experience of working with yeast dough. The process takes time, but the result is a soft, fragrant pastry that feels both comforting and celebratory.
This particular recipe follows the modern American-style approach, featuring a buttery yeast dough, a generous brown sugar and cinnamon filling, and a creamy cream cheese icing.
Formation and Texture: What Makes These Cinnamon Rolls Special?
The delicious texture of cinnamon rolls depends on several ingredients and baking stages working together.
The flour creates the structure. All-purpose flour provides the proteins that form gluten during mixing and kneading. This structure allows the dough to expand while holding its shape.
The yeast creates the rise. Active dry yeast produces carbon dioxide, which becomes trapped inside the dough. As the dough rises, it develops a lighter texture and more complex flavor.
The milk adds moisture. Milk hydrates the flour and contributes a soft crumb. Its proteins and natural sugars also help the rolls develop an attractive golden color during baking.
The egg adds richness. The egg contributes structure, moisture, and a tender texture. It also helps create a dough that is easier to shape.
The butter creates tenderness. Butter adds flavor and softens the dough’s texture. It also enriches the cinnamon filling, allowing the sugar and spice to form a delicious layer between the rolls.
The brown sugar creates gooey swirls. Brown sugar melts as the rolls bake, combining with the butter and cinnamon to create a sweet filling that settles between the layers.
The cinnamon provides warmth. Ground cinnamon gives the rolls their signature aroma and flavor. Its fragrant sweetness complements the buttery dough and brown sugar.
The cream cheese icing adds contrast. The icing combines sweetness with a slight tang, balancing the richness of the filling.
When everything comes together correctly, the finished cinnamon rolls should be fluffy and tender inside, lightly golden on the outside, and filled with sweet cinnamon swirls.
Tips for Perfect Homemade Cinnamon Rolls
1. Check your yeast. Fresh, active yeast is essential for a good rise. If it does not foam during activation, check the yeast and liquid temperature before proceeding.
2. Use warm, not hot, milk. Excessive heat can damage the yeast and prevent the dough from rising.
3. Avoid adding too much flour. The dough should be soft and slightly tacky. Too much flour creates dry, dense rolls.
4. Knead until smooth. Proper kneading helps the dough develop the strength needed to trap gas and rise evenly.
5. Allow enough rising time. The dough should approximately double during the first rise and look puffy during the second rise.
6. Spread the butter evenly. An even layer helps distribute the cinnamon filling throughout the rolls.
7. Roll the dough consistently. A uniform rectangle and evenly cut pieces help the rolls bake at the same rate.
8. Do not overbake. Remove the rolls when they are lightly golden and cooked through. Overbaking can make them dry.
9. Soften the icing ingredients. Room-temperature cream cheese and butter produce a smoother icing with fewer lumps.
10. Ice while warm, not piping hot. A short rest helps the icing soften without becoming completely runny.
11. Use a sharp knife or dental floss. This helps cut neat rolls without compressing the dough.
12. Give the rolls room to expand. Leave space between them before the second rise so they can become light and fluffy.
Delicious Variations

1. Classic Bakery-Style Cinnamon Rolls
Follow the original recipe and spread a generous layer of cream cheese icing over the warm rolls. This version highlights the traditional combination of soft dough, buttery cinnamon sugar, and creamy frosting.

2. Pecan Cinnamon Rolls
Add ½ cup of chopped pecans to the cinnamon-sugar filling. The nuts provide a pleasant crunch and a buttery flavor that pairs beautifully with brown sugar.

3. Maple Cinnamon Rolls
Add 1–2 tablespoons of pure maple syrup to the icing, reducing the milk slightly if necessary. The maple flavor gives the rolls a warm sweetness that works especially well in autumn.

4. Apple Cinnamon Rolls
Add a small amount of finely diced apple that has been lightly cooked and cooled to the filling. Remove excess moisture first to prevent the dough from becoming soggy.

5. Chocolate Chip Cinnamon Rolls
Sprinkle ½ cup of mini chocolate chips over the cinnamon-sugar filling before rolling the dough. The chocolate melts into the swirls and creates a richer dessert-style pastry.
Make-Ahead and Storage Instructions
Preparing the Rolls the Night Before
Cinnamon rolls are excellent for preparing ahead, particularly when you want a fresh breakfast without doing all the work in the morning.
Prepare the dough, allow it to complete the first rise, and shape the rolls with the cinnamon filling.
Arrange them in a greased baking dish, cover tightly, and refrigerate overnight. The dough will rise slowly in the refrigerator.
The following morning, allow the rolls to sit at room temperature until puffy before baking. Depending on how cold they are, this may take approximately 45–90 minutes.
Bake as directed, then prepare and spread the icing.
Storing Leftover Cinnamon Rolls
Because the icing contains cream cheese, refrigerate leftover frosted rolls in an airtight container within 2 hours of baking.
They can generally be kept refrigerated for up to 4 days for best quality.
For a softer texture, let an individual roll stand at room temperature briefly before reheating.
Freezing Cinnamon Rolls
You can freeze baked cinnamon rolls with or without icing.
For the best texture, allow the rolls to cool completely before wrapping them individually or arranging them in a freezer-safe container.
Freeze for up to 2–3 months for best quality.
Thaw overnight in the refrigerator or at room temperature, then warm gently before serving. If you prefer fresh-looking icing, add it after reheating.
Frequently Asked Questions
Why are my cinnamon rolls not fluffy?
The most common causes are inactive yeast, insufficient kneading, too much flour, or not allowing the dough enough time to rise. Check the yeast, keep the dough soft, and allow it to become visibly puffy before baking.
Why is my cinnamon roll dough sticky?
A slightly tacky dough is normal. If it is difficult to handle, let it rest for several minutes before kneading again. Add extra flour only a tablespoon at a time, because too much flour can make the finished rolls dense.
Can I use instant yeast instead of active dry yeast?
Yes. Instant yeast can generally be substituted in the same quantity by weight. It can be mixed directly with the dry ingredients, although you can still dissolve it in the warm milk if you prefer.
Can I make cinnamon rolls without cream cheese?
Yes. Replace the cream cheese icing with a simple vanilla glaze made from powdered sugar, vanilla extract, and milk. Mix until smooth and drizzle over the warm rolls.
Why did the filling leak out?
Some filling leakage is normal, but excessive leakage can result from rolling the dough too loosely, using melted butter, or adding too much filling. Spread softened butter evenly and seal the log gently before cutting.
Can I make these cinnamon rolls without a stand mixer?
Absolutely. A large bowl, wooden spoon, and your hands are all you need. Kneading by hand takes a little longer but works very well.
How do I get a gooey center?
Avoid overbaking, make sure the rolls rise properly, and spread the filling evenly. Place the rolls close enough to support one another as they rise, while leaving enough room for expansion.
Can I make the cinnamon rolls smaller?
Yes. Divide the dough into more pieces for smaller rolls. Smaller rolls will bake more quickly, so begin checking them earlier than the original recipe’s recommended baking time.
Conclusion
Homemade Cinnamon Rolls with Cream Cheese Icing are the perfect combination of soft, fluffy dough, buttery cinnamon-sugar filling, and smooth, tangy frosting.
Every step contributes to the final result, from activating the yeast and kneading the dough to allowing the rolls to rise and baking them until lightly golden. The sweet cinnamon swirls create the familiar flavor everyone loves, while the cream cheese icing adds a rich finishing touch.
Although homemade cinnamon rolls require time for rising, the actual ingredients and techniques are simple. With a little patience, you can create a batch that tastes wonderful, smells incredible, and brings everyone to the kitchen.
Serve them warm for breakfast, prepare them ahead for a holiday brunch, or enjoy one as an afternoon treat with coffee or tea. You can even customize the filling with pecans, apples, chocolate chips, or maple flavoring.
Once you make these rolls from scratch, you may find yourself returning to this recipe whenever you want a comforting homemade pastry.
For Cinnamon Roll Lovers
If you love the smell of cinnamon, the taste of warm brown sugar, and the soft texture of freshly baked bread, these homemade cinnamon rolls deserve a place in your baking collection.
The best part is choosing your favorite piece. Some people reach straight for the gooey center, where the cinnamon filling and icing meet in soft, sweet layers. Others prefer the lightly golden edges, where the dough has a little more structure and the cinnamon sugar becomes beautifully caramelized.
Whichever part you love most, these rolls offer a comforting homemade treat that is perfect for sharing.
Bake a batch for your family, serve them fresh from the oven, and enjoy the simple pleasure of warm cinnamon rolls made with love.
So, which one are you grabbing first: the gooey center roll or the golden edge roll?