
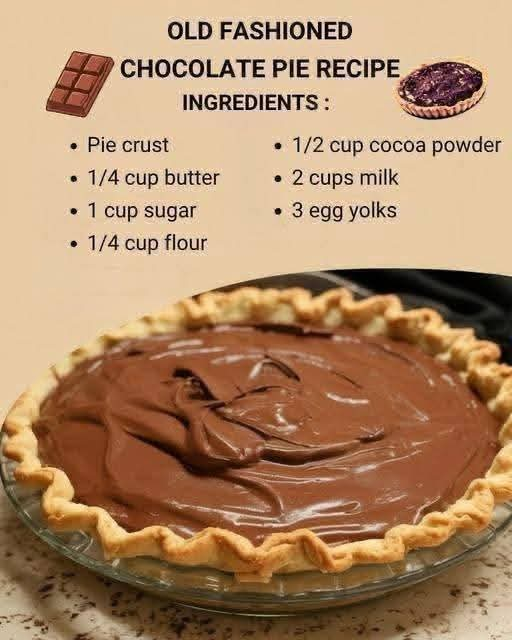
Old-Fashioned Chocolate Pie Recipe


Old-Fashioned Chocolate Pie is a timeless homemade dessert that brings together a flaky pie crust and a smooth, rich chocolate custard filling. Made with simple pantry ingredients such as butter, sugar, cocoa powder, milk, flour, and egg yolks, this traditional pie delivers comforting chocolate flavor in every bite.
This is the kind of dessert that reminds people of family gatherings, Sunday dinners, and the wonderful pies that once cooled on kitchen counters while everyone waited for a slice. The filling is thick, silky, and chocolatey, while the pastry crust provides a delicious contrast to the creamy center.
Whether you are preparing dessert for your family, celebrating a special occasion, or simply craving an old-fashioned chocolate treat, this recipe is a wonderful choice. It requires no complicated ingredients, and with a little patience while cooking the custard, you can create a beautiful pie that tastes homemade in the best possible way.
Preparation and Cooking Details
Preparation time
15 minutes
Cooking time
15–25 minutes for the filling, plus crust baking if needed
Chilling time
At least 4 hours
Servings
6–8 slices
Ingredients

This recipe uses seven basic ingredients to make a delicious traditional chocolate pie.
For the pie
- 1 unbaked 9-inch pie crust, homemade or store-bought
- 1/4 cup unsalted butter (56 g)
- 1 cup granulated sugar (200 g)
- 1/4 cup all-purpose flour (about 30 g)
- 1/2 cup unsweetened cocoa powder (about 40–45 g)
- 2 cups whole milk (480 ml)
- 3 large egg yolks
Optional toppings
- Whipped cream
- Chocolate shavings
- A light dusting of cocoa powder
- Chocolate curls
- A few fresh berries for serving
The toppings are optional. The pie is delicious on its own, with its creamy chocolate filling and crisp pastry shell.
Instructions
Step 1: Prepare the pie crust

Preheat your oven according to the instructions for your pie crust, usually around 375°F (190°C).
Place the pie crust into a 9-inch pie dish and gently press it against the bottom and sides. Trim any excess pastry and crimp the edges if desired.
Prick the bottom lightly with a fork. Line the crust with parchment paper and fill it with pie weights or dried beans if you are baking it without a filling.
Bake according to your crust’s directions until the pastry is golden and fully cooked. Remove the weights and parchment during the final part of baking if necessary.
Allow the crust to cool completely before adding the chocolate filling.
Important: The chocolate custard is cooked separately on the stovetop, so the crust must be baked before filling.
Step 2: Combine the dry ingredients
In a medium saucepan, whisk together the sugar, flour, and cocoa powder until evenly combined.
Breaking up any lumps in the cocoa powder now helps create a smoother chocolate filling later.
The flour acts as a thickener, while the cocoa powder gives the pie its deep chocolate color and classic chocolate flavor.
Step 3: Add the milk gradually
Slowly pour the milk into the dry ingredients, whisking constantly.
Continue whisking until the mixture is smooth and no dry pockets remain. Scrape the sides and bottom of the saucepan to ensure everything is evenly incorporated.
Place the saucepan over medium heat.
Step 4: Cook the chocolate mixture

Cook the mixture over medium heat, stirring continuously with a whisk or heat-resistant spatula.
As the milk warms, the sugar dissolves and the cocoa blends into the liquid. Gradually, the mixture will begin to thicken.
Continue cooking until it reaches a gentle simmer and becomes thick enough to coat the back of a spoon. This generally takes about 8–12 minutes, depending on the saucepan and heat level.
Avoid rushing the process with high heat, as the milk can scorch on the bottom of the pan.
Step 5: Temper the egg yolks
Place the three egg yolks in a separate heatproof bowl and whisk them until smooth.
Slowly pour a small amount of the hot chocolate mixture into the yolks, whisking constantly. Repeat with another small amount.
This process, called tempering, gradually warms the yolks and helps prevent them from scrambling.
Pour the warmed egg-yolk mixture back into the saucepan while whisking continuously.
Step 6: Finish the custard
Return the saucepan to medium-low heat and continue stirring for another 2–4 minutes, or until the custard is thick, smooth, and glossy.
Do not allow it to boil vigorously after adding the yolks. If you have a food thermometer, bring the custard to at least 160°F (71°C), stirring constantly, and follow safe egg-handling guidance.
Remove the saucepan from the heat.
Step 7: Add the butter

Add the butter to the warm chocolate custard.
Stir until the butter has completely melted and blended into the filling. It adds richness, smoothness, and a lovely sheen.
Let the filling cool for a few minutes, stirring occasionally to prevent a skin from forming.
Step 8: Fill the pie shell
Pour the warm chocolate custard into the cooled, baked pie crust.
Use a spatula to spread the filling evenly, smoothing the surface from the center toward the edges.
If a few small lumps remain, you can pass the custard through a fine-mesh sieve before pouring it into the crust.
Step 9: Chill until set

Allow the pie to cool until it is no longer steaming, then refrigerate it.
Chill for at least 4 hours, preferably longer, until the filling is firm enough to cut into clean slices.
For food safety, refrigerate the pie promptly rather than leaving it at room temperature for an extended period.
Step 10: Slice and serve
When the pie is fully chilled, cut it with a sharp knife. For neat slices, dip the knife in warm water and wipe it clean between cuts.
Top each serving with whipped cream, chocolate shavings, or a light dusting of cocoa powder if desired.
Serve cold and enjoy the creamy filling with the buttery, flaky crust.
Cooking Methods Explained
There are several important techniques that make this traditional chocolate pie successful.
1. Stovetop custard method
Cooking the filling in a saucepan allows you to control the heat and watch the custard thicken. Constant stirring helps prevent scorching and encourages a smooth consistency.
2. Tempering the egg yolks
Adding hot chocolate mixture gradually to the yolks raises their temperature gently. This helps the yolks blend into the custard without forming scrambled pieces.
3. Thickening with flour
Flour provides structure to the filling. It needs enough cooking time to thicken properly and lose its raw flour taste.
4. Finishing with butter
Stirring butter into the finished custard adds a richer mouthfeel and a glossy appearance.
5. Chilling the pie
Refrigeration gives the custard time to firm up. Cutting the pie too early may cause the filling to run, so patience is essential.
The History of Old-Fashioned Chocolate Pie

Chocolate pie belongs to a long tradition of homemade custard and cream pies that became popular in American home cooking. As cocoa powder, sugar, milk, eggs, and baking ingredients became more accessible, families adapted familiar pudding and custard techniques to create chocolate-filled pastries.
Chocolate pies became especially associated with Southern American home cooking, where pies were common desserts for Sunday dinners, holidays, church gatherings, and family celebrations.
Many older recipes relied on affordable ingredients already available in the kitchen. A pie crust could be made from scratch or purchased ready-made, while a stovetop filling transformed everyday milk, sugar, cocoa, flour, and eggs into something special.
There is no single universally accepted origin for old-fashioned chocolate pie. Instead, it developed through many household and regional variations, passed from one generation to another through handwritten recipe cards, family cookbooks, and well-loved kitchen traditions.
Some versions use flour as the thickener, while others use cornstarch. Some include whole eggs, while others rely on egg yolks for richness. The recipe presented here follows the simple flour-thickened custard style.
Formation and Texture of the Perfect Chocolate Pie
The secret to an excellent chocolate pie lies in the balance between the crust and the filling.
The pastry should be crisp enough to hold the custard without becoming soggy. The filling should be thick enough to slice but smooth enough to melt gently in the mouth.
The cocoa powder provides the chocolate flavor, while the sugar balances its natural bitterness. Milk creates the creamy base, flour thickens the mixture, and egg yolks contribute richness and help the custard develop a velvety texture.
Butter brings all the flavors together and gives the finished filling a smooth finish.
When the pie is properly cooked and chilled, each slice should hold its shape while remaining soft and creamy inside.
Tips for the Best Results
- Whisk the dry ingredients first. This helps prevent cocoa and flour lumps.
- Add milk gradually. A slow pour makes it easier to create a smooth mixture.
- Keep stirring. The bottom of the saucepan can scorch if the custard is left unattended.
- Temper the yolks carefully. Never pour all the hot mixture into the eggs at once.
- Bake the crust completely. An underbaked crust may become soft once the filling is added.
- Allow enough chilling time. Four hours is a minimum; overnight chilling often produces cleaner slices.
- Cover the surface if needed. Press food-safe plastic wrap directly onto the custard while cooling to help prevent a skin from forming.
- Store leftovers safely. Keep the pie refrigerated and consume within 3–4 days.
Delicious Variations

Chocolate Cream Pie
Top the chilled pie with a generous layer of lightly sweetened whipped cream. Add chocolate curls for a traditional bakery-style finish.

Extra-Chocolate Pie
Stir a small amount of finely chopped semisweet chocolate into the hot custard after removing it from the heat for a deeper chocolate taste.

Chocolate Pie with Crumb Crust
Replace the pastry shell with a prepared graham cracker crust for a slightly sweeter, crunchy base. Follow the crust package instructions for whether pre-baking is necessary.

Chocolate Pecan Pie Finish
Sprinkle toasted chopped pecans over the whipped cream for a nutty crunch that complements the chocolate filling.
Serving Suggestions
Old-Fashioned Chocolate Pie is wonderful served after a Sunday family meal, at a holiday gathering, or alongside a cup of coffee or tea.
For a classic presentation, serve each slice with whipped cream. For a richer dessert, add a scoop of vanilla ice cream beside the pie. Fresh strawberries or raspberries can provide a pleasant fruity contrast to the chocolate.
Because the filling is rich, modest slices are often enough to satisfy a chocolate craving.
Frequently Asked Questions
Why is my chocolate pie filling runny?
The custard may not have cooked long enough, or the pie may not have chilled completely. Make sure the filling thickens on the stove and refrigerate the pie for at least four hours.
Why does my filling have lumps?
Lumps can form if the cocoa or flour is not mixed properly, or if the egg yolks become too hot too quickly. Whisk the dry ingredients thoroughly and temper the yolks slowly.
Can I make the pie ahead of time?
Yes. This pie is an excellent make-ahead dessert. Prepare it the day before serving and keep it covered in the refrigerator.
Can I use a store-bought pie crust?
Absolutely. A store-bought crust makes preparation easier. Bake it according to the package instructions before adding the cooked filling.
Does this pie need refrigeration?
Yes. Because it contains milk and egg yolks, the finished pie should be refrigerated.
Conclusion
Old-Fashioned Chocolate Pie proves that a handful of simple ingredients can create an unforgettable dessert. Its flaky crust, smooth cocoa custard, and rich buttery finish make it a comforting classic worth keeping in your recipe collection.
The method is straightforward: prepare the crust, cook the chocolate filling slowly, temper the egg yolks, stir in the butter, and let the pie chill until perfectly set.
Whether you serve it plain or finish it with whipped cream and chocolate shavings, this homemade pie is a delicious way to bring a little old-fashioned charm to your table.
For Chocolate Pie Lovers
If you love traditional desserts, creamy chocolate fillings, and recipes that remind you of family kitchens, this pie deserves a place among your favorites. It is simple enough for an ordinary afternoon and special enough for birthdays, holidays, and Sunday dinners.
Make it once, share it with the people you love, and you may find that this humble chocolate pie becomes a dessert everyone asks you to prepare again.
Recipe tip: For the cleanest slices, prepare the pie the night before and refrigerate it overnight. Add any whipped cream topping shortly before serving for the best texture and presentation.