
The Absolute Best Coconut Cream Pie
Introduction
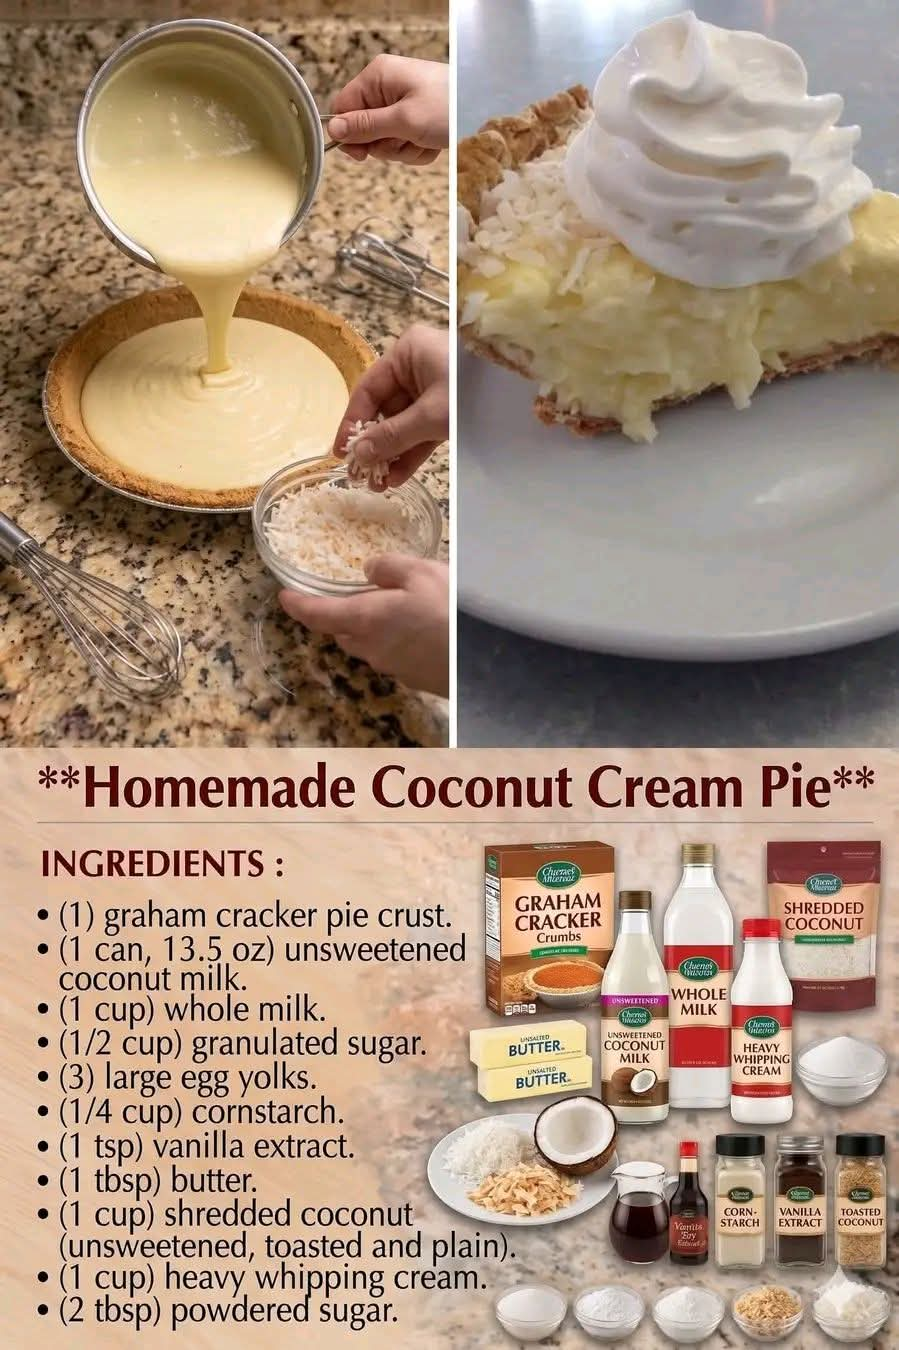
There is something wonderfully comforting about a classic Coconut Cream Pie. With its crisp baked pastry shell, silky homemade coconut custard, toasted coconut, and light whipped topping, this dessert brings together simple ingredients in a way that feels both nostalgic and special.
The secret to making an exceptional coconut cream pie is a smooth, rich filling and plenty of real toasted coconut. Toasting the coconut first gives it a warm, nutty flavor that makes the finished pie much more fragrant and delicious. The custard is cooked slowly until thick and creamy, then combined with toasted coconut and vanilla before being poured into the baked crust.
After several hours of chilling, the filling becomes beautifully firm while remaining soft and creamy when sliced. Finished with whipped topping and another generous sprinkle of toasted coconut, this pie is perfect for holidays, family dinners, Sunday desserts, potlucks, birthdays, or simply whenever you are craving an old-fashioned homemade treat.
Ingredients
For the Toasted Coconut
- 1 cup sweetened flaked coconut
For the Coconut Custard Filling
- 3 cups half-and-half
- ¾ cup granulated white sugar
- ½ cup all-purpose flour
- 3 large eggs, beaten
- ¼ teaspoon salt
- ¾ cup toasted coconut
- 1 teaspoon vanilla extract
For the Pie
- 1 baked 9-inch pie shell
- 1 cup frozen whipped topping, thawed
- Remaining toasted coconut, for garnish
Instructions
Step 1: Prepare the Coconut
Preheat the oven to 350°F (175°C).
Spread the sweetened flaked coconut evenly over a baking sheet. Place it in the preheated oven and toast for approximately 5 minutes.
Stir the coconut occasionally as it cooks. Coconut can go from golden brown to burnt very quickly, so watch it carefully during the final few minutes.
Once the coconut is lightly golden, fragrant, and evenly toasted, remove it from the oven and allow it to cool slightly.
Measure out ¾ cup of the toasted coconut for the custard filling. Keep the remaining toasted coconut aside to decorate the finished pie.
Step 2: Make the Custard
In a medium saucepan, combine the half-and-half, sugar, flour, beaten eggs, and salt.
Place the saucepan over low heat.
Cook the mixture slowly, stirring constantly with a wooden spoon or heat-resistant whisk. Continuous stirring is important because it prevents the flour and eggs from settling on the bottom of the pan and helps create a smooth custard.
Continue cooking until the mixture becomes noticeably thick and coats the back of a wooden spoon. This can take approximately 15 minutes depending on the heat of your stove.
Do not rush this process by turning the heat too high. A slow cooking temperature gives the eggs time to thicken the custard without scrambling.
Step 3: Add the Coconut and Vanilla
Once the custard has thickened, remove the saucepan from the heat.
Immediately stir in the ¾ cup of toasted coconut and the vanilla extract.
Mix thoroughly so the coconut is evenly distributed throughout the creamy filling.
The vanilla adds warmth and enhances the flavor of the coconut without overpowering it.
Step 4: Fill the Pie Shell
Place the baked 9-inch pie shell on a stable surface.
Carefully pour the warm coconut custard into the crust. Spread the top gently with a spatula if necessary to create an even surface.
Allow the pie to cool for a short time at room temperature before transferring it to the refrigerator.
Step 5: Chill the Pie
Refrigerate the pie for approximately 4 hours, or until the filling is completely firm and chilled.
This step is essential. The custard continues to set as it cools, so cutting the pie too early can result in a loose filling.
For the cleanest slices, you can prepare the pie a day ahead and allow it to chill overnight.
Step 6: Decorate
Once the pie has completely chilled, spread the thawed whipped topping evenly over the surface.
Finish by sprinkling the remaining toasted coconut generously over the whipped topping.
For a more decorative presentation, you can arrange the coconut around the edges or create a thicker layer in the center.
Method
The method behind this coconut cream pie is based on three important techniques: toasting the coconut, carefully cooking the custard, and allowing sufficient chilling time.
Toasting the coconut develops deeper flavor and gives the pie a pleasant nutty aroma. The custard is then gently cooked with half-and-half, sugar, flour, eggs, and salt until it reaches the proper thickness. Finally, the toasted coconut and vanilla are added before the filling goes into the baked pie shell.
The refrigeration stage allows the cooked custard to become firm enough to slice while maintaining its creamy texture.
The History of Coconut Cream Pie
Coconut cream pie belongs to the long tradition of American cream pies, which became especially popular as home cooks developed practical methods for preparing rich custard fillings with milk, eggs, sugar, and thickening ingredients.
Coconut became a particularly popular flavor for desserts because dried coconut was easy to store and could add both texture and flavor to cakes, cookies, puddings, and pies.
Classic coconut cream pies became associated with family gatherings, diners, church suppers, holiday tables, and traditional American baking. Many families developed their own versions, changing the crust, sweetness, coconut quantity, or topping according to personal preference.
The combination of creamy custard and toasted coconut remains popular because it is both familiar and distinctive.
Formation and Texture
The structure of this pie comes primarily from the cooked custard.
The flour helps thicken the filling, while the eggs contribute richness and structure. The half-and-half provides the creamy dairy base, and the sugar balances the natural flavor of the coconut.
As the custard cools, it becomes firmer. This is why adequate refrigeration is important before slicing.
The toasted coconut provides a pleasant contrast to the smooth custard. Meanwhile, the whipped topping creates a soft, airy finish that balances the richness of the filling.
The finished pie should have a creamy, tender interior that holds its shape when sliced.
Tips for the Best Coconut Cream Pie
Toast the coconut carefully
Do not walk away from the oven while the coconut is toasting. It can brown very quickly. Stirring it occasionally helps it toast more evenly.
Stir the custard constantly
Constant stirring is one of the most important steps. It helps prevent lumps and keeps the bottom of the saucepan from scorching.
Keep the heat low
Cooking the custard slowly gives you better control and reduces the risk of the eggs becoming scrambled.
Let the pie chill completely
Give the pie at least 4 hours in the refrigerator. Overnight chilling is even better when you have time.
Use a fully baked crust
Because the filling is cooked separately, the pie shell should already be completely baked before the custard is added.
Add the topping after chilling
For the best appearance and texture, wait until the custard is completely chilled before adding the whipped topping.
Serving Suggestions
Serve the coconut cream pie cold, straight from the refrigerator.
For an especially beautiful presentation, cut the pie into neat wedges and place each slice on a dessert plate. A little additional toasted coconut can be sprinkled around the plate for decoration.
This pie pairs wonderfully with coffee, tea, hot chocolate, or a glass of cold milk.
It is particularly delicious after a family dinner, at a holiday gathering, or as part of a dessert table.
Make-Ahead Instructions
Coconut cream pie is an excellent make-ahead dessert.
You can prepare the pie several hours before serving and refrigerate it until needed. In fact, making it the day before can make serving easier because the custard has plenty of time to set.
Keep the finished pie refrigerated and covered when possible. Add the whipped topping and final coconut garnish before serving if you want the freshest presentation.
Storage
Store leftover coconut cream pie in the refrigerator.
Keep it covered and consume it within a few days for the best quality. Because the filling contains dairy and eggs, it should not be left at room temperature for extended periods.
For the best texture, avoid freezing the completed pie unless you are prepared for some possible changes in the custard and whipped topping after thawing.
Why Coconut Cream Pie Lovers Love It
Coconut cream pie lovers appreciate this dessert because it combines several textures in one slice.
The crust provides a tender, crisp foundation. The coconut custard is smooth, creamy, and rich. Toasted coconut adds chewiness and a deeper roasted flavor, while the whipped topping makes every bite light and soft.
It is also a wonderful example of how simple pantry ingredients can become an impressive homemade dessert.
Conclusion
The Absolute Best Coconut Cream Pie is a classic dessert that brings together creamy homemade custard, sweet toasted coconut, flaky pie crust, and fluffy whipped topping.
The recipe takes a little patience, particularly while cooking the custard and waiting for the pie to chill, but the result is well worth the effort. Every slice offers a combination of creamy coconut filling, fragrant toasted coconut, and a delicate crust.
Whether served for a holiday, Sunday dinner, family celebration, potluck, or an ordinary evening when you want something special, this coconut cream pie is the kind of dessert that disappears quickly.
And if you love old-fashioned homemade pies, this is one recipe worth keeping in your collection.
For the Coconut Cream Pie Lovers
If coconut desserts are your weakness, this is the kind of pie you will want to make again and again. The toasted coconut gives it an extra layer of flavor, while the creamy custard makes every bite rich without being complicated.
It is comforting, traditional, homemade, and perfect for sharing.
And now, I need some people to say “YUMMY” so I can add your names to the Active Member List.
If you love coconut cream pie, leave YUMMY in the comments and show some love for this classic dessert.