
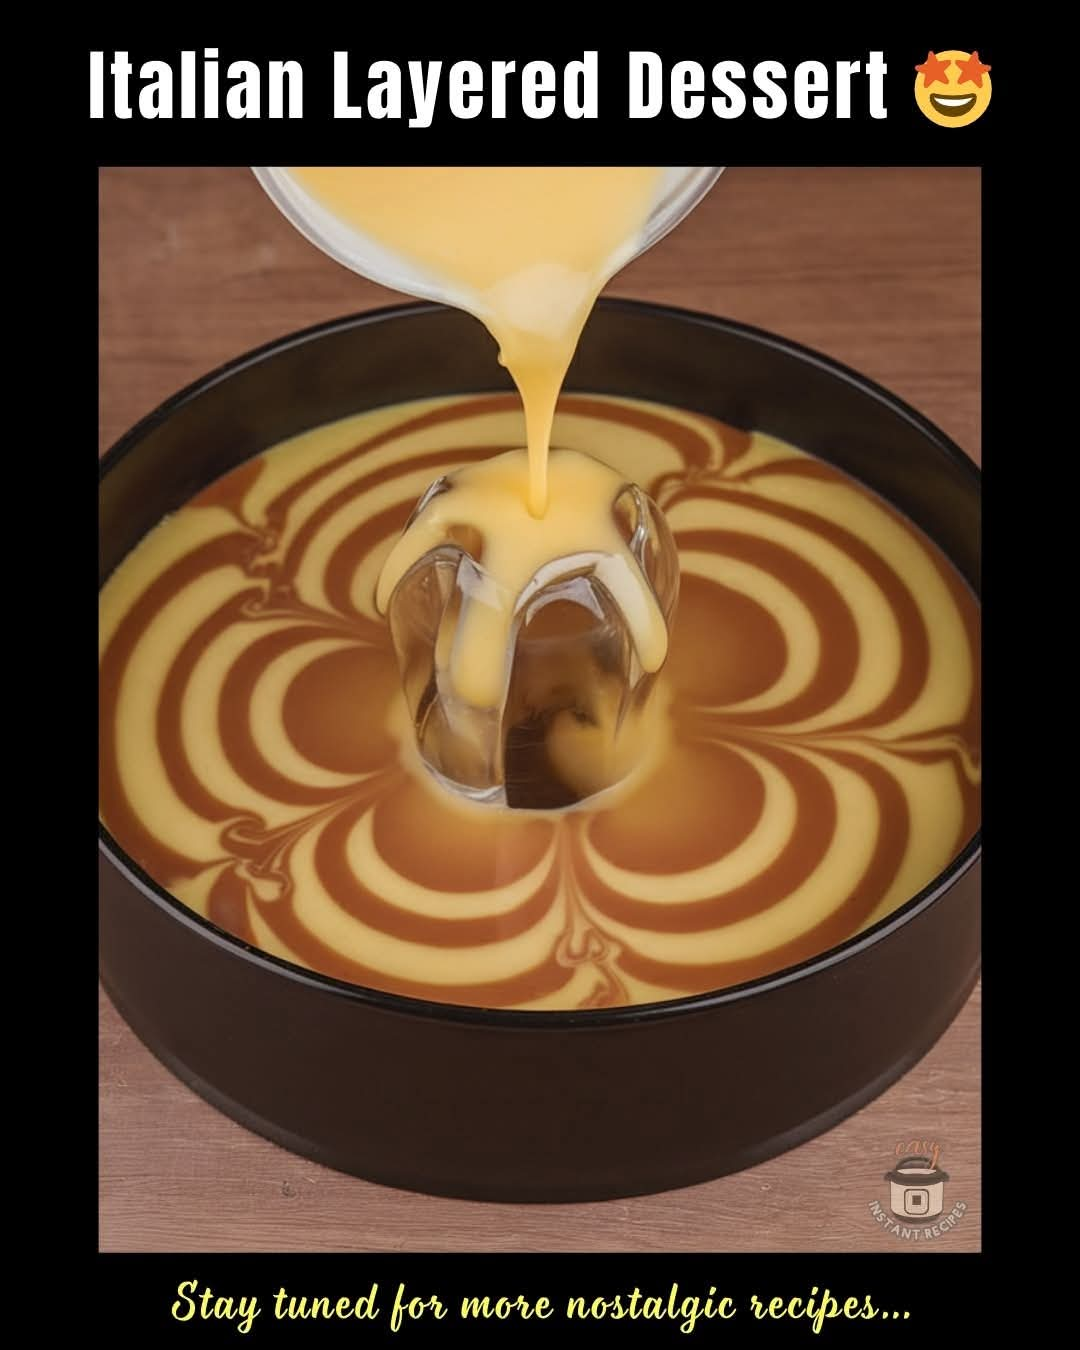
Cocoa and Vanilla Ribbon Layered Dessert
Introduction
There is something wonderfully old-fashioned about a dessert that looks modest on the outside but becomes something special the moment you cut into it. This Cocoa and Vanilla Ribbon Layered Dessert is exactly that kind of treat.
From the outside, it has a simple golden-brown appearance, but the first slice reveals delicate ribbons of cocoa and vanilla running through the tender crumb. The chocolate portions bring a deep, slightly bittersweet flavor, while the vanilla portions remain soft, fragrant, and buttery.
It is the kind of dessert that deserves to be placed in the center of the table and sliced in front of everyone. Serve it with coffee, tea, or a glass of cold milk, and it becomes an especially comforting afternoon or after-dinner treat.
The best part may be the next morning, when a leftover slice has had time to settle and the flavors become even more pronounced.
Ingredients
For the Vanilla Batter
- 2 cups all-purpose flour
- 2 teaspoons baking powder
- 1/2 teaspoon salt
- 1 cup unsalted butter, softened
- 1 1/4 cups granulated sugar
- 4 large eggs, room temperature
- 2 teaspoons pure vanilla extract
- 3/4 cup whole milk, room temperature
- 1/2 cup sour cream or plain full-fat yogurt
For the Cocoa Ribbon
- 1/3 cup unsweetened cocoa powder
- 1/3 cup granulated sugar
- 1/4 cup hot milk
- 1 teaspoon vanilla extract
- 1 tablespoon melted butter
Optional Finishing
- Powdered sugar for dusting
- Chocolate glaze
- Vanilla glaze
- Lightly whipped cream
- Fresh berries for serving
Equipment
- 9-inch loaf pan or 10-inch Bundt pan
- Mixing bowls
- Electric mixer
- Rubber spatula
- Measuring cups and spoons
- Wire cooling rack
- Toothpick or wooden skewer
Preparation
Begin by bringing the butter, eggs, milk, and sour cream to room temperature. Room-temperature ingredients blend more easily and help create a smooth, evenly textured batter.
Preheat the oven to 350°F (175°C).
Grease the baking pan thoroughly. If using a loaf pan, line the bottom with parchment paper, leaving a little overhang to make the finished dessert easier to remove.
Method 1: Preparing the Cocoa Ribbon
Place the cocoa powder and sugar in a small bowl.
Add the hot milk gradually, whisking until the cocoa becomes smooth and glossy. Stir in the melted butter and vanilla extract.
The mixture should resemble a thick chocolate paste. Set it aside while preparing the vanilla batter.
This step is important because mixing the cocoa with liquid separately prevents dry cocoa powder from making the chocolate portion of the cake heavy or uneven.
Method 2: Preparing the Vanilla Batter
In a medium bowl, whisk together the flour, baking powder, and salt.
In a large mixing bowl, beat the softened butter and sugar together for approximately 3 to 5 minutes.
The mixture should become pale, light, and fluffy. This creaming process incorporates air into the butter and helps produce a tender cake.
Add the eggs one at a time, beating well after each addition.
Mix in the vanilla extract.
In another bowl, combine the milk and sour cream.
Add approximately one-third of the flour mixture to the butter mixture and mix gently.
Add half of the milk mixture.
Continue alternating the dry and wet ingredients, beginning and ending with the flour mixture.
Do not overmix once the flour has been incorporated. Stop as soon as the batter becomes smooth.
Method 3: Creating the Cocoa and Vanilla Ribbons
Transfer approximately one-third of the vanilla batter into the bowl containing the cocoa mixture.
Fold gently until the cocoa batter is evenly incorporated.
You should now have two batters: one pale vanilla batter and one rich chocolate batter.
The chocolate batter should remain soft enough to spread easily. If it seems unusually thick, stir in one tablespoon of milk.
Method 4: Forming the Layers
Spoon approximately one-third of the vanilla batter into the prepared pan.
Spread it gently into an even layer.
Add several spoonfuls of the chocolate batter over the vanilla layer.
Continue alternating the vanilla and cocoa batters until everything has been used.
For distinct ribbons, avoid completely mixing the two batters.
For a more dramatic marbled appearance, insert a butter knife or wooden skewer into the batter and gently make a few curved movements through the layers.
Do not swirl excessively. A few gentle passes are enough.
The goal is to create ribbons rather than turn the entire cake into one uniform chocolate-and-vanilla mixture.
Method 5: Baking
Place the pan in the center of the preheated oven.
Bake for approximately 50 to 65 minutes, depending on the shape and depth of the pan.
Begin checking around the 50-minute mark.
Insert a wooden skewer into the center. It should come out clean or with a few moist crumbs attached.
If the top begins browning too quickly, loosely cover it with aluminum foil during the final portion of baking.
Avoid opening the oven repeatedly during the first 40 minutes because sudden temperature changes can cause the cake to sink.
Method 6: Cooling
Remove the dessert from the oven and allow it to rest in the pan for approximately 10 to 15 minutes.
Run a thin knife carefully around the edges.
Turn the cake onto a cooling rack and allow it to cool completely before slicing.
Although it can be eaten warm, allowing it to cool gives the crumb time to settle and makes the cocoa and vanilla ribbons much easier to see.
Method 7: Finishing
For a traditional finish, simply dust the completely cooled dessert with powdered sugar.
For something richer, drizzle the top with a simple chocolate glaze.
Another beautiful option is a vanilla glaze made from powdered sugar, vanilla extract, and a small amount of milk.
The dessert does not need heavy decoration. Its greatest appeal is the pattern revealed when it is sliced.
How to Make the Perfect Ribbons
The secret to attractive ribbons is contrast and restraint.
Keep the vanilla batter light and the cocoa batter noticeably darker.
Do not over-swirl the mixture.
Use a knife or skewer only a few times.
Make sure the cocoa mixture is not dramatically thicker than the vanilla batter.
When slicing, use a sharp serrated knife and make smooth, gentle cuts rather than pressing downward heavily.
This preserves the delicate layers and gives every slice a beautiful pattern.
Texture and Flavor
The finished dessert should have a soft, buttery crumb with a subtle richness from the sour cream or yogurt.
The vanilla sections provide sweetness and fragrance, while the cocoa ribbons add depth and balance.
The texture should be moist without being dense, and the cake should hold together cleanly when sliced.
The cocoa flavor becomes even more noticeable after the dessert has cooled completely.
A Little History
Layered and marbled cakes have a long tradition in European and American home baking.
Marble cakes became particularly popular because they offered home bakers an attractive way to combine two familiar flavors in one dessert. Vanilla and chocolate were natural partners, and the contrasting colors made every slice look distinctive without requiring elaborate decoration.
The technique also became associated with practical home baking. Instead of preparing two completely separate cakes, bakers could divide one batter, flavor part of it with cocoa, and create an impressive dessert from simple pantry ingredients.
Over generations, the method has appeared in countless family kitchens, community cookbooks, bakeries, and holiday tables.
Formation of the Dessert
The beauty of this dessert comes from the formation of its layers.
First, the vanilla batter creates the soft foundation.
Next, portions of cocoa batter are added to introduce dark chocolate ribbons.
Additional layers of vanilla and cocoa are built carefully on top of one another.
A few gentle swirls connect the layers without completely blending them.
During baking, the butter, eggs, flour, and leavening agents create the structure of the cake while the two batters expand together.
When the dessert is finally cut, those once-separate spoonfuls become beautiful ribbons running through the crumb.
Serving Suggestions
Serve each slice at room temperature with freshly brewed coffee.
For an elegant dessert, add a spoonful of lightly whipped cream.
For a family gathering, serve it with vanilla ice cream.
For a chocolate lover’s version, drizzle each slice with warm chocolate sauce.
For breakfast or brunch, keep it simple with coffee or tea and a light dusting of powdered sugar.
The cake is also excellent slightly warmed for a few seconds before serving.
Storage
Store the cooled dessert in an airtight container at room temperature for up to 3 days.
For longer storage, refrigerate it for up to 5 days.
Allow refrigerated slices to sit at room temperature before serving for the best texture.
Individual slices can also be wrapped tightly and frozen for approximately 2 to 3 months.
Thaw them overnight in the refrigerator or for several hours at room temperature.
Tips for Success
Use room-temperature ingredients whenever possible.
Cream the butter and sugar thoroughly. This is one of the most important steps for a light texture.
Measure the flour carefully. Too much flour can make the dessert dry.
Do not overmix the batter after adding the flour.
Do not over-swirl the cocoa mixture.
Allow the dessert to cool before cutting if you want especially clean ribbons.
Use a serrated knife for neat slices.
If preparing it for guests, bake it several hours ahead of time so the crumb has time to settle.
Conclusion
This Cocoa and Vanilla Ribbon Layered Dessert is proof that an impressive dessert does not need complicated decoration.
Its charm is hidden inside.
The outside may look like an ordinary homemade cake, but the first slice tells another story: soft vanilla crumb, rich cocoa ribbons, delicate layers, and the comforting aroma of butter and vanilla.
It is perfect for family gatherings, afternoon coffee, holiday tables, bake sales, or simply keeping on the kitchen counter for a quiet treat.
And there is nothing wrong with quietly saving the neatest end piece for the next morning. In fact, that may be one of the best ways to enjoy it.
For the Lovers of Chocolate and Vanilla
Chocolate lovers will appreciate the deep cocoa ribbons, while vanilla lovers will enjoy the fragrant, buttery cake surrounding them.
For those who love both flavors, this dessert offers the best of both worlds in every slice.
The combination is familiar, comforting, and timeless, which is exactly why it continues to work so beautifully.
Final Method at a Glance
Prepare the cocoa mixture.
Whisk together the dry ingredients.
Cream the butter and sugar.
Add the eggs and vanilla.
Alternate the dry ingredients with the milk and sour cream.
Divide the batter.
Mix cocoa into one portion.
Layer vanilla and cocoa batters in the prepared pan.
Gently swirl.
Bake at 350°F (175°C) until a skewer comes out clean.
Cool completely.
Dust with powdered sugar or finish with your favorite glaze.
Slice and serve with coffee, tea, or milk.
The result is a tender homemade dessert with beautiful cocoa and vanilla ribbons hidden inside every slice.